• Folks, if you've recently upgraded or renewed your annual club membership but it's still not active, please reach out to the BOD or a moderator. The PayPal system has a slight bug which it doesn't allow it to activate the account on it's own.

48x24x16 Rimless Reef ready build...it has begun!!!

DangerDave

NJRC Member
You should be fine if you make a strong mechanical connection. Salt creep will fill in any leaks. That said, there is a piece of mind in everything being glued, and **** happens. I’m about 50:50 myself lol.

Dave
 

Hockeynut

NJRC Member
You should be fine if you make a strong mechanical connection. Salt creep will fill in any leaks. That said, there is a piece of mind in everything being glued, and **** happens. I’m about 50:50 myself lol.

Dave
Ohhh no, only inside the box is not glued, outside everything is glued I’m sorry if I wrote something that could be misunderstood. I would be really nervous about have any any pvc joints outside the tank or sump not glued.
 
Ohhh no, only inside the box is not glued, outside everything is glued I’m sorry if I wrote something that could be misunderstood. I would be really nervous about have any any pvc joints outside the tank or sump not glue

Of Course. You replied to what i was asking about. The return pipe inside of the overflow box itself...not under neath. Everything underneath is rock solid glued!!!
 
Of Course. You replied to what i was asking about. The return pipe inside of the overflow box itself...not under neath. Everything underneath is rock solid glued!!!
I wouldn't worry about it inside the tank. Get it as tightly fit with your hand as you can and you'll be fine. Not enough pressure to push the loc line out (or whatever you're using).
 
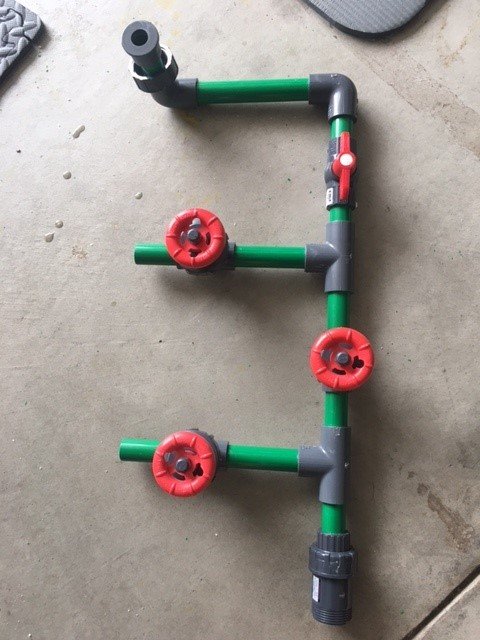
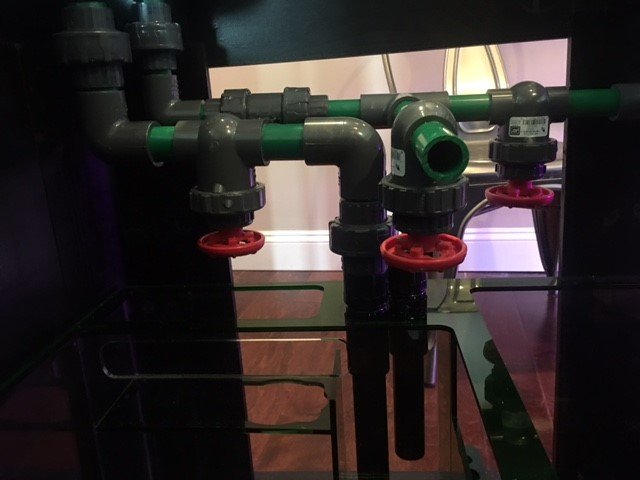
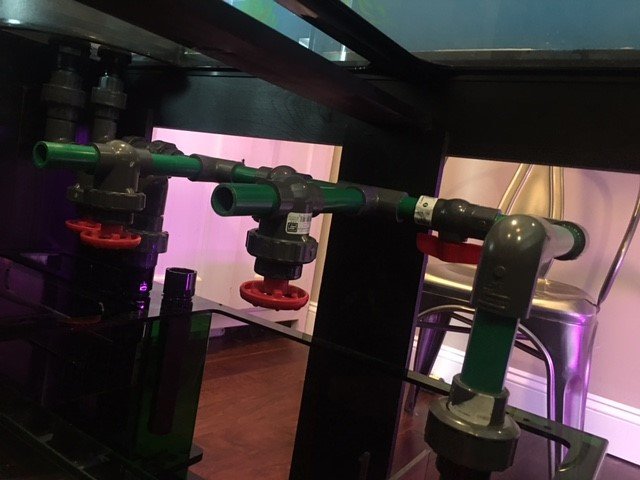
Ok. Plumbing is done. Originally did this with white schedule 40 but I was an idiot on and used the yellow Oatley cement. Looked absolutely terrible. Figured since I am redoing it..why not make it purdy..so I was the fool with money and bought the expensive colored pvc to match my Emerald Trigger Systems Sump. Outside of the fact that the Schedule 80 fittings hide most of the coloration..looks pretty darn good!!! As of now, I left a plumbing out so that I can add a future state UV filter. Probably a better place to put it but I can live with the front facing plumbing. All in all, only one MAJOR mistake and that is my vertical from my return pump is about an inch short which is probably going to put a little extra stress on the joints.. As such, just going to put in a 1" ceramic bio brick under it and level it off. Was hoping to get the tank wet this weekend but going to wait for my brick. Finally, have a Durso drain and a horizontally placed ball check valve.

Plumb1.jpgPlumb2.jpgPlumb 3.jpg
 
You dont want that. I spent the last few days chasing a pin hole leak!!! However, it does seem like my plumbing is finally water tight and I am starting to get the tank wet. Sucks that I only have a 5 gallon RODI reservoir so probably going to take me about a week to get it filled!!! My wife is already yelling at me for using all of the water on my nano!!!

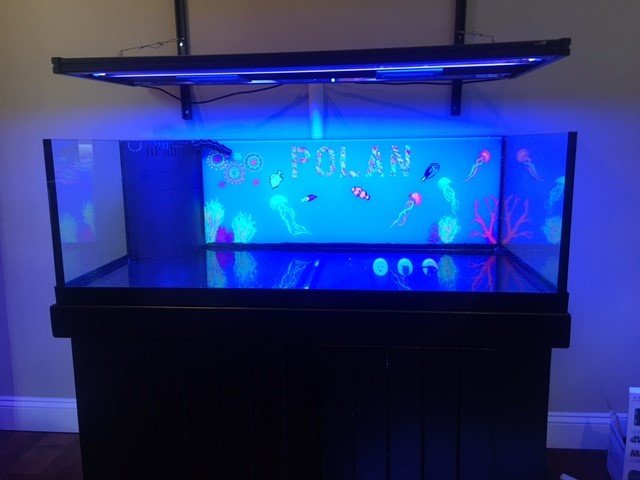
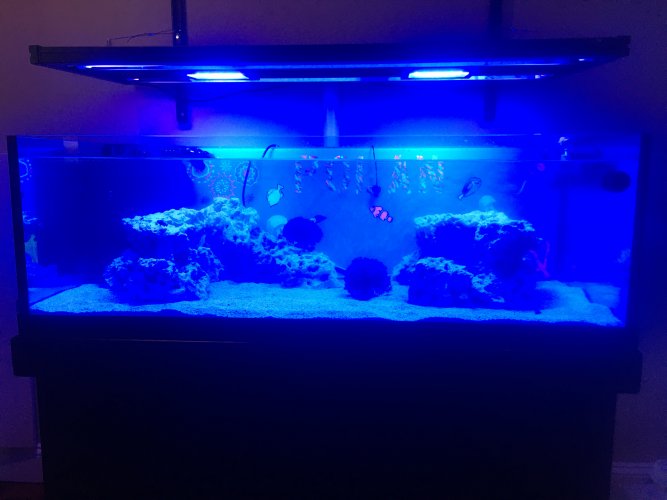
Anyway, the back has been painted, the plumbing installed, tank put in place and the water getting filled. Yes I said painted. I let my daughters paint the back with black light paint so it shows up nice and pretty!!! Gives me something to remember them by when they go off to college :cry2:

Tank.jpg
 

Mark_C

Staff member
Officer Emeritus
NJRC Member
Moderator
Question for the vets out there. My 3/4 return is a slip x slip. Do I cement in the return pvc in the overflow bulkhead? Worried that the pressure will push out the tube. But also worries that I won’t be able to remove if I need to. Thoughts?

They're deceptively solid connections once seated. I've exclusively used slips in every build from 80 to 140 and never had a concern. As Rob said, I'd avoid PVC cement as theres always a chance of a future mod. Sometimes i would assemble the slip halfway, then put a small bead of silicone on the male part near the connection, then fully seat. It gives a bit of extra support, ensured watertightness, and was easy enough to disassemble if needed. I doubt it was necessary but it was a small habit I got into when using slip connections.

Edit: Sorry, I seem to be severely late to this thread.
 

Salted

NJRC Member
As such, just going to put in a 1" ceramic bio brick under it and level it off.
I recall reading more than once that there was a bad batch of these that were crumbling apart over time. If the possibility cracking is a real concern keep an eye on your brick or use something else. I have a bunch of eggcrate left over from making a top screen that you're welcome to if you want it. Plumbing and tank look great btw.
 
I recall reading more than once that there was a bad batch of these that were crumbling apart over time. If the possibility cracking is a real concern keep an eye on your brick or use something else. I have a bunch of eggcrate left over from making a top screen that you're welcome to if you want it. Plumbing and tank look great btw
Thanks. Definitely keeping this in mind. I used the Bio Bricks as a stop gap measure because I wanted to start getting water in the tank. Already ordered some egg crate. Thanks for the offer.
 
The next part in my build series is my review of the Tunze Osmolator Universal 3155 Auto Top Off that I purchased at @Premiumaq during their sale. I was so happy..I bought at 15% off and just before the $10 price increase. Woot Woot.

This is reportedly the best ATO in the business. Initial impressions does nothing to diminish that standing. I had it set up in about 10 minutes. Would have been sooner, but anyone who has bought a Tunze before knows that you are leafing through a German instruction manual to get to the English. Nice long wires, plenty of tubing, even provided the velcro patch to attach to your tank. The only REAL complaint on the set up was that I had was that I was not sure which wire went into which connector. After leafing through the german to find the English..I finally came to the singular sentence that 'it is immaterial on which wire goes into which connector'. DOH My 'why does this bother you so much' complaint is that the magnet on the outside piece has the poles reversed to the inside piece so that the wording is upside down. Goes against my OCD nature. Told you..it was one of those complaints ;)

The ATO has two sensors...an optical eye (make sure you point it down and the tip of the eye is at your desired water level) and an emergency, redundant float switch. A little large...but awesome precision. Doing a few manual tests, I can say they worked as expected.

The pump is nice and small and fits in those wonderful 5 gallon jugs of sea water you get at your LFS. Only complaint on the pump is that it is pretty loud. Not 'leave the room loud'..but definitely a 'did a fish just get sucked up and jam the gears' loud.

The ATO has been up and running for a little over a day now. Water level is perfect. Highly recommend..even if a little on the pricey side.
 
Ok. She is all but filled. Took a freaking week because of my 5 gallon reserve in my sink. Might need to bet a dedicated system. Need 5 more gallons to keep the return bay full above water level needs. Tank a little cloudy from rearranging my current live rock but it will settle soon. Got my clown colony in here and two sacrificial corals. Only think left to do is bring my ATo and heater down into my sump and let it run for a few months. Also waiting for my gift card I won to by an MP40. B60F08B1-0FAF-4209-AC50-9A97D17DEC04.jpeg
Question for those with a duroso drain. I am getting air bubble heading into sump. Thoughts? Only thing i can think of is needing to up the return flow (which I’ll do after my last 5 gallons of water)
 

DEL

Vice President
Staff member
Board of Directors
NJRC Member
Moderator
The next part in my build series is my review of the Tunze Osmolator Universal 3155 Auto Top Off that I purchased at @Premiumaq during their sale. I was so happy..I bought at 15% off and just before the $10 price increase. Woot Woot.

This is reportedly the best ATO in the business. Initial impressions does nothing to diminish that standing. I had it set up in about 10 minutes. Would have been sooner, but anyone who has bought a Tunze before knows that you are leafing through a German instruction manual to get to the English. Nice long wires, plenty of tubing, even provided the velcro patch to attach to your tank. The only REAL complaint on the set up was that I had was that I was not sure which wire went into which connector. After leafing through the german to find the English..I finally came to the singular sentence that 'it is immaterial on which wire goes into which connector'. DOH My 'why does this bother you so much' complaint is that the magnet on the outside piece has the poles reversed to the inside piece so that the wording is upside down. Goes against my OCD nature. Told you..it was one of those complaints ;)

The ATO has two sensors...an optical eye (make sure you point it down and the tip of the eye is at your desired water level) and an emergency, redundant float switch. A little large...but awesome precision. Doing a few manual tests, I can say they worked as expected.

The pump is nice and small and fits in those wonderful 5 gallon jugs of sea water you get at your LFS. Only complaint on the pump is that it is pretty loud. Not 'leave the room loud'..but definitely a 'did a fish just get sucked up and jam the gears' loud.

The ATO has been up and running for a little over a day now. Water level is perfect. Highly recommend..even if a little on the pricey side.
I only used Tunze ato in my last 3 setups. very reliable. never had an issue and pump is cheap enough to replace
 
Man was I spoiled with my herbie on my nano. I have been futzing with this duroso drain for hours trying to get the flow just right. With the herbie, if too much flow it just hits the emergency drain. Here too much flow it over flows the tank. Too little flow is is obnoxiously loud. The only way of making it safe is to under power the return pump which then has the water going in the over flow just way too loud because of the distance it has to fall. Looks like I am going to be crafting my own duroso with a higher drain point so that the water is quieter going into the over flow. Surprised seapora didn’t figure this out with their tank and overflow design.
 

amado

Dal
Staff member
Board of Directors
NJRC Member
The tank is coming along great.
I use the tunze ato and I love it.
It’s one of the few things in this hobby that really
Does what it says.
 
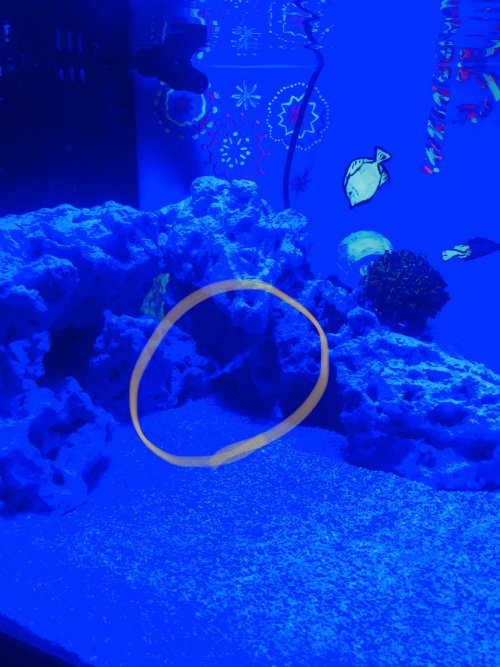
Having a little set back. Some white slime goo keeps generating. I keep siphoning it out but it keeps coming back. I took out my sacrificial hammer frag wondering if it is just pumping out slime. I don’t know. Just slimming faster that I can clean it. Thoughts?

E54AA0AB-DF11-4C27-99B1-92DA8BF6D0B1.jpeg
 
Ok. Finally the slime has cleared up. Don’t know what it was but I kept having to siphon it out. Tank running pretty well

now for my next review: the trigger system emerald 34 sump. I got this as a slightly blemished from trigger directly so good deal and I can’t find what is wrong with it. I even splurged and got the matching 5 gallon reservoir.

pros:
  • It’s Gorgeous.
  • Slots for probes and dosing
  • Adjustable water level in first two compartments
  • Great place for media in the bubble trap
  • It’s huge (actually too big as I can’t take it out without sawing my stand
  • Nice sized, three compartment design
  • Nice cover over the filter socks to minimize noise and solash
    cons
  • The intake pipes are at an odd angle. Was forced to do two 90 degree angles instead of straight down or 45s
  • The filter sock container won’t allow for standard media cups. I had to 3D print my own media cups
  • The dosing ports don’t have secure screws so dosing lines don’t pop out.
  • Finally, the overflow would have been better served if on the short side instead of against the back. Makes accessing the filter media difficult.

  • Overall, a good sump but some design flaws. Had I know the defects, I probably would have opted for a different sump. 3 out of 5 stars.
 
Been a while. Figured I would post a picture and an update. Overall things are stabilized. Had to start dosing potassium Nitrate and Tridodium phosphates via ATO as i could not keep the Cheato and the Protein Skimmer from sucking out EVERYTHING. Still working on keeping it from giving wild swings..but the small swings havent seem to be a problem. Also started dosing Kalk and am on the look out for a good Kalk stirrer. Absolutely praying Avast Marine goes on sale but highly doubt it will and not sure I am willing to hold out until Black Friday on the offchance of saving $15 which will probably just offset the Covid inflation price increase between now and then. Also dosing some RedSea B (the Alk) trying to get my alk a little higher than the kalk is allowing without putting the calcium through the roof. Had a couple of of my sps duck and cover as the alk raised a little..but everything seems to be adjusting well.

Now to how it is looking.
  • As you can see, I have a nice hammer and frogspawn garden on the bottom left. They are doing great and the heads are multiplying. Call out to @r2reyzer for the gorgeous neon froggie. Really stands out.
  • I have a rose bubble tip nem that is in the process of splitting in the upper middle. I changed my power heads and he moved a little. I am quite nervous he is going to pull a crocodile dundee and go walk about.
  • Right below my new is my blasto garden with my prized piece being the rainbow blasto. Debating on moving it a little further away from the nem.
  • In the center front..i have my torches. I am really struggling to keep these guys happy. My other euphillya are doing great..but my torches, I have not been successful with.
  • at the top layer is approximately 25 sps frags that are starting to encrust. Not seeing a lot of upwards growth, but they do appear happy with polyp extension and good color.
  • My pride and joy being a bleeding apple scoly in the bottom right. I am on the lookout for a war paint scoly and am debating buying one that is on Living Reef Orlando right now..just cant justify 350 for a coral when I need my kalk stirrer.
  • I have a couple of zoa frags that I have strategically placed along the back glass hoping that they start growing up the back of the tank We shall see.
  • Other than that, I have 12 head duncan (grown from 2), 4 Monticaps spread out closer to the bottom, a few birdsnest scattered in the back, a candy cane coral in the back and a blue stylo in the bottom front.
My only concern is that it appears I have some pulsing xenia that hitched onto a live rock. I am hoping that If i deprive it of all light..it will whither and die..but I am nervous.

Anyway..hope everyone is suriving the vid and your tanks are looking wonderful.

Latez
 

Attachments

  • Reef1.jpg
    Reef1.jpg
    202.6 KB · Views: 11
  • Reef2.jpg
    Reef2.jpg
    305.7 KB · Views: 11
Top