• Folks, if you've recently upgraded or renewed your annual club membership but it's still not active, please reach out to the BOD or a moderator. The PayPal system has a slight bug which it doesn't allow it to activate the account on it's own.

75 Gallons of Entertainment! The build begins...

mnat

Officer Emeritus
Staff member
Moderator
Be careful with those GSPs guys, they can become a problem. We started with this in march:
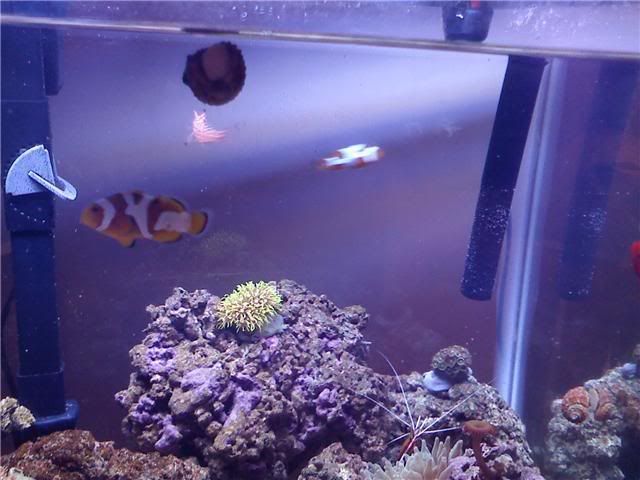
picasso.jpg

This is august:
20fts08.jpg

Now it looks like this (and you cannot see the back of the live rock that is completely covered:
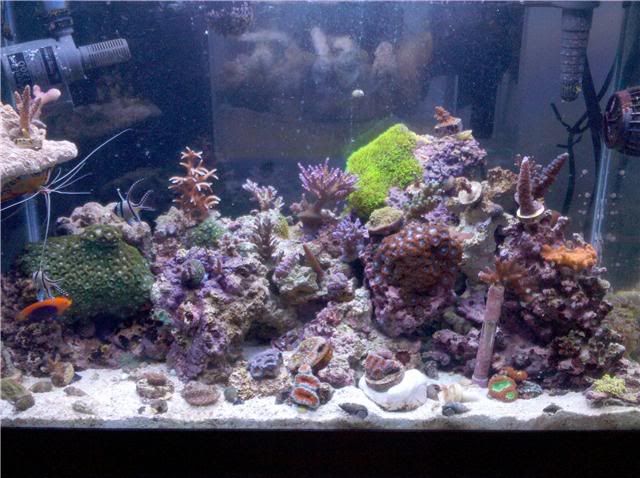
20jan307.jpg


Be careful if you have sensitive skin, it stung my wife's hand and has left a mark for several days now.
 

TanksNStuff

Officer Emeritus
Officer Emeritus
Thanks for the reply mnat. Yea, I've heard plenty of stories of these getting out of control... which is why I plan on keeping an eye on it. I wasn't aware of them stinging you though, so that was good info.
 

TanksNStuff

Officer Emeritus
Officer Emeritus
Wow! Browsing through the Tale of the Tanks threads, I realized I haven't updated mine in quite some time. I think I also lost a bit during the site crash and unfortunately I couldn't find a google cache to replace it so I'll have to do it manually.

I was going to start posting some info on my starting bio-pellets this weekend, but I think I want to keep things chronological and add the bio-pellet info at the end. I think I have a bunch of pics on photobucket and/or on my computer at home, so I'll try to get up to speed over the next week or so.

Also, I'll be getting a new camera soon (Canon T2i) so I'll be able to take some really nice new photos after that. Also, since I got a nice bonus check for Xmas, I'm going to upgrade to LED's (still contemplating which kind I want).

Stay tuned!
 

TanksNStuff

Officer Emeritus
Officer Emeritus
Nobody likes empty promises! Haha, well it took me much longer than I anticipated and even though I'm still not finished getting the canopy/leds/controller setup, I've made some progress to warrant an update.

First off, I'm going to disregard my last post and skip to my most recent stuff first. Mainly because I just uploaded the pics for my half-done canopy and I have a bunch of my new Apollo LED's already... so I'll go into all that now and fill in previous changes to the tank later on.

OK, to begin with, I ordered 2 Apollo Reef LED Dimmable fixtures. I saw these in action at the NJRC Frag Swap and decided they were much nicer than any other LED at the swap. The only downfall with these things is that they don't come with a controller/dimmer. I could have easily hooked them up to a typical potentiometer to control the dimming manually... but I did a bunch of research and fell in love with the Reef Angel Controller. This is a fully customizable controller system which allows you to do virtually anything you want... as long as you figure out how to write the Arduino code for it. It sounds complicated, but it's not really that hard. I would say anyone that's a novice with computers and/or knows anything about html would pick it up very easily. Besides, the forum community they have there is fantastic and any problem you have will literally be resolved in less than one day, sometimes you get answers within 15 minutes! I noticed that as I researched what the controller can do, and that customer service sold it for me.

OK, enough praising my new equipment. Lets get to my progress. In order to acclimate my corals properly from T5's to the LED's, Joe from Apollo recommended starting with the fixtures 12" above the water surface. I have popcorn ceilings above my tank so hanging them from the ceiling wasn't an option for me. Not only that, with LED's being so bright and being that high above the tank, being blinded by light from the sides (above the tank) was going to be an issue. I decided I'd build a canopy to house the fixtures. I recruited my friend Mike to help with this project because he's a carpenter by trade and he was willing to help. He also has all the tools needed that I don't, plus he also had access to some nice furniture grade birch plywood that I could have for free.

This past weekend, we finally had a chance to start this build and got the framework complete. He then took measurements so that he could cut the plywood at his shop (where he had a band saw to make the cuts nicer). He should be stopping back over tonight with those to complete the canopy, leaving me with just painting left after that. I know what everyone is thinking... where are the pics? Well, I was so excited to get working on this that I forgot to take them as we were building it. However, here are a few taken of what I have now.
The complete frame, with 2 aluminum angles mounted so the LEDs sit in them at 12" above the water line. (Thanks Ricwilli for the idea! This was much easier than trying to find a way to adapt to/hang them from the hanger studs that are built in.)

IMG_0157.jpg


Here's a closeup of the LED sitting in the "track". I don't plan to secure them in place, I want to be able to slide them to one side if I need more access to the tank from the top. I will put some little rubber stickons on the bottom of the fixtures so that the coating doesn't get scratched by sliding on the aluminum.

IMG_0158.jpg


Here's a shot of the frame sitting on the tank (back.) Ignore the messy wiring, I will tidy that all up once I get it finished and setup for good. We designed the frame to sit inside the lip of the tanks plastic frame (where you would normally set the glass lids on) and made two boxes for the bottom (to fit on either side of the center cross brace) and then made the top just one big box. Hope you understand what I mean. The little notch on the bottom center is where the brace is, and we just put a spacer piece in that sits on top of the brace and holds the two bottom boxes together, giving it a bit more strength.

IMG_0150.jpg


Here's a front view. As you can see from this pic, I should have plenty of room to reach into my tank for maintenance once the hinged door is open. The top will be fully open also, so if I need to go in from the very top I can do that also (along the front or back of the fixtures, or I can slide them both to either side and have the center area open too.) That's my friend Mike on the right side... getting measurements for the plywood shell. :cool:

IMG_0146.jpg


Here's a side view up close. If you look at the bottom left corner, you can see how it sits right inside the frame lip. The birch plywood is the exact same width as the rim of the tank frame. So, when we screw on the shell it won't bulge out and look like a top hat, lol. It will look like an extension of the tank going straight up (I hope.)

IMG_0148.jpg


Here's a shot from above, with the lights on. I didn't have my coding on the controller complete at that time, so I wasn't able to adjust the intensity of the blues/whites yet... so I didn't bother taking any pics of the look of the lights. I fixed the coding last night so that I have complete dimming control, I just didn't get any pics since I fixed it yet. Those will be in the next update.

IMG_0152.jpg


That's all for now on the canopy. I'll take some more pics after I get the doors on (the front and backs will be full-length hinged doors by the way, and I hope to make them flip up and just sit on top of the canopy so I don't need to rig something to hold them open) and when I finish painting it. I got some Killz2 indoor/outdoor primer that I'm going to use for the inside and outside of the canopy, then I'll paint the outside black to match my stand. Still need to pick up the black paint though.

As I said above, I also took a bunch of pics of the LED's themselves. I put them all in another thread I made for the Apollo LED's... but I'll put them here too.

Bottom view. There are 5 rows of 11 3w Bridgelux LEDs. Outside rows and center row are all Royal Blue with 4 of the center row being UV Purples. The rows on either side of the middle ("yellowish looking") are a mixture of cool whites and neutral whites (I don't know the exact combination). There are also 3 separate Royal Blues running at 1w each for moonlights (no optics).

IMG_0104.jpg


Here's a closeup of the bottom, you can see one of the moonlights in there (no optics on it) and you can see the optics on all the other bulbs.

IMG_0105.jpg


OK, lets take a peek inside. Here's the heatsink that's on top of the LED panelboard.

IMG_0099.jpg


This is the inside of the top lid, showing the 3 fans, driver for the whites, driver for the blues, and the small driver for the moonlights. The wiring at the bottom goes to (from left to right) power plugs: moonlights, blues, whites; ethernet port (for dimming control).

IMG_0098.jpg


Closeup of the drivers for the blues/whites (both are the same, but whites and blues/UVs are on one each.

IMG_0103.jpg


Here's the small moonlight driver

IMG_0101.jpg


And this is one of the 3 fans

IMG_0102.jpg


Finally, this is a closeup of the wiring connections. Each component is hard wired to a snap-together clip so if you need to replace a part, it's a simple matter of unclipping, replacing, clipping new piece back. It looks very professional!

IMG_0100.jpg


OK, that's it for today's installment. Hope to get the canopy shelled out today and take some pics. Might have another update tomorrow, or I may wait until it's all painted. Stay tuned!
 

Tazmaniancowboy

Officer Emeritus
Officer Emeritus
Tank looks great George!
I got some Killz2 indoor/outdoor primer that I'm going to use for the inside and outside of the canopy, then I'll paint the outside black to match my stand. Still need to pick up the black paint though.
BE careful with Kilz....if it is alcohol based I would paint it outside....My family killed a whole tank of fish by priming the ceiling with Kilz in the same room as the tank. I don't remember about the Kilz2, but wanted to caution you.That hood looked awful heavy at first glance, but it is a great job. can't wait to see more on it and then see it in person!
 

TanksNStuff

Officer Emeritus
Officer Emeritus
Thanks for the compliments everyone!

Don, I plan to paint it out in the garage, with the door wide open. I also have a couple fans that will be running in there to blow the fumes outside. Not really concerned about that.

Jim, I hadn't considered those, but if the doors don't flip up the way I'm expecting, I'll look into those. Thanks for the link.
 

TanksNStuff

Officer Emeritus
Officer Emeritus
Well, my buddy Mike showed up with all the plywood. Man, he did a great job on it! He made all the edges cut on 45 degree angles so when the big doors are closed it looks like the edges match perfectly.

The bad news is that I got out the 48" piano hinge and did a dry run... the way I'm going to attach the door to the frame, the hinge will only allow the door to be flipped straight up (180 degrees) instead of all the way onto the top of the canopy. At that point, the door edge hits the top of the canopy and it won't swing any further. So, I'm either going to need something like Jim linked to hold it open, or find another hinge style/method that will allow a 270 degree swing.

Or, since both front and back will be able to swing straight up, we thought about maybe putting an eye hook on the inside/center of each door and then using a bungy cord or something similar to have them hold each other up. Any ideas similar to this that I could do to have both doors (and gravity pulling them apart/down) to keep them both open at the same time? I'm fearing the bungy will stretch over time and eventually not work.

I didn't get to put the plywood on the canopy by the way. We both agreed it would be better to paint everything before putting them on. I'm going to try to get it painted in the next day or two, then attach the plywood to the frame.

Oh, by the way, Taz mentioned he thought the canopy looked awfully heavy. Believe it or not, the frame is very light and I can pick the whole thing up with one hand very easily. The plywood shell will add a bit of weight to it though because that's 3/4" thick. I piled all the plywood on top of the frame and picked it up without too much effort though. I'm not too worried about that.
 

Tazmaniancowboy

Officer Emeritus
Officer Emeritus
Or, since both front and back will be able to swing straight up, we thought about maybe putting an eye hook on the inside/center of each door and then using a bungy cord or something similar to have them hold each other up. Any ideas similar to this that I could do to have both doors (and gravity pulling them apart/down) to keep them both open at the same time? I'm fearing the bungy will stretch over time and eventually not work.
Don't like that Idea at all, I'm sure someone will come up with a better idea!

I'm getting jealous now and want to put a canopy on my tanks!
 
Those supports are probably your best bet but they will hold the doors out perpendicular to you canopy. I am not sure I that would be an issue for you or not. Are you going to put handles on the doors? A piece of chain with a caribeaner on each end would probably be more secure until you can work out a better solution.
 

TanksNStuff

Officer Emeritus
Officer Emeritus
Well, it's been a few weeks since I updated the ToTT thread. I need to clone myself so I have more time to keep up with everything going on, lol.

Anyway, I managed to get the canopy painted/stained/clear-coated, drilled the hole for wiring (restain/clear-coat that part again cause I'm an idiot), put it all together and set it up on the tank. It was a lot of work but in the end I'm really happy with how it all turned out. In hind sight, I should have used a semi-gloss polyurethane instead of gloss because it's really shiny, but maybe that'll just fade a bit over time? Too late to change it now though, lol. I used all stainless steel screws except for the hinges because I didn't have enough small ones for all those screw holes. I may replace them at some point if I see any signs of rusting. Here are some pics of the finished product.

Frame painted with Killz2

IMG_0553.jpg


Frame with the two ends screwed on

IMG_0554.jpg


Closeup / inside of the wiring hole

IMG_0555.jpg


Closeup / outside of the wiring hole

IMG_0556.jpg


Canopy on it's side after installing the first door. Notice the white nubs on the left side? That's the bottom of the frame that will sit inside the tanks plastic top-frame.

IMG_0558.jpg


Here's that same side with the door hinged open

IMG_0559.jpg


Canopy with both doors attached

IMG_0560.jpg


To my suprise and astonishment, the doors hold themselves up by themselves when fully open!

IMG_0561.jpg


Here's a better view of what I mean by that... with both doors fully open

IMG_0566.jpg


Yea, yea. I know you all want to see what it looks like on the tank... so here are a few shots from different angles:

Front

IMG_0637.jpg


Side

IMG_0638.jpg


Back

IMG_0639.jpg


"Hidden" side (Ignore the wiring mess, this was literally 2 minutes after I hooked up the lights and didn't organize it all yet.)

IMG_0640.jpg


Front view with door open

IMG_0644.jpg


Inside view

IMG_0645.jpg


Other side inside view, showing my Reef Angel Relay outlet box (shell made of plastic). That's a temp probe hanging there, and my ATO feed tubing is mounted onto the closer for the back door in the right corner. I have 2 closers on each door to help keep it shut tight, you can see one the rollers of one on the left side also.

IMG_0647.jpg


Here's a view from the top (wiring is semi organized with electrical tape but I plan on using zip ties and attaching them to the frame at some point.) You can also see my auto feeder on the left between the two light fixtures. It's attached to the center brace under the aluminum rails and drops flakes right into the tank without getting on any wood... so no worries about having to clean that up! :biggrin:

IMG_0643.jpg


Well, that's all the pics for this installment. I also had to complete the installation of the Reef Angel (RA) controller equipment and transfer all of my equipments power plugs into the RA outlet box... but at the time I took pics the wiring was a rats nest and I didn't attach any of the modules to my stand yet. I haven't had a chance to completely organize it all yet, but when I do I'll post more pics of how that was done.

As for the Apollo LED's, I really love the look! I took a bunch of pics with my new camera, but they all seem to have a pink glow to them. I need to figure out the white balance or something. In person, the colors in my corals really pop and I never knew I had so much fluorescent pigments in my corals! I'll try to get some pics of the lights at different %'s and combos of white/blue and compare them to my old T-5's and put them up soon.

I've had some issues with the LED's flickering at night. This is because the RA controller is programmed with a "slope" function that automatically adjusts the intensity based on custom factors I give it. So I've been toying with the start%, end%, and duration of the "slope". The "slope" is basically a specified period of time where the controller will evenly ramp up intensity from your start% to your end% and spread that change out over the duration you specify.

For example, I used 10% for start, 50% for end and 75 minutes for duration. When my lights come on at the specified time (8 AM) they start out at 10% intensity. Then, over the next 75 minutes, there are interval increases that raise it to 50% intensity (say 10% increase every 18 minutes or so... I'm not sure of the exact number of increases or amount of the increase... that changes based on my custom factors). Once it's at the end% (50% in my case) it stays like that until 75 minutes before the light is scheduled to be off. At this time, the slope works in reverse and starts dimming the LED's at the same %/rate as it was raised before.

Now that you understand that part (you do right?) I'll explain the flickering problem. The issue is the drivers for the LED's require a minimum of around 10% intensity to have enough voltage to power all the leds on the fixture. If it's 9%, it's close and if the current fluctuates it can temporarily have enough juice to light the LED's until the voltage drops slightly below the minimum. It's like holding a 9v battery to power something and as you lose contact with the wire for a split second it loses power until you touch the wire again... same sort of concept.

Anyway, due to the slope calculation in the controller and this being in a "loop" function of the code, it seems to be sending the analog signal in more of a pulse mode. When the slope gets towards the end (say the last 15 minutes or so of the light cycle) the slope is sending 9.xxx% and not quite 10%. I don't know why, but it's bordering on the minimum % and the lights have been flickering at the end. I tried to compensate by starting the lights at 15% and that seems to have fixed it. I may even bump it up to 20% in a week or two when my corals are adjusted to the LED's better. This is when I'll also be raising the end% (max) too, so the intervals should remain the same for a while.

Only other issue I've had with the lights is the moonlights. Wow, they are bright! There's only 3 bulbs per fixture running at 1w each (so 6w total) and it's making my fish think it's still daytime, lol. I've been manually flipping the rocker switches to shut them off after a couple hours, but I plan to re-code the controller to just power those outlets off after 2-3 hours so I won't have to do that every night.
 

panmanmatt

Officer Emeritus
Officer Emeritus
George, the canopy looks great. Only thing that caught my eye is that outlet box inside the canopy. The salt and humidity is going to play havoc on that thing, especially with the 2 unused outlets. Is there any way you can mount that outside the canopy?
 

redfishbluefish

Officer Emeritus
Officer Emeritus
George, the canopy looks fantastic. Nice job. I’m using some of your design elements in my canopy….someday. You’re right about the gloss. Instead of recoating, could you kill the gloss by rubbing with a very fine steel wool, say a triple zero steel wool?
 
That came out really nice George. Interesting about the flickering. I haven't noticed that at all yet and the bottom of my slope is around 9%. How many drivers are you running off of each channel? I'm doing 2 on each.

What mix of blue to white are you running? Right now I'm about 80/70 blue/white. I've got a loner par meter for a few days and hoping to squeeze some time in this weekend to see what I get at different hights and power levels. I did a quick check last night and was getting 100 to 130 on my sand bed, 250 to 300 in the middle, 400 to 500 towards the top. That's was in a 24 inch deep tank with the lights mounted 12 inches above.
 

TanksNStuff

Officer Emeritus
Officer Emeritus
Matt - Yea, I hear you on the outlet box. It worries me too and my plan was to put it above the rails originally... but it ended up sticking up higher than the frame so I went under the rail instead. I'll take a look at it tonight to see if maybe I can unhook it and mount it outside of that side wall instead of inside the canopy. I'm sure all the cords will reach through the hole and into the outlets since I have all the slack twist tied together in there. I wanted to hide everything originally, but I think you are changing my mind on keeping them safe from humidity and salt. Only reason I decided to go this way to begin with is that the box is plastic... but the open outlets are certainly a concern. Thanks for the input!

Paul - I got the basic design from you originally anyway, and the rail idea was from Richie... so you're not really stealing anything from me, lol. I actually did use fine steel wool in between coats of the poly and it left a scratchy look to it that was worse than the gloss. I'm not too concerned with it. The shine is only bad when the camera flash is on or the ceiling lights are on in that room. When the room is dark, it actually looks pretty nice.

Mike - Are you using a PWM module or the 2 channels on the main relay box? Roberto modified my PWM module to send analog signals but my relay box is original (although not connected to my lights). I don't know if this makes a difference.

Curt (binder) said he's going to add extra memory locations to the Android app for slopes on the PWM channels in the next version of the libraries. Once he does that I'll be able to manually choose a specific % for each channel and test the lowest I can go on each one before it flickers. I still think that it's more of the code "refreshing" the signal command while in the loop than the actual low % it's at. I don't know, will have to do more testing and investigating.

Right now, I have 1 driver per channel so each blue/white on each fixture can be controlled to their own individual % if I want. But my slope function in the code has both blues running parallel and both whites running parallel (ie. the slope data is the same for the like-colored channels).

I'm maxing mine at 60%blue/50% white right now to acclimate my corals. Remember, I'm coming from a 4-bulb T-5 fixture so this is quite a bit stronger. I'm taking it slow so I don't burn out everything.

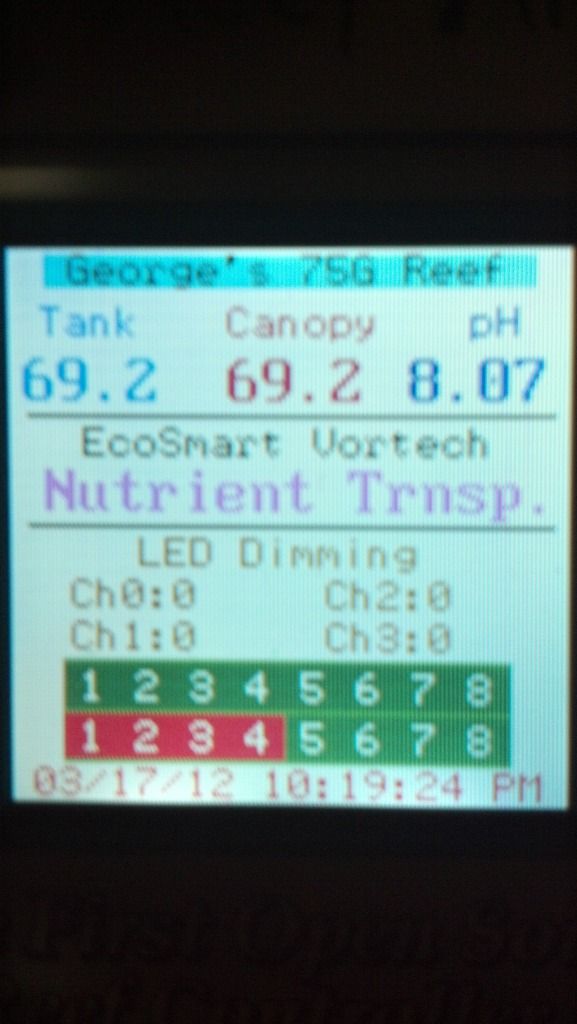
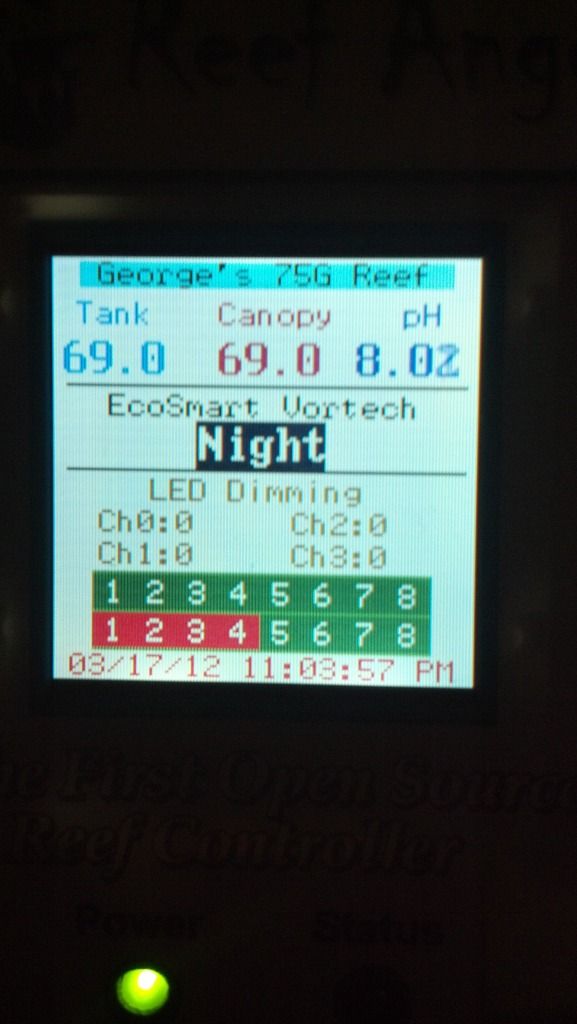
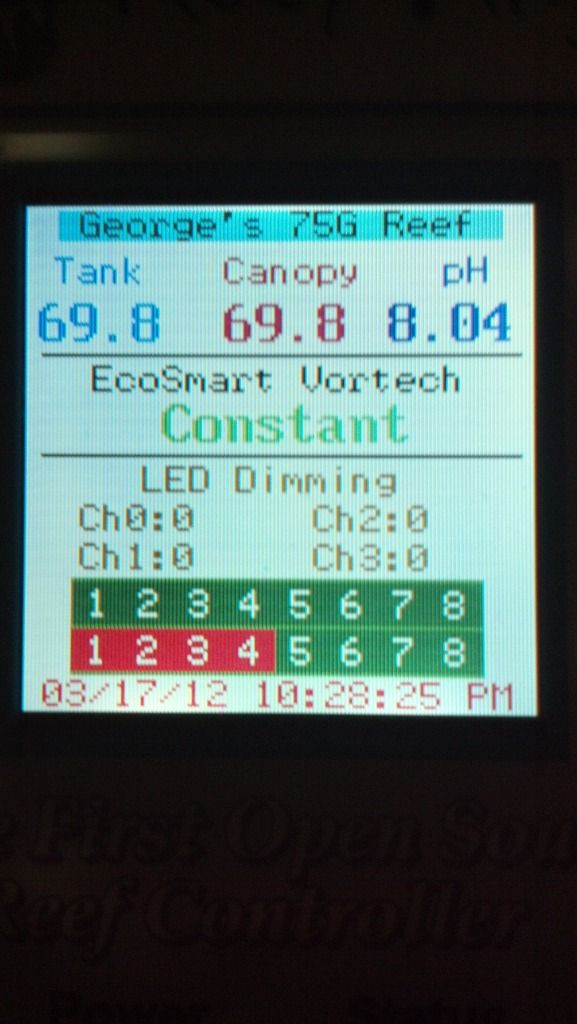
Oh, I do have a few other pics that I can show you guys. This is the custom display screen on my RA controller head unit.

2012-03-17_22-29-03_503.jpg


2012-03-17_22-20-02_555.jpg


2012-03-17_23-04-43_642.jpg


To give a quick description of them...

- Across the top is my custom banner... spiffy eh?
- Under that, is readings from 2 temp probes (Tank and Canopy) and pH probe.
- Under that, is a display of the current mode my VorTech MP40 is in. This changes automatically with whatever I set it at via an Android app on my phone! You can see by the 3 pics that the text even changes colors to match what the EcoTech LED display color would be during those modes. This is really cool. I can be here at work and change my VorTech to any mode I want, remotely! I can even change the speed of the pump and/or the duration of the pulses (in pulse modes).
- Under that, I have my 4 LED channels that show the current signal % values. (The lights were off when I took the pics so they show 0)
- Under that is 2 bars, numbered 1-8. These represent the main relay outlet box (top) and the extra relay box for the lights (bottom). Also, the color changes to green when that outlet is active and red when it's off. This gives you a quick indication of whether the equipment is getting power or not.
- At the bottom, is the current date/time on the controller. All automatic functions get controlled based off of this clock, so this is great for knowing if your code is working as you intended.
 
Top