DIY Nano Stand
I am very happy the way the DIY Nano Cube Canopy came out, I’ve decided to now build a similarly designed stand for the JBJ 28.
There are other reasons I want a new stand as well.
1.) I’m not real happy with the stability, or lack of stability, of the stand. When I use the MAG float to clean the front glass, the whole tank and stand sway back and forth while I push the cleaner back and forth.
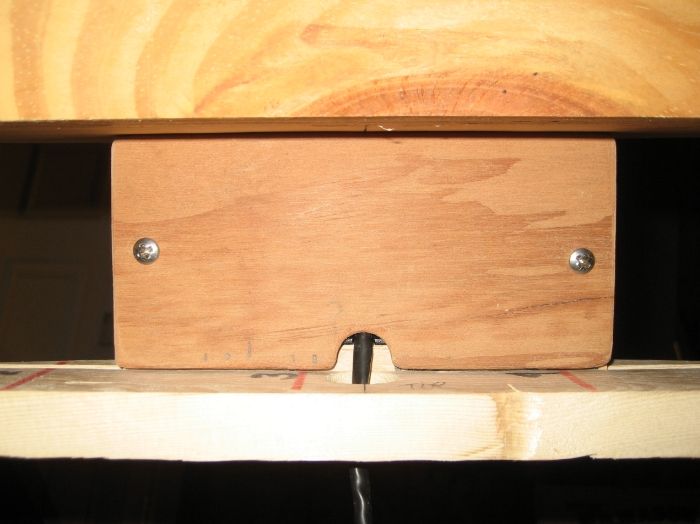
2.) When I got this setup a while back, the stand never had the door installed, and therefore I did not get the door hardware. (The door wasn’t installed because the prior owner had the chiller below, and it need air flow to stay cool.)
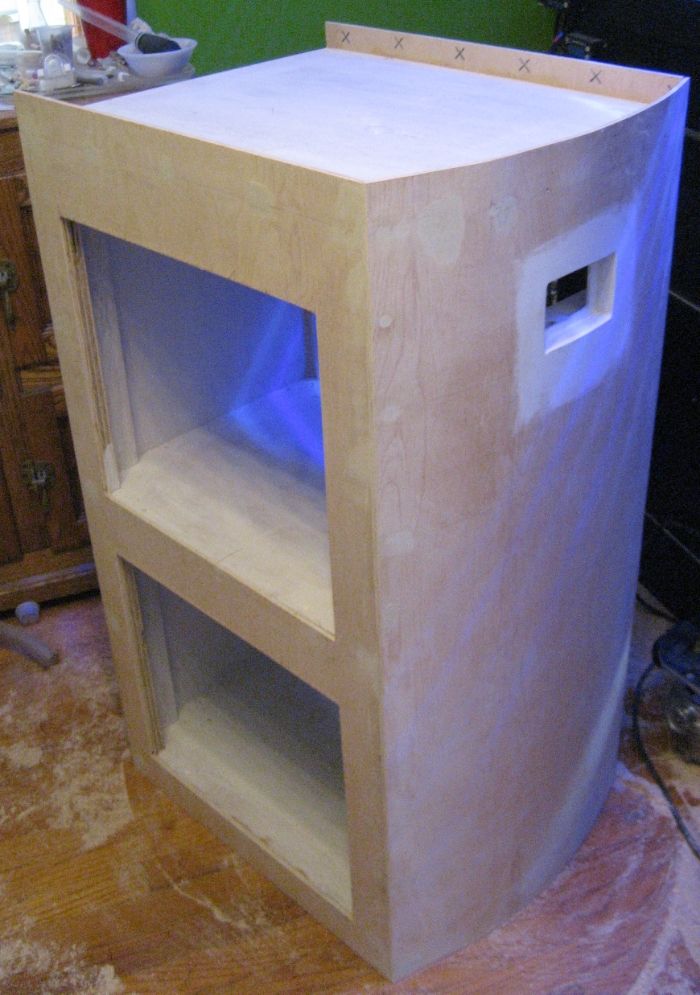
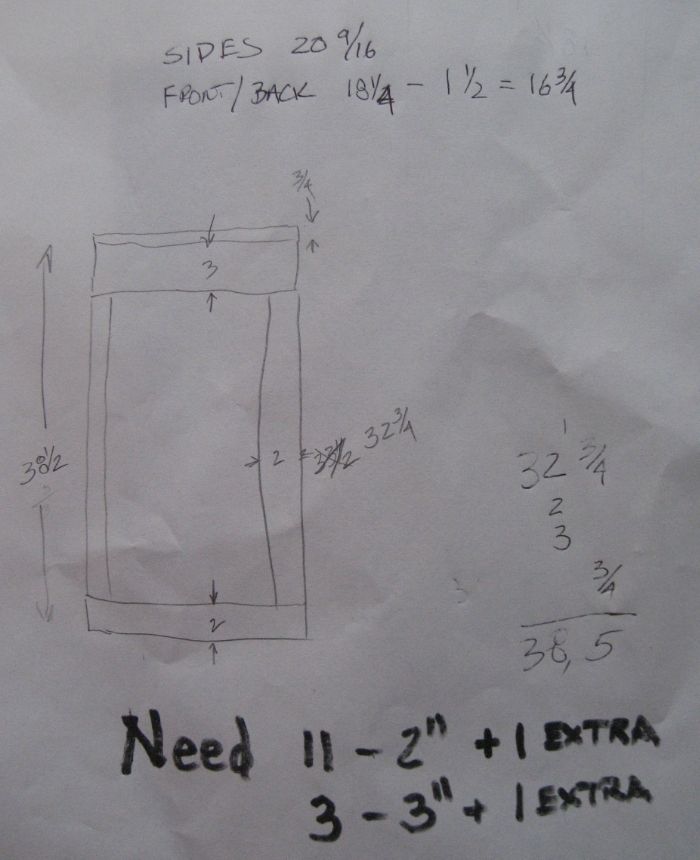
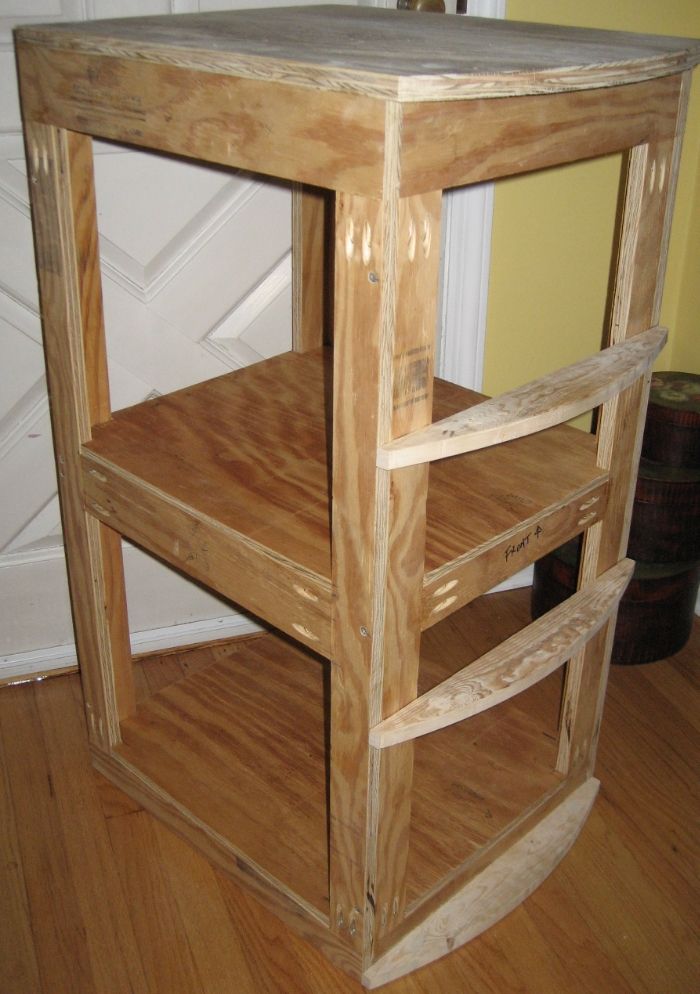
3.) I don’t like standard height stands….they are too low…..32 inches. I have to bend down to look into the tank. This new build will be approximately 38 ½ inches high.
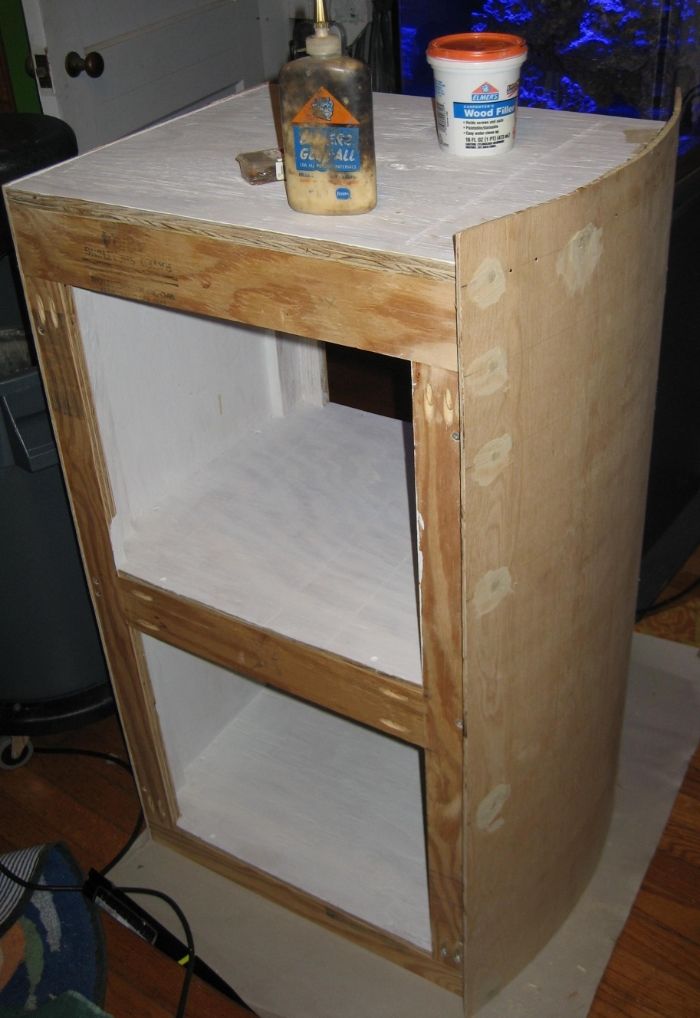
4.) More storage. They built that current stand to have “style,” with the narrow sides, and floating top…but it grossly limits storage.
The General Plan
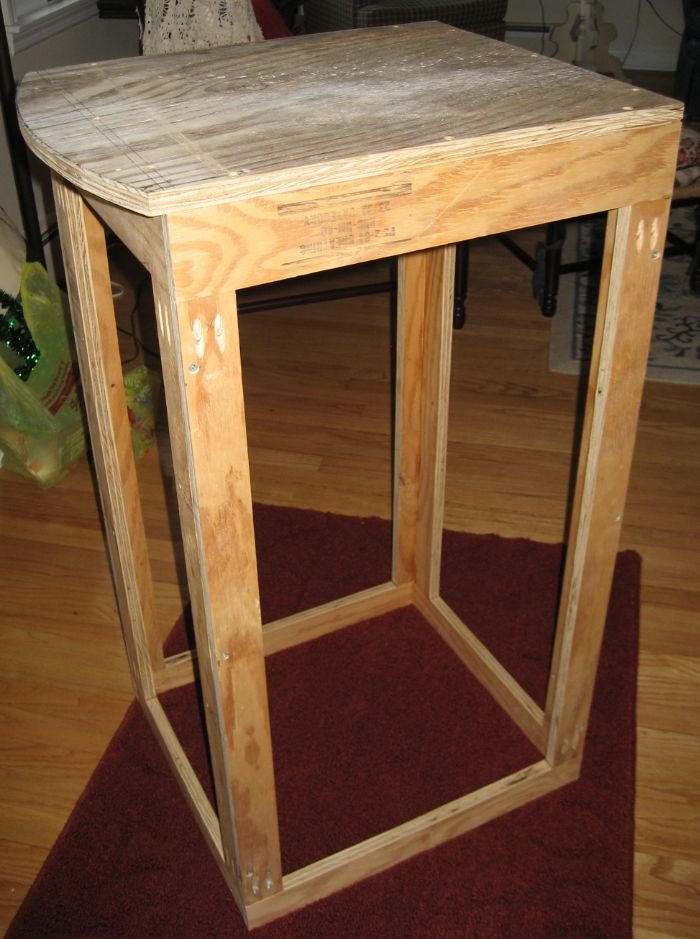
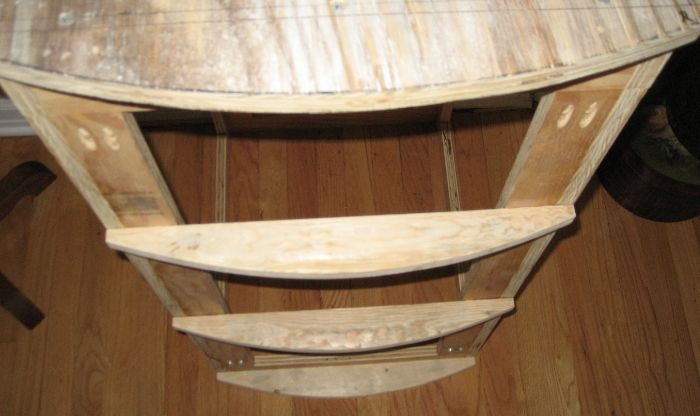
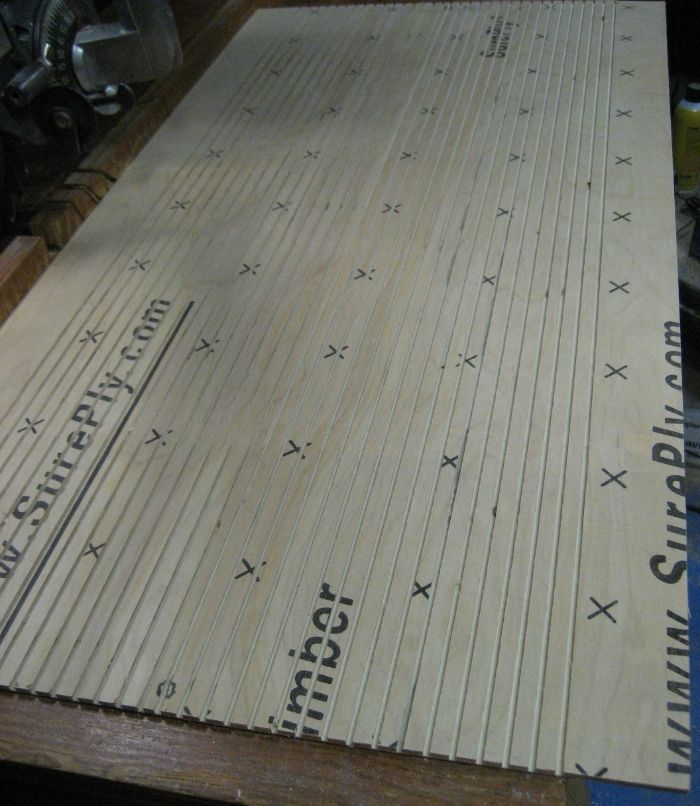
First I will cut the top out of ¾ inch plywood. Then frames will be made out of ¾ inch plywood and will be assembled to make the rectangular skeleton. Arced pieces will be cut to form the bellied front, with the doors in both sides. It will be skinned with ¼ inch plywood.
Still up in the air is how the doors will be attached. Similar to the canopy, I’m struggling on how to do this.
Now the Build
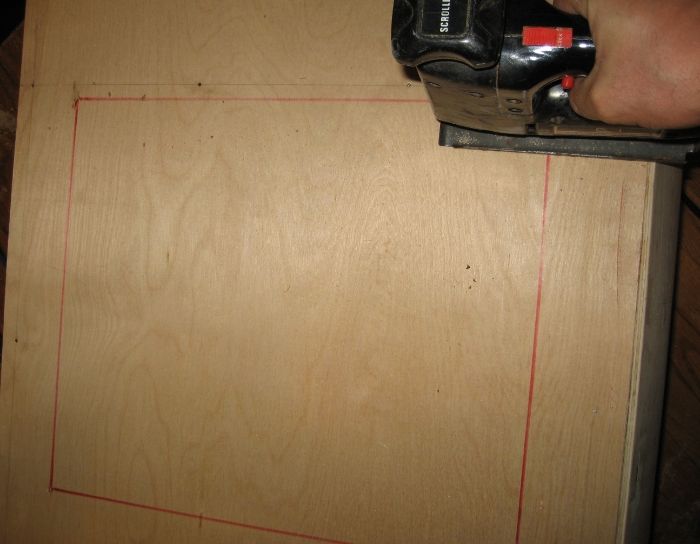
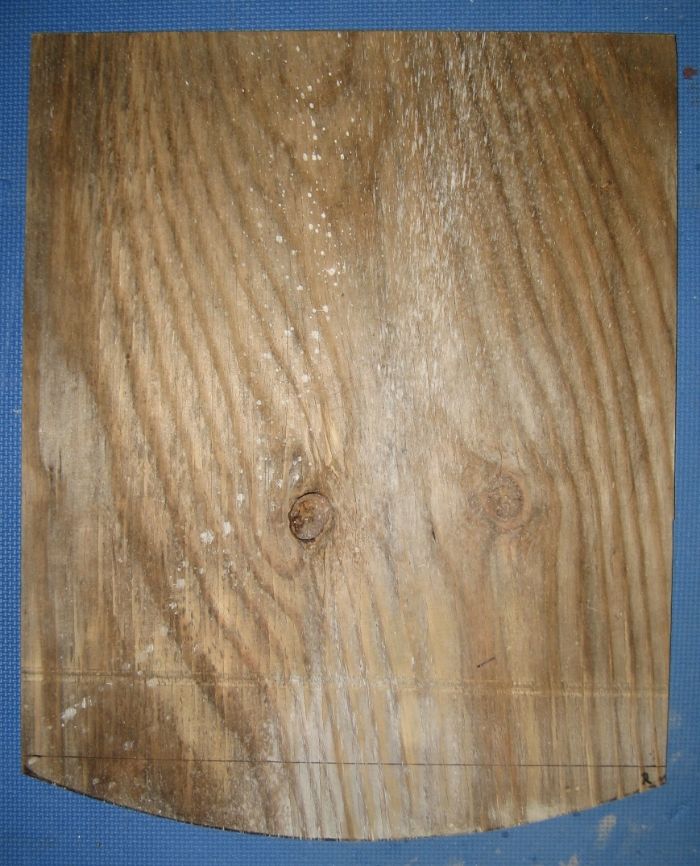
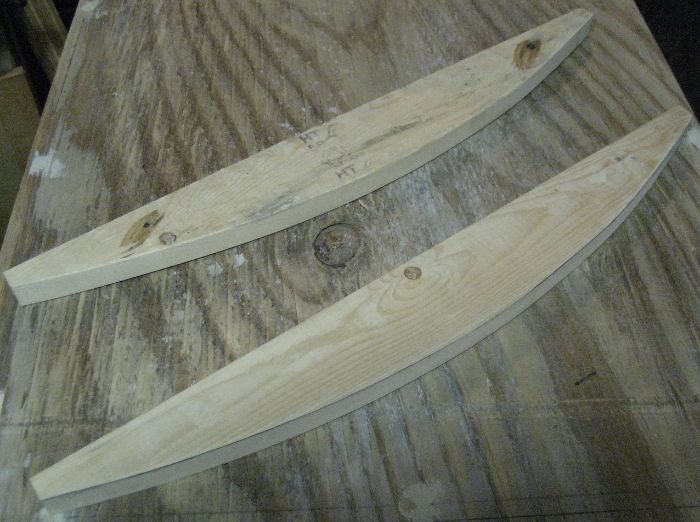
First thing was to cut the top. A piece of ¾ inch ply was placed on the top of the tank, and the outline of the tank was traced onto the plywood. This was cut slightly fat, with particular attention to the front arc. This arc will be the template for the other arced ribs on the front of the stand.
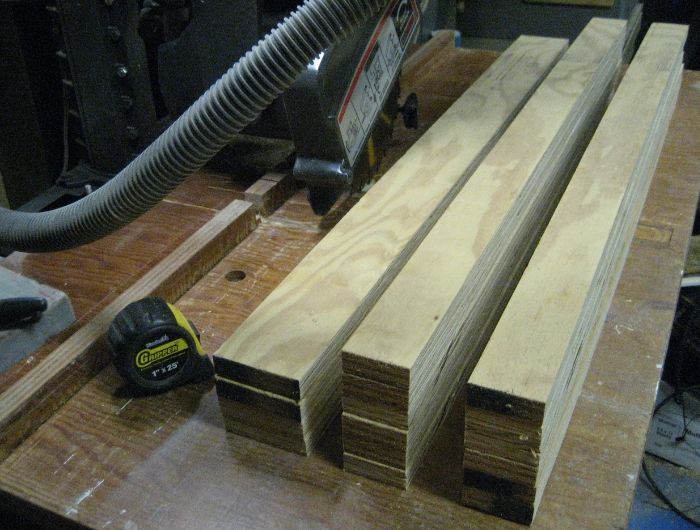
Next the arced ribs where cut to length and then rough cut with the band saw. Three were cut….but a potential fourth might be available. These pieces were individually screwed to the top piece of plywood.
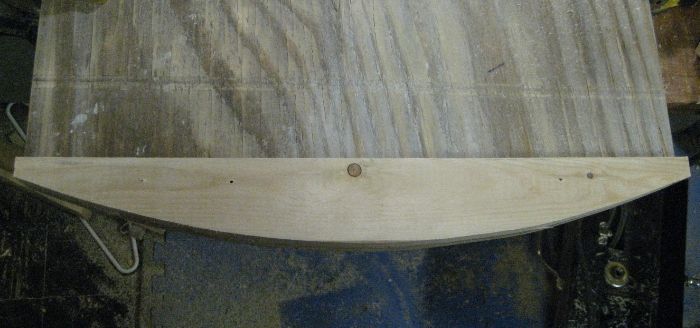
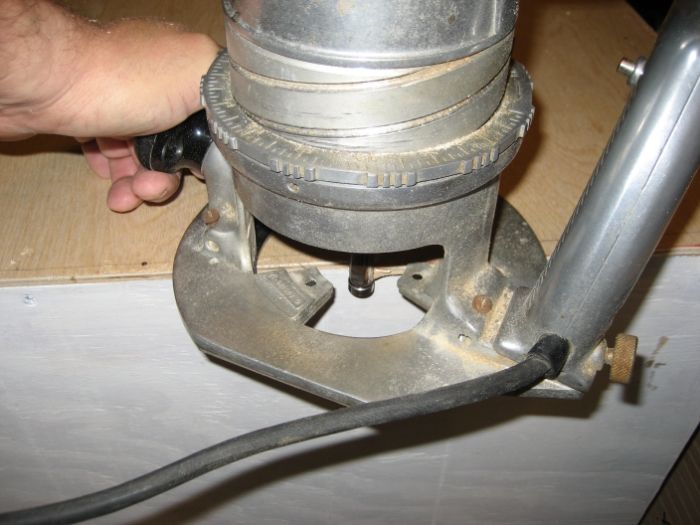
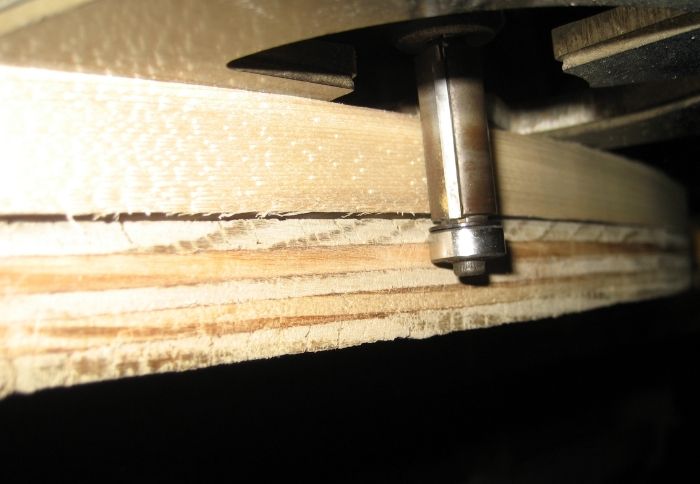
A router was then used with a trim bit (a bit with a roller bearing), to cut each rib to the exact arch of the top. Now the reason for potentially having four of these ribs is that one splintered while routing. I then made another while I glued up the splinted piece, hoping I could finish trimming it tomorrow.
Time for bed…..more tomorrow…..the ¾ ply skeleton.
I am very happy the way the DIY Nano Cube Canopy came out, I’ve decided to now build a similarly designed stand for the JBJ 28.
There are other reasons I want a new stand as well.
1.) I’m not real happy with the stability, or lack of stability, of the stand. When I use the MAG float to clean the front glass, the whole tank and stand sway back and forth while I push the cleaner back and forth.
2.) When I got this setup a while back, the stand never had the door installed, and therefore I did not get the door hardware. (The door wasn’t installed because the prior owner had the chiller below, and it need air flow to stay cool.)
3.) I don’t like standard height stands….they are too low…..32 inches. I have to bend down to look into the tank. This new build will be approximately 38 ½ inches high.
4.) More storage. They built that current stand to have “style,” with the narrow sides, and floating top…but it grossly limits storage.
The General Plan
First I will cut the top out of ¾ inch plywood. Then frames will be made out of ¾ inch plywood and will be assembled to make the rectangular skeleton. Arced pieces will be cut to form the bellied front, with the doors in both sides. It will be skinned with ¼ inch plywood.
Still up in the air is how the doors will be attached. Similar to the canopy, I’m struggling on how to do this.
Now the Build
First thing was to cut the top. A piece of ¾ inch ply was placed on the top of the tank, and the outline of the tank was traced onto the plywood. This was cut slightly fat, with particular attention to the front arc. This arc will be the template for the other arced ribs on the front of the stand.
Next the arced ribs where cut to length and then rough cut with the band saw. Three were cut….but a potential fourth might be available. These pieces were individually screwed to the top piece of plywood.
A router was then used with a trim bit (a bit with a roller bearing), to cut each rib to the exact arch of the top. Now the reason for potentially having four of these ribs is that one splintered while routing. I then made another while I glued up the splinted piece, hoping I could finish trimming it tomorrow.
Time for bed…..more tomorrow…..the ¾ ply skeleton.


")