• Folks, if you've recently upgraded or renewed your annual club membership but it's still not active, please reach out to the BOD or a moderator. The PayPal system has a slight bug which it doesn't allow it to activate the account on it's own.

Inherited 90

I still have them (mini GBTA) , probably 6 from original 3, so in my tank they not that prolific.
How do you know that they to blame for NuclearGreenZoas ?
I guess there could be some people that would like to have them, may be beginners that like anemones but do not want to spend much. I would give couple to someone for free.
You know "one man's garbage is another man's lunch".
 

redfishbluefish

Officer Emeritus
Officer Emeritus
How do you know that they to blame for NuclearGreenZoas ?

The anemones moved into where the Nuclear Green’s were. When there was one anemone amongst 50 zoas, it wasn’t a problem, but when there were 20 anemones in the same spot as the Green’s, the zoas lost out. I’m actually seeing that some zoas survived, so the colony of Green’s will probably recover.
 

redfishbluefish

Officer Emeritus
Officer Emeritus
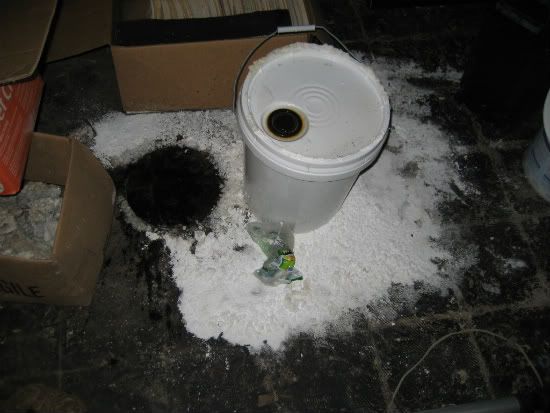
Five Gallon Bucket of Bionic Calcium Leaked!!!

I went to refill the gallon jugs of Bionic from the source five gallon buckets I have in the basement. I went downstairs and found the calcium bucket had sprung a leak, and the solution evaporated, leaving the calcium on the floor. My guess is I lost about 1 ½ gallons of calc. In examining the bucket they use, it’s real cheap….thin. The crack developed at the injection point on the base of the bucket. I guess I’ll make homemade calc until the alc is used up before ordering two more buckets.


IMG_4428.jpg
 

Sunny

NJRC Member
Article Contributor
Paul

Believe it or not the exact same thing happened to me tonight :-O . I was wondering what is up with the frosting on the floor :)
They do use a cheap bucket :(. My guess is the cold weather opened up the cracks ... given that my basement is very cold in winters.

Sunny
 

redfishbluefish

Officer Emeritus
Officer Emeritus
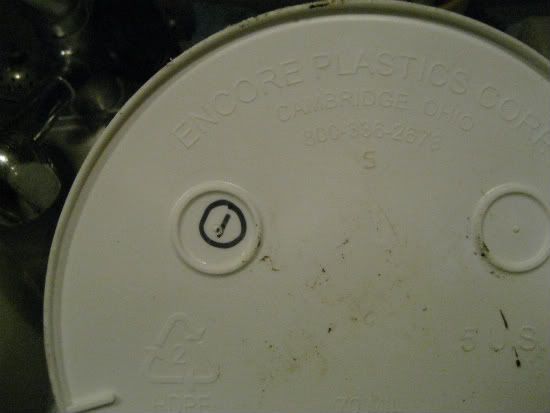
Sunny, it’s not cold weather…..really, how cold is your basement….maybe 60? Anyway, where is the crack in your bucket? Mine is on the bottom, right on the injection molding point. Using a Sharpie, I put a line on the crack and circled it.

IMG_4429.jpg


I’m tempted to write a letter to ESV. This bucket just sits in my basement at no less than 60F. I don’t have baboons down there throwing around these buckets. Plain and simple, their buckets are crap! By the way, the buckets are made by Encore Plastics out of Ohio……A CRAP PLASTIC COMPANY!
 

Sunny

NJRC Member
Article Contributor
Well, I already send them an email :) You should do that as well (info@esvco.com). My basement is reading 45 right now. It is unfinished area remember :)
I will take a pick of the crack and upload a pick later.
 
lol..... crazy thing, tonight i was doing a water change and wondered why there was a gallon less water in the bucket that i had been mixing in.... lifted it up and poured it into a new bucket, flipped it over and theres a crack in the EXACT same spot you have circled. Basement for me too. Idk i guess it has to be from the cold....? walmart bucket for me. blue one.
 

redfishbluefish

Officer Emeritus
Officer Emeritus
Glass Holes Overflow Maintenance

I noticed the water level of my tank had risen, wetting the wood supports for my lights. In addition, there was a slight gurgling noise coming from my overflow.

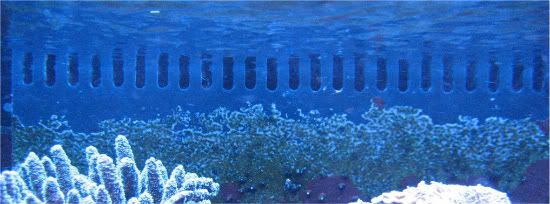
I turned off the pumps and raised the lights and took a close look at the overflow. Coralline had grown all over the overflow, including the saw-tooth portions. I figured that this coat of coralline restricted the overflow, causing a rise in the water level.

Using a sharp knife, I scraped the coralline off all the saw-teeth….all four sides. In addition, the bottom “U” part of the saw-tooth was difficult to knife clean, so I used a round file to clean that portion. I also finished up the cleaning by using a small stainless steel wire brush to clean the inside of the overflow. I scraped the outside of the saw-tooth portion as well, to allow water to easily flow through the teeth. Here’s a shot with the coralline scrapped away from the saw-teeth.

IMG_4484.jpg


Now no noise and the water level is down about a ¼ inch. So I guess I’ll have to put this on my maintenance list every three to four years!
 

redfishbluefish

Officer Emeritus
Officer Emeritus
New Apollo LED Lights

Well, I’ve finally bit the bullet and went LED.

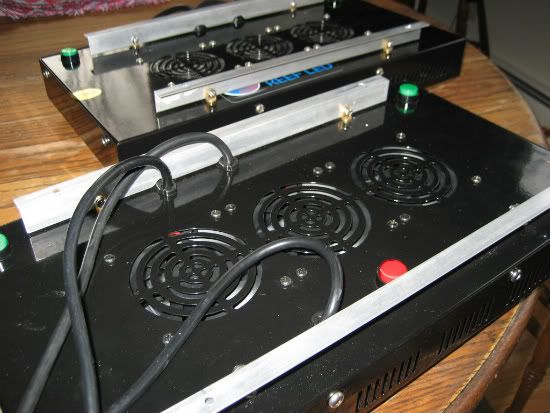
I purchased a lightly used Apollo 20K, 120W from a member. This wouldn’t be enough for my five foot, 90 gallon tank, so I emailed Joe at Apollo. With their constant “improvements,” this fixture was no longer available, however they did have two older style boxes remaining in inventory, and he could build me one. So I placed the order. This actually happened over this past weekend, and with Monday a holiday, the unit was built and delivered by Wednesday. I was pleasantly surprised, expecting that the delivery was a good week or two out, easy.

So I now had two Apollo (non controllable) units and was planning on building a canopy to hold them. Well I couldn’t wait, and today I did what I had to do to get these over my tank.

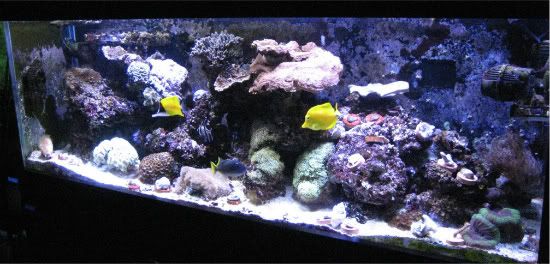
Just to take a step back, I currently have six T5 bulbs overdriven by IceCap ballasts. In addition, I have two IceCap LED moonlights. Here is the homemade retro white beast:

IMG_4506.jpg


So with the Apollos, the first thing I needed to do was to make brackets that would allow me to mount the fixtures in a canopy. Both units came with the cable hangers. However, the cables required maybe a foot or so of room above the fixture. I didn’t want to waste a foot of space just for cables. So what I did was pick up some aluminum angle at Home Depot, and fabricated stand-offs for the fixtures. The fixtures required stand-offs to avoid the on/off buttons and wiring. (I think the new units don’t have this problem.)

IMG_4500.jpg


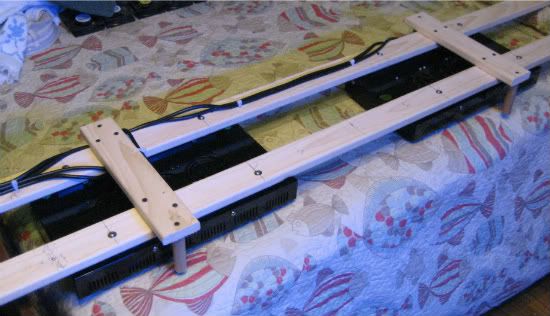
After the brackets were built and attached, then came the wood frame. I simply used cheap fir strapping to make the frame. I also included mounting points on either side of the fixtures for the two IceCap LED moonlights. I figure I could still use them in my light cycle to mimic early morning and late evening.

IMG_4502.jpg


All done, the lights were rested on top of my temporary canopy. The look is definitely different to the eye. Appears to be a lot more shadows, and not as bright. However, I now have the shimmer that is typical of medal halide. Guess it’s going to take a little time to get use to the different look.

IMG_4512.jpg
 
Would like to see how that cap (if it is a cap) on the top is going to react with the change. How far from the water line are the led's? I'm thinking that they should be raised pretty high since they are not controllable. I can bring my par meter with me if you like when I bring the tub back to your house. We can take some par readings. Let me know.
 

redfishbluefish

Officer Emeritus
Officer Emeritus
Would like to see how that cap (if it is a cap) on the top is going to react with the change. How far from the water line are the led's? I'm thinking that they should be raised pretty high since they are not controllable. I can bring my par meter with me if you like when I bring the tub back to your house. We can take some par readings. Let me know.

Rich, bring that meter down!

That is an orange cap in the middle of the tank. It has always grown down.
:confused: I thought that was normal until one day, when a fellow reefer was over, he questioned me on how I got the cap to grow down. I shrugged my shoulders and gave him my best dumb look (which isn’t hard for me....it's natural. :witless: ) Maybe with the LEDs, it will start to grow up. :p

From the bottom of the fixtures to the waterline is approximately 13 ½ inches. The frame I made to hold the fixtures is literally resting on the top of the canopy.

IMG_4523.jpg
 

redfishbluefish

Officer Emeritus
Officer Emeritus
Looks great Paul, nicely done.


Thanks Jim!


This morning I added in the IceCap LED moonlights.

IMG_4520.jpg


Next is to straighten out the bird’s nest of wires and split them up to four timing spots on the ReefKeeper.


I’m wondering how many hours I should have these on in acclimating the corals. Anyone have an opinion or can direct me to a nice read?

EDIT TO ADD: I just found THIS article about acclimating corals.
 

redfishbluefish

Officer Emeritus
Officer Emeritus
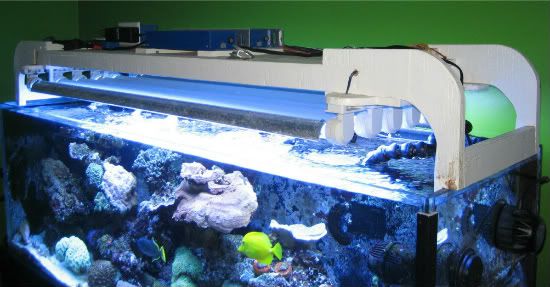
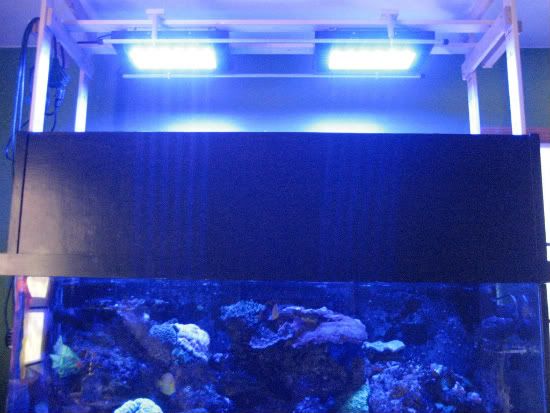
Thanks CFM, I read that post and a couple more that gave me a scare about new LEDs bleaching out your corals when not slowly acclimated. So I quickly made this contraption to raise the lights up about 30 ½ inches above the waterline to begin the process.

IMG_4526.jpg
 

redfishbluefish

Officer Emeritus
Officer Emeritus
After mounting the lights in the monstrosity in the above picture, I ran into a little problem….I could not get into my tank. With the canopy attached to the frames holding the lights, it was very difficult to slide off this Rube Goldberg to get into the tank. The upper frame pieces were less than an inch from the ceiling, and it required two people, with great care, to get this thing off the tank.

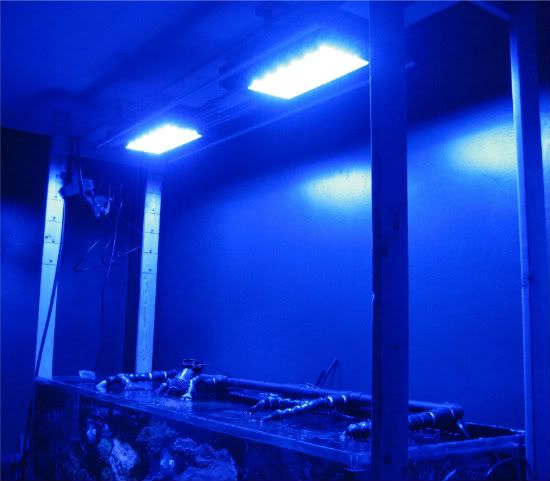
Today I remade the frames, attaching them to the stand. Now I have full access to the tank, while I slowly lower the new LEDs over the next month or so. With the old temporary canopy off, it will now allow me to build one with a hinged door on the front.

IMG_4529.jpg
 

Fish Brain

Officer Emeritus
Officer Emeritus
Why in the world would you want to be able to get in the tank? Hands off reefing is the way to go, sit back and just let nature take care of it. :p :D
 
Top