• Folks, if you've recently upgraded or renewed your annual club membership but it's still not active, please reach out to the BOD or a moderator. The PayPal system has a slight bug which it doesn't allow it to activate the account on it's own.

Inherited 90

TanksNStuff

Officer Emeritus
Officer Emeritus
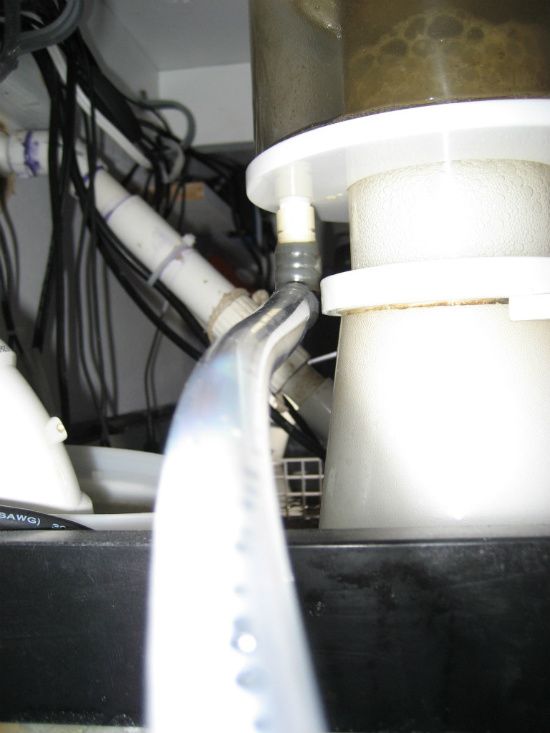
I figured you could use a Uniseal bulkhead (http://www.aquaticeco.com/subcategories/829/Uniseals) for the curved body or possibly go through the bottom plate of the skimmer.

Yea, a uniseal would be better than a bulkhead for this I agree. I really like the idea of going through the bottom plate though. That thing is flat and pretty rigid, so no worries about anything cracking. However, as long as you got it working Paul, I wouldn't mess with it.

As for the organization, I didn't see the before, but the after looks pretty good. (Well, maybe except for that rusting power strip. :eek: )
 

redfishbluefish

Officer Emeritus
Officer Emeritus
Yea, a uniseal would be better than a bulkhead for this I agree. I really like the idea of going through the bottom plate though. That thing is flat and pretty rigid, so no worries about anything cracking. However, as long as you got it working Paul, I wouldn't mess with it.

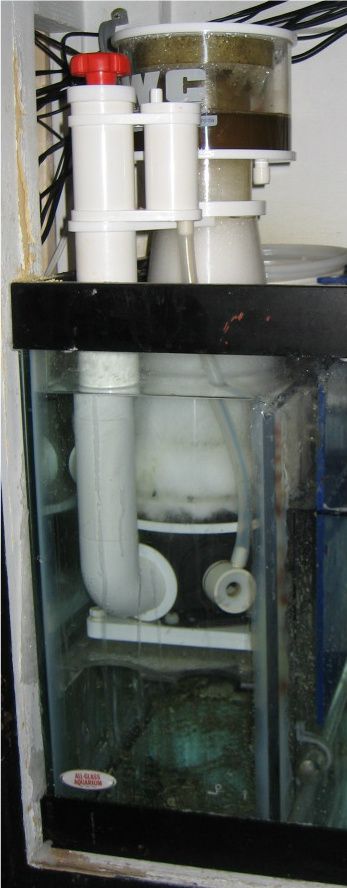
I agree about going through the bottom….and that wouldn’t be a problem for me since the skimmer sits up about six inches or so:

IMG_4790.jpg


I think the bubble plate would be easily supported and the only thing you’d have to do is cover up the hole in the side. However, it’s now working and I’m not looking for yet another project.


As for the organization, I didn't see the before, but the after looks pretty good. (Well, maybe except for that rusting power strip. :eek: )

I’ll have you know that my equipment does not simply “rust,” it oxidizes! “Rust” means it’s a cheap piece-o-crap while “oxidize” means age and wisdom….it’s a fine line. :peaceful:
 
I’ll have you know that my equipment does not simply “rust,” it oxidizes! “Rust” means it’s a cheap piece-o-crap while “oxidize” means age and wisdom….it’s a fine line. :peaceful:

In my business we call it "patina" and raise the price 60%. LOL

The skimmer looks like it's really going good now. I wouldn't touch it either.
 

TanksNStuff

Officer Emeritus
Officer Emeritus
I’ll have you know that my equipment does not simply “rust,” it oxidizes! “Rust” means it’s a cheap piece-o-crap while “oxidize” means age and wisdom….it’s a fine line. :peaceful:

Well played sir! Although, I like Jc's response better. :p

In my business we call it "patina" and raise the price 60%. LOL

The skimmer looks like it's really going good now. I wouldn't touch it either.

And yes, it looks like it's running like a champ. Don't even breathe on it!
 
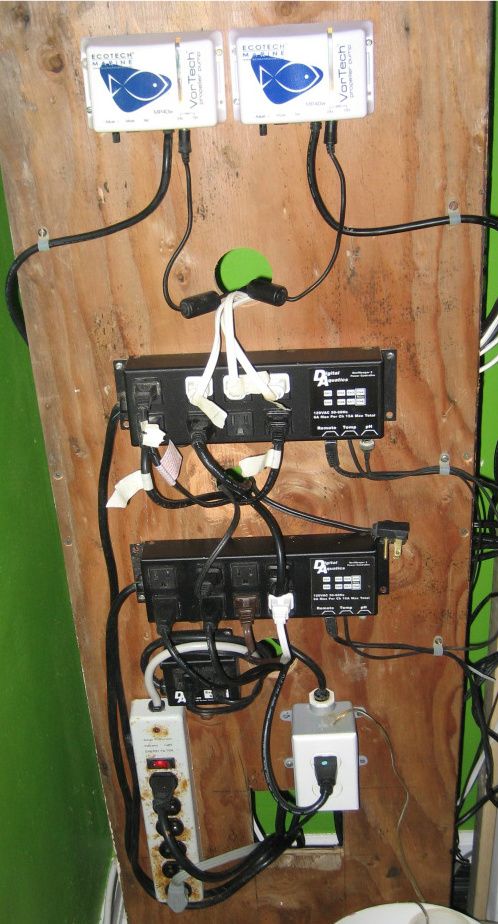
With the external skimmer now gone, I tackled the spaghetti-like mess of wires on that side of the tank. For the past two years, whenever anything new was added, it was simply plugged in and left on the table or floor to the left of the tank. I didn’t take a “before” picture, but believe me when I tell you it was a knotted mess of wires.

With a scrap piece of plywood and a bag of screws, I untangled, organized and mounted everything up. Here’s what it looks like now:

IMG_4788.jpg

Nice. This is exactly what I will be doing. I just wish that the cable attached to the vortech was detachable.
 

fatoldsun

NJRC Member
Nice. This is exactly what I will be doing. I just wish that the cable attached to the vortech was detachable.

If you have the older style like in the pic they're very easy to detach from the controller. Just pry the to snap clips at either end and unplug the cable. Can't speak to the ES controllers but the dry side and wire is the same do I'd bet they're pretty similar.
 

TanksNStuff

Officer Emeritus
Officer Emeritus
Yep, you can easily take the case apart, unplug the wire from the board, route it through wherever you want, then simply plug it back in and snap the case closed.

Here's a vid instruction on the upgrade to Ecosmart controller which shows how simple it is.

[video]http://ecotechmarine.com/media-gallery/video/ecosmart-driver-upgrade-2/[/video]
 

redfishbluefish

Officer Emeritus
Officer Emeritus
Nice. This is exactly what I will be doing. I just wish that the cable attached to the vortech was detachable.

Yea, that bugged me too Rich. But looks like Dave and George know the solution. Thanks guys….and thanks Rich for bringing it up. I’ll do the unplug thing when I mount this stuff for real in a cabinet. Good stuff!
 

redfishbluefish

Officer Emeritus
Officer Emeritus
New bubble trap

Here’s my latest lamebrain idea for a bubble trap.

I pulled out the old Rube Goldberg bubble trap….too big, and growing all kinds of stuff.

IMG_2306.jpg


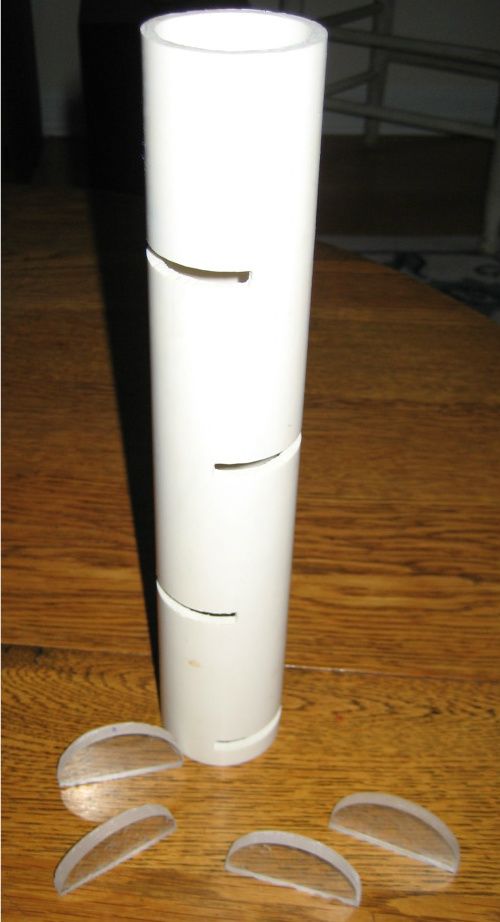
Using a short length of 1 ½ pipe, I cut four slots about 2 ½ inches apart, half way through the pipe, and alternating from one side to the other. I also cut half-round pieces of acrylic. Here’s a picture that will give you a better idea.

IMG_4803.jpg


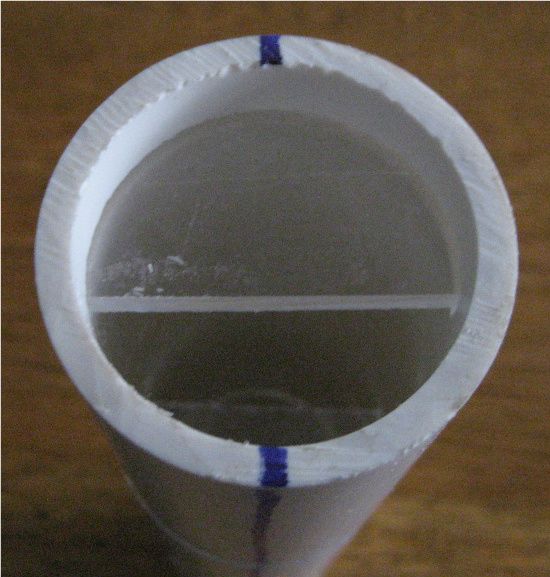
The half-circles were glued into the slots with one-drop glue and sealed with some epoxy. So when you look down the pipe, you see the alternating pieces of acrylic.

IMG_4805.jpg


The idea is that the alternating acrylic pieces will slow down the flow, allowing bubbles the time to exit upward in the pipe before being dumped into the sump.

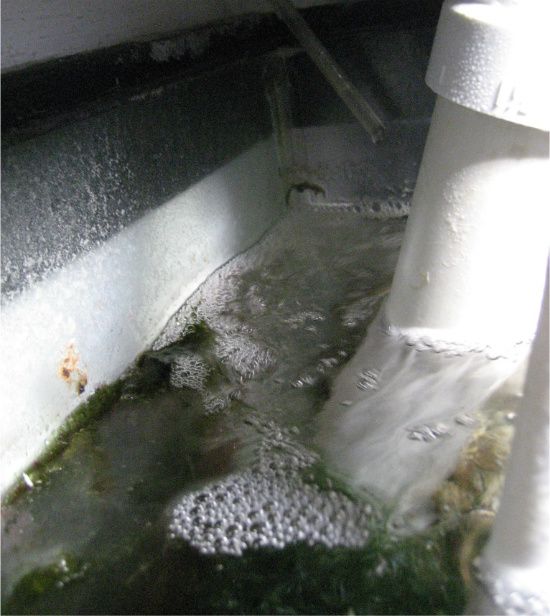
Here’s a BEFORE picture of the bubbles (straight piece of pipe)

IMG_4810.jpg


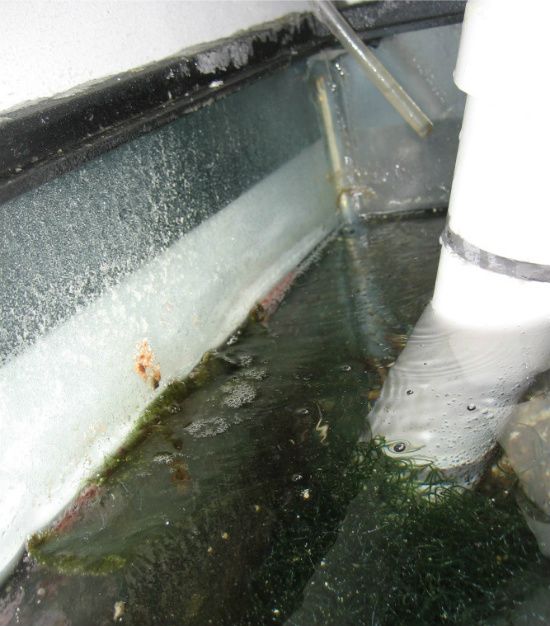
And an AFTER picture of the bubbles (with the baffled pipe)

IMG_4813.jpg


There is definitely a reduction in bubbles, but still getting a few coming through. I’ll try adding a couple more baffles to see what that does.
 

Tazmaniancowboy

Officer Emeritus
Officer Emeritus
Paul, Nice job with the wires and mounting of electronics. I have been wanting to do this and put it on slider rails or on a hinge inside my cabinet, but haven't figured it out yet. A setup like this would make it easier to do things as well as make it much easier to program and update the electronics. Oh the projects continue to build!
 

TanksNStuff

Officer Emeritus
Officer Emeritus
Nice job Paul. Not only does it work better, but it also takes up less space in your sump. :encouragement:

Any worries about having to clean that thing once in a while though? I can picture snails/bristleworms/excess food/algae/etc. building up in there. How easy is it to remove from your drain pipe to give a good spay clean from the hose?
 

redfishbluefish

Officer Emeritus
Officer Emeritus
Nice job Paul. Not only does it work better, but it also takes up less space in your sump. :encouragement:

Any worries about having to clean that thing once in a while though? I can picture snails/bristleworms/excess food/algae/etc. building up in there. How easy is it to remove from your drain pipe to give a good spay clean from the hose?

George, no worries about cleaning. The water is coming out with more force, disturbing the sandbed below. I actually can’t see bristle worms, algae, food or snails lasting long…..maybe some of the calcified worms, but the flow is pretty fast.

I’m still scratching my head on this one. I’ve added two more baffles, and then removed one, and still getting some bubbles coming out. Might be going back to the Rube Goldberg (with further modification). Still playing with this one.
 

Tazmaniancowboy

Officer Emeritus
Officer Emeritus

I’m still scratching my head on this one. I’ve added two more baffles, and then removed one, and still getting some bubbles coming out.
Paul, My original thought when I saw this contraption was that it will chop and smash the air bubbles to micro bubbles with the force of the water falling and hitting the plates...is this possibly what is happening?
 

redfishbluefish

Officer Emeritus
Officer Emeritus
Paul, My original thought when I saw this contraption was that it will chop and smash the air bubbles to micro bubbles with the force of the water falling and hitting the plates...is this possibly what is happening?

Don, it’s actually doing just the opposite. I’m no longer getting microbubbles, just large bubbles shooting out the bottom of the pipe….with quite a bit of force. The microbubbles are being stopped by the baffles.
 

redfishbluefish

Officer Emeritus
Officer Emeritus
Skimmer Tweaks

Now that it looks like this cone skimmer is going to work out, I’ve decided to do a couple tweaks.

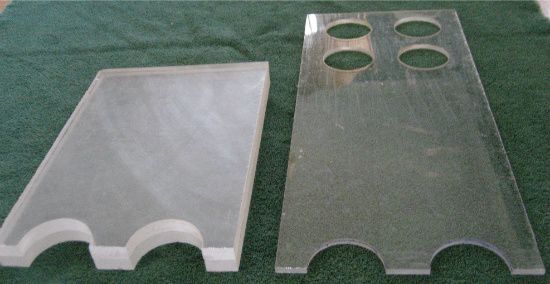
First thing was to raise it up a bit. It currently sits on a shelf that runs the full width of the sump, and has the skimmer at nine inches deep. The full length also keeps the filter sock from fully extending. The sock sits on the top of the shelf. So to raise the skimmer and open up the sock to fully extend, I made a 1 inch thick shelf that only goes about 2/3 of the way back.

Here’s the original fully length shelf (on right), and the shorter, thicker shelf on the left.

IMG_4795.jpg


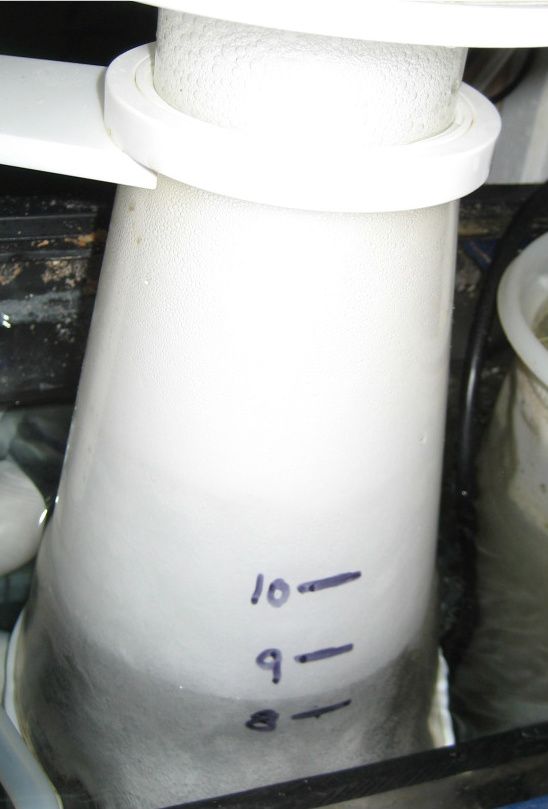
The raised shelf now puts the skimmer in 8 ¼ inches of water.

IMG_4798.jpg


The other thing I did was put a drain line on the skimmer cup. I really liked this option on the MRC, and wanted this option with this skimmer as well. The ½ inch line includes a barbed elbow just below the cup to get the tube heading in the right direction, towards the skimmer collection jug.

IMG_4817.jpg
 

redfishbluefish

Officer Emeritus
Officer Emeritus
I posted these over in the FULL TANK SHOT thread (posts 77 and 78) and just wanted to include it here for the record.

Three shots….all LED lights on, default color balance (sunlight?):

IMG_4856.jpg


Full lights, white balanced:

IMG_4849.jpg


Blue LEDs only, white balanced:

IMG_4859.jpg


And the camera was a little Canon SD630 point and shoot.
 

TanksNStuff

Officer Emeritus
Officer Emeritus
Maybe it's just my phone ... but the 2nd one looks orange and the 3rd looks green Paul.

1st one looks really good though.
 
I think he is trying to tell us how fast his tank gets full with algae. LOL...

Just messing.....

First pic looks great.
 

redfishbluefish

Officer Emeritus
Officer Emeritus
Spaghetti Explosion

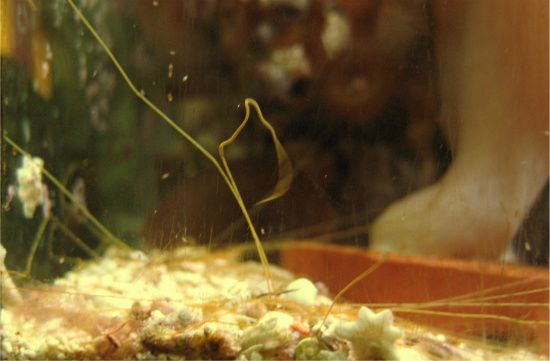
I’m pretty sure these are the “tentacles” of a spaghetti worm. They must be real happy because they are all over my sandbed…..a nice green color

IMG_4891.jpg


I’ve also had an explosion of brittle stars. The weekly sock change usually results in 5 to 10 stars in the sock.

Life is good!
 
Top