• Folks, if you've recently upgraded or renewed your annual club membership but it's still not active, please reach out to the BOD or a moderator. The PayPal system has a slight bug which it doesn't allow it to activate the account on it's own.

DIY Nano Cube Canopy

redfishbluefish

Officer Emeritus
Officer Emeritus
The First Fitting


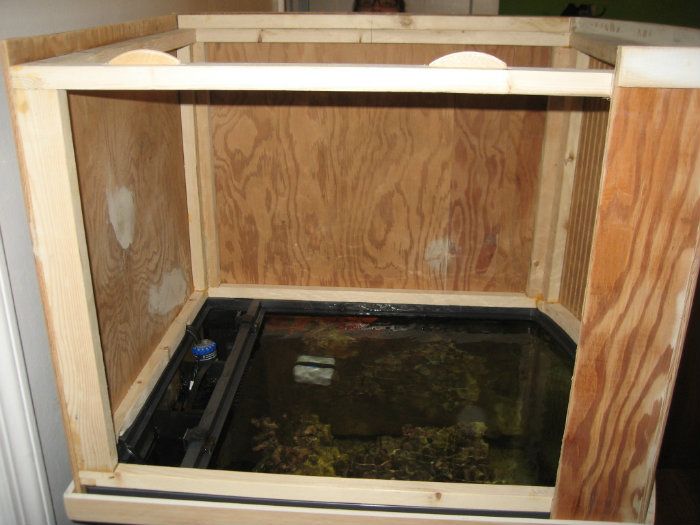
Sanded the filler and put the canopy on the tank tonight. The first fitting:
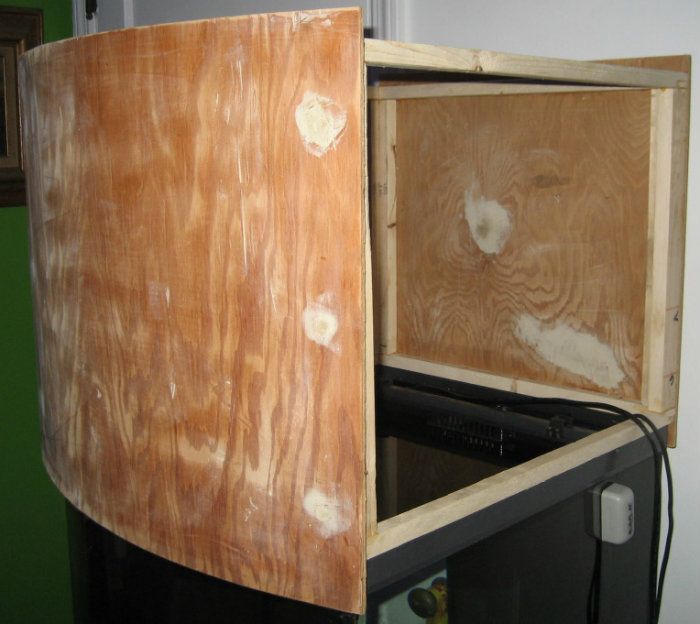

TheFirstFitting.jpg


I’m happy with the way it fits. The front brace fits like a glove:
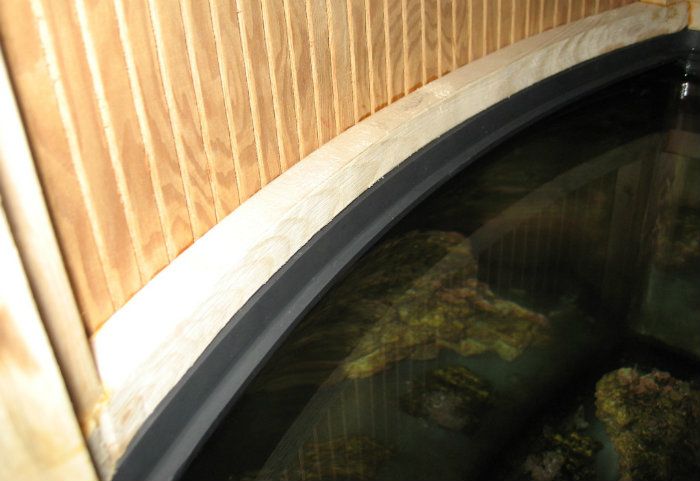

FrontBraceFit.jpg


As well as the back brace:


BackBraceFit.jpg


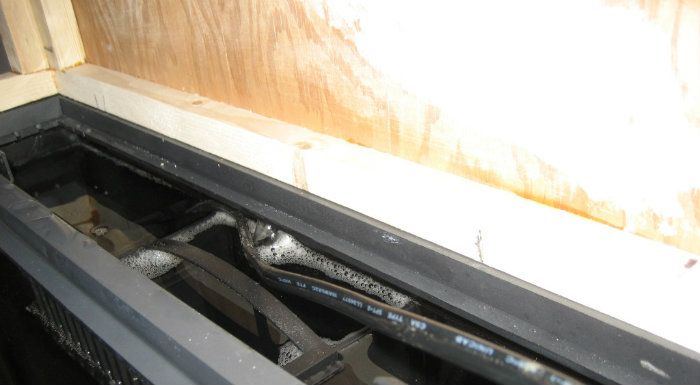
I marked for the two pump wires and the heater wire to relieve the lower back brace. Even though they have wire chases on the sides, I’m going to run the wires out the back.
 
I used White Kitchen and Bath Latex Paint on mine, Prevents mold from growing on painted surface, I've had mold growing on Oil Based... FYI
~Justin (zoanut's sidekick)
 
Really nice job. I love a nice woodworking project. You have inspired me to go in the garage and build something. Maybe a table. Lets see what kind of scraps I have laying around.
 

TanksNStuff

Officer Emeritus
Officer Emeritus
Paul... I'm speechless. (Well, not really, I have plenty to say) :p

Great job on the bend. It came out awesome and the braces fit perfectly.

I like Option D for the side doors since sliding straight up would be great if you have it close to a wall or something at some point. No swing radius to worry about. However, instead of worrying about how to make a slide groove for the doors... how about just insetting a magnet into the frame and doors so it will just stick on once in place? Other options could be some kind of picture hangers that you can get at HD or Lowes that will let you just "hang" it on the top side frames.

I like the Kilz Complete for protecting the interior of the canopy also. I used it on my last build and don't have any complaints.
 

redfishbluefish

Officer Emeritus
Officer Emeritus
First, I would like to thank everyone for the compliments.


Like a glove!! Dear god, you could calibrate instruments off those fittings!!!


Pete, sometimes serendipity just happens!


I used White Kitchen and Bath Latex Paint on mine, Prevents mold from growing on painted surface, I've had mold growing on Oil Based... FYI
~Justin (zoanut's sidekick)

Justin, thanks for your input on paint. Actually if anyone has a favorite latex, or oil base paint, they sell little packets of mold inhibitor that can be added to any paint….. either latex or oil. The stuff I buy is pretty stinky. However, I don’t have a mold problem with my stand or canopy and therefore do not use mold inhibitor paints.

I still prefer Kilz Complete. It dries in ten minutes and sticks like grim death. My only complaint are the volatile chemicals they use….they will knock you out if not used in a well-ventilated room or outside. It’s a nasty smelling stench. I usually cover the Kilz Complete with a coat of Kilz latex for the inside of canopies or stands.


Really nice job. I love a nice woodworking project. You have inspired me to go in the garage and build something. Maybe a table. Lets see what kind of scraps I have laying around.

I’ve got to work on my inspirational skills…..I was hoping for a complete dining room set…table, chairs and china cabinet. :eek:


Paul... I'm speechless. (Well, not really, I have plenty to say)

Great job on the bend. It came out awesome and the braces fit perfectly.

I like Option D ............


George, you had me laughing at “I’m speechless.” :grin:

I liked your suggestion about magnets and as I thought about where to buy them and how I could mount them, another thought popped into my head. So thanks for feeding the brain with other options. I’m going to keep you in suspense to see if your inspirational design works out. I’ll give you a hint….I might need to find my biscuit cutter.


Now as far as progress on the canopy…..I was out all today and will be out Thursday and Friday. So I don’t know how much I’ll be able to get done the next few days. I’m going to see if I can sneak into the shop tonight and get a little done.
 
What about recessed magnets. I think they would work nicely. The panels are light enough for them to hold well. No visible hinges.
 

redfishbluefish

Officer Emeritus
Officer Emeritus
Joe, I've made the executive decision to go metal free. So no hinges or magnets. You'll have to wait and see.


So I didn’t get much done today.


Too busy during the day, and the wife home at night.


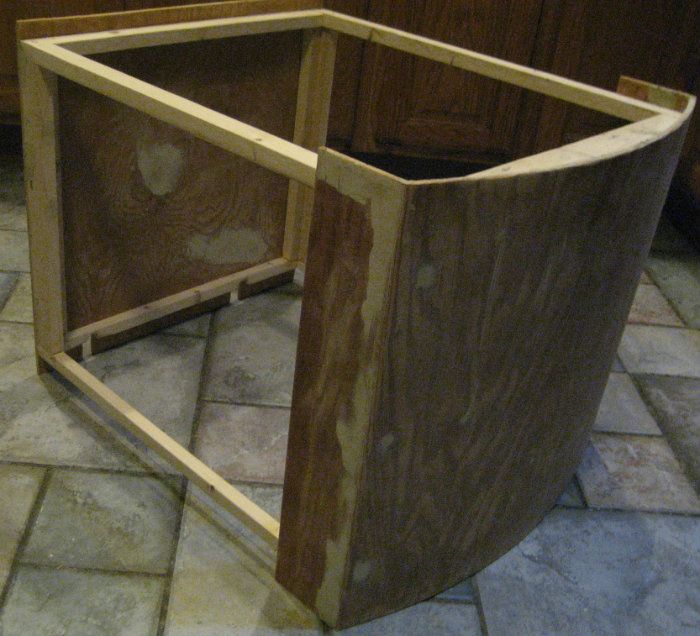
I was able to attach two fixed front side panels, slap on a bunch of wood filler, and do a fair amount of sanding. You can also see the wire cut-outs I did last night in the back lower portion of the canopy.


Canopy010913.jpg


I also cut out the doors and slapped a good bit of wood filler on them as well…..to be worked on tomorrow.....time permitting.
 

TanksNStuff

Officer Emeritus
Officer Emeritus
Biscuit cutter? Glad I could inspire you to try other options... but now that puzzle is going to be nagging me until I find out what you're up to Paul! Now I know what your wife feels like when she doesn't know about something until after it's done, haha.

Before you decide on this secret method you're concocting though, check out ABC Plastics. They have all kinds of plastic hinges and attachments that might spark another idea.

Minimal progress yesterday, but it was progress nonetheless. The wire cutout holes look good. Hard to tell due to the shadows, but did you notch out part of the bottom cross frame too?

I also have another question regarding painting. I was wondering if it would be a good idea to paint the entire frame (inside and outside) prior to adding on the plywood shell? Kind of late for that for you here Paul, but I've been considering it for my own canopy for my 120g upgrade going on now. I'm just worried that moisture might have a chance to creep in between the frame and shell to get to the exposed, unpainted outside of the frame unless you make sure all the edges are sealed really well. Anyway, just wondering if anyone had an opinion on that?
 

redfishbluefish

Officer Emeritus
Officer Emeritus
Biscuit cutter? Glad I could inspire you to try other options... but now that puzzle is going to be nagging me until I find out what you're up to Paul! Now I know what your wife feels like when she doesn't know about something until after it's done, haha.

Before you decide on this secret method you're concocting though, check out ABC Plastics. They have all kinds of plastic hinges and attachments that might spark another idea.


I’ve got you hooked Greoge….you’ll have to wait. I will tell you that I’m only gluing one side of the biscuit….no glue on the other side. Maybe I should play one of Sunny’s games, and have people guess which one I’m going to do. ;)

And there won’t be any hinges, metal or plastic, or any magnets.


The wire cutout holes look good. Hard to tell due to the shadows, but did you notch out part of the bottom cross frame too?

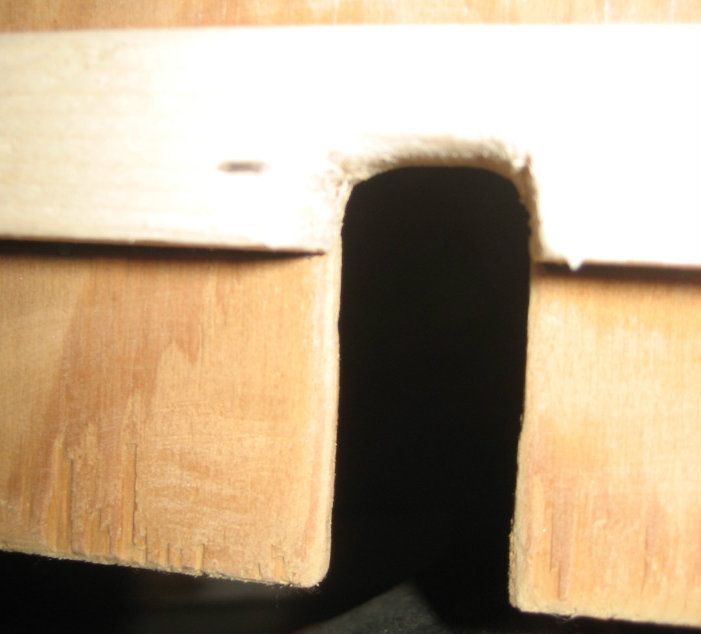
Yep, a big enough notch to fit the round wire to the heater….that’s the fattest.

WireCutout.jpg


I also have another question regarding painting. I was wondering if it would be a good idea to paint the entire frame (inside and outside) prior to adding on the plywood shell?


I didn’t want to paint the frame because I was gluing most of the skin, without nails or screws. So I wanted a good wood to wood bond. What I do plan on doing is to caulk (silicone) the front and back lower braces where the plywood meets the brace. This is especially a concern with the front brace/plywood joint because of all those kerf holes. Don’t want water sitting down between the plywood and brace.
 

redfishbluefish

Officer Emeritus
Officer Emeritus
I’ve made a decision on the two doors…..no hinges, magnets or anything metal. They will slide in and out, but not like Plan D above (post 18.) They will look more like Plan C, but no hinges, and no noticeable sliding components.


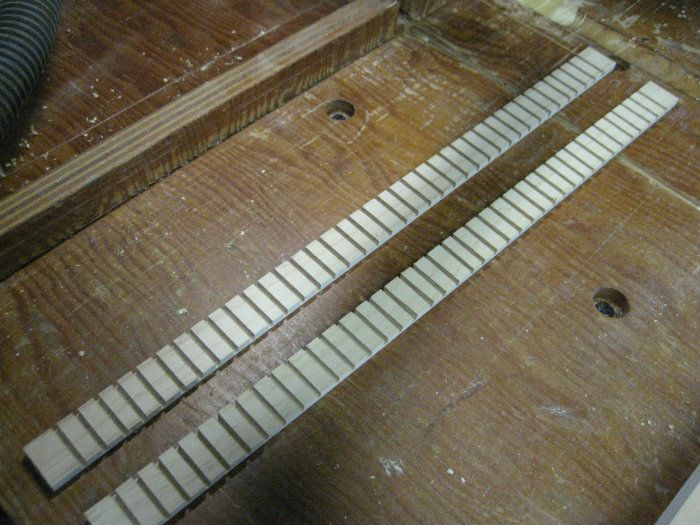
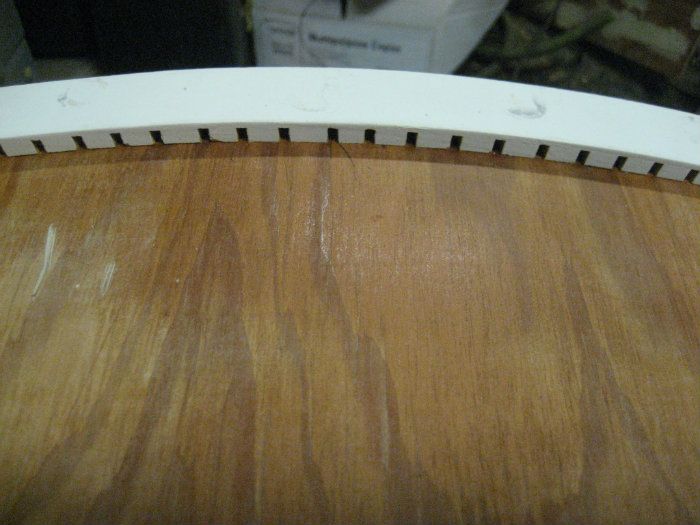
So the next step was molding. I wanted something simple, so I went with regular lattice strips (ca 1 1/16” x 1/4”.) I actually cut my own from extra molding stock I had. The molding will be applied on the whole upper and lower edges of the canopy. I began with the two pieces on the front curved section.


Just like with the plywood on the front, I cut kerfs in the molding every half inch, about 2/3’s the way through.


FrontMoldingCut.jpg


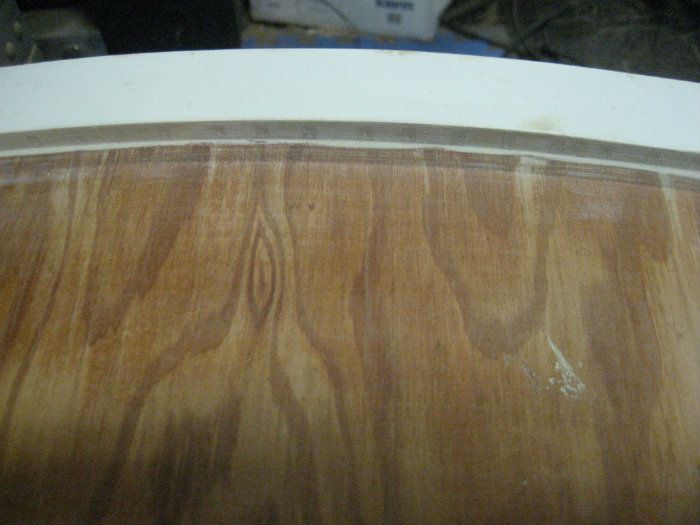
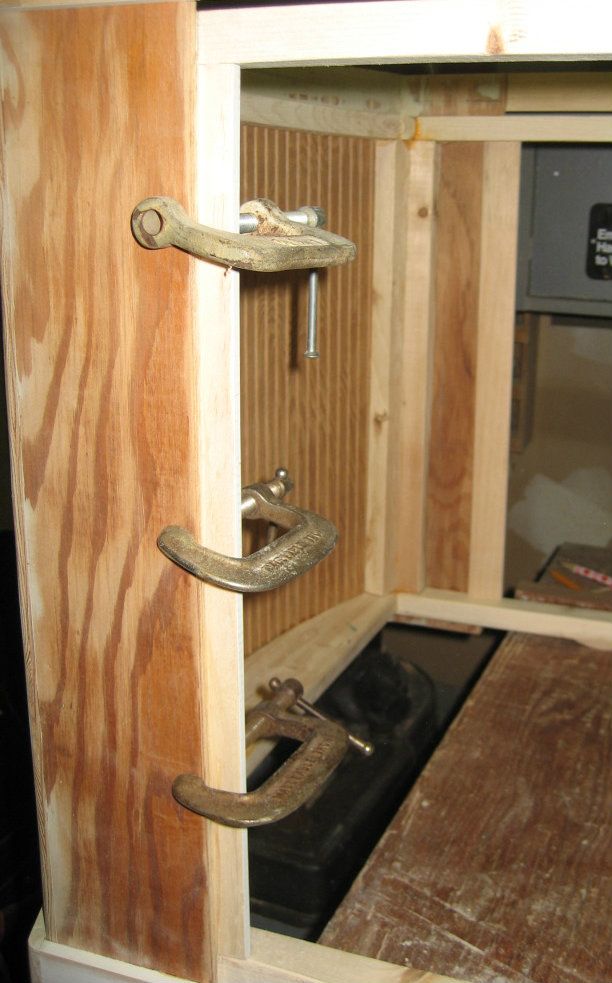
This were glued on the top and bottom edges of the front piece…..with loads of clamps….here is the last one glued, with just two clamps left to remove.


FrontMoldingGlued.jpg


The kerfs were then filled with wood filler. Wood filler is your friend with this project.


FrontMoldingPutty.jpg


Need to wait until the glue and filler dries……..tomorrow.
 

redfishbluefish

Officer Emeritus
Officer Emeritus
The Doors


This is the end
Beautiful friend
This is the end
My only friend, the end.


Oh, I’m sorry, I just had a déjà vu moment to Jim Morrison and The Doors!


But this project is close to the end. So here is the design I used for the doors.


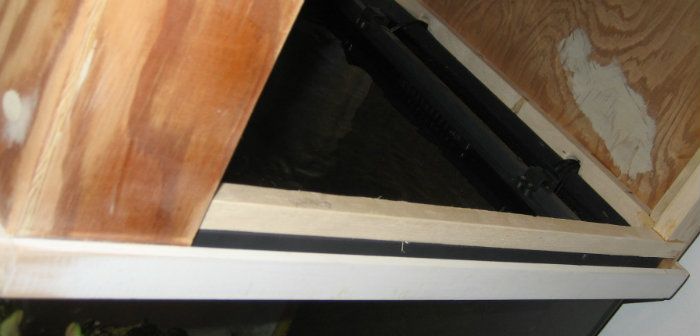
As I mentioned in the above post, I installed the lattice molding. For the lower side, I continued that molding all the way to the back with no plywood side below.


LowerSideTrimMolding.jpg


This open molding portion will fit the lower part of the side door just by sliding behind the molding.


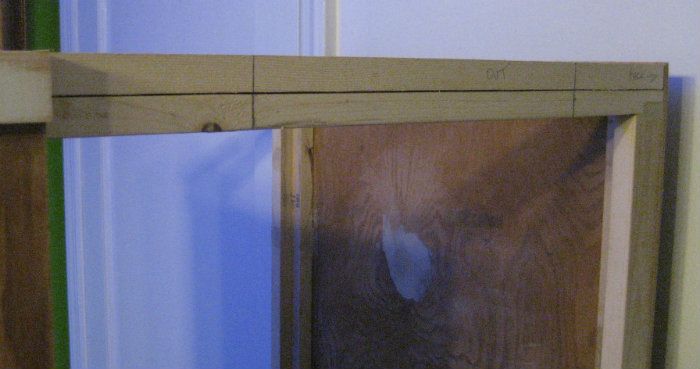
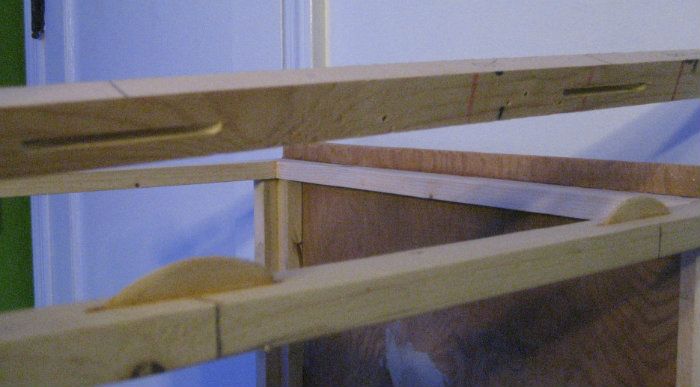
For the top portion of the side door, I began by cutting a second board the same width as the top brace, but a few inches shorter. I placed this on the top side brace and marked were I was going to cut biscuit slots, top and bottom (four inches from either end).


TopSideDoorCleat.jpg


Biscuit slots were cut top and bottom and biscuits glued into the lower brace only.


BiscuitsCut.jpg


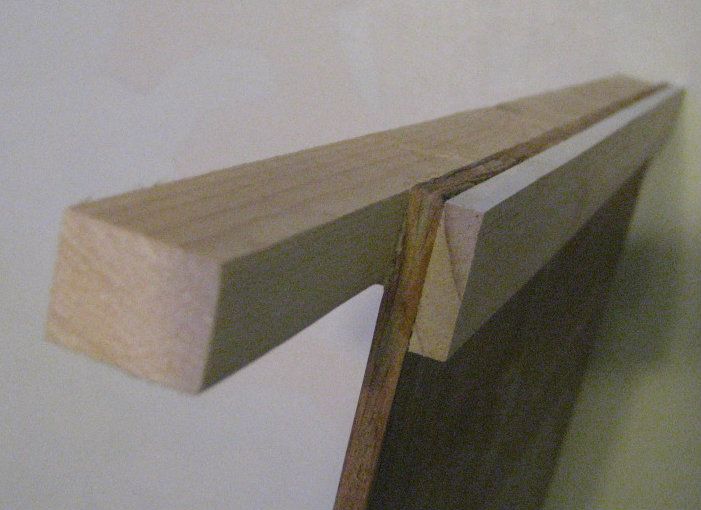
So now this top brace (cleat) with the biscuit cuts will be put on top of the glued biscuits and the plywood side put in place (with glue on the side of the brace). Clamps are installed to hold the plywood side and this top cleat. After the glue dries, the clamps are removed and the top of the side door looks like this….cleat, plywood and top molding.


ToporDoor.jpg


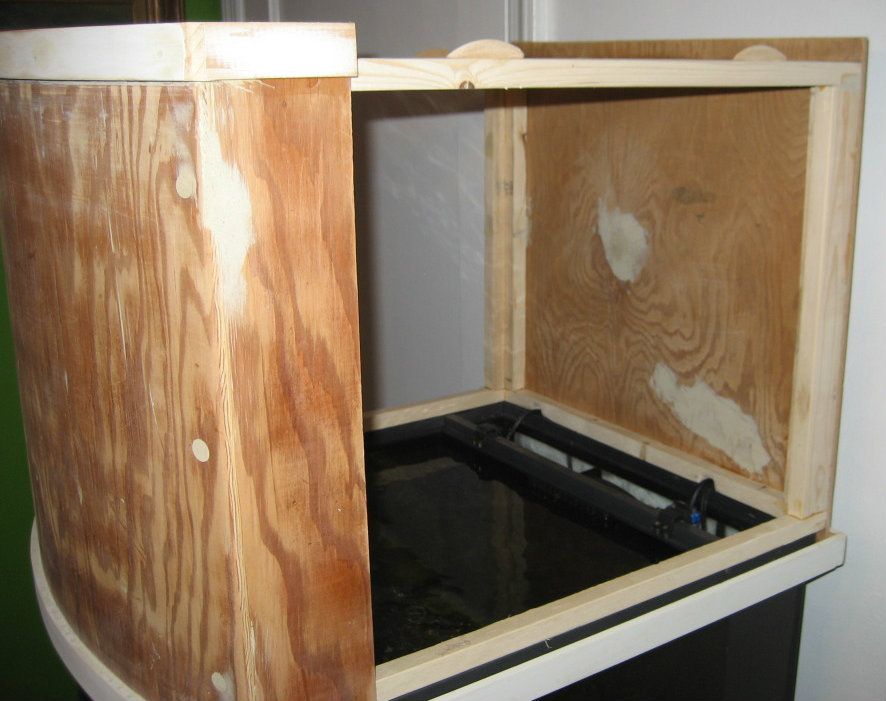
So the open side of the canopy, with molding installed, and biscuits installed, looks like this.


CanopyOpenSide.jpg


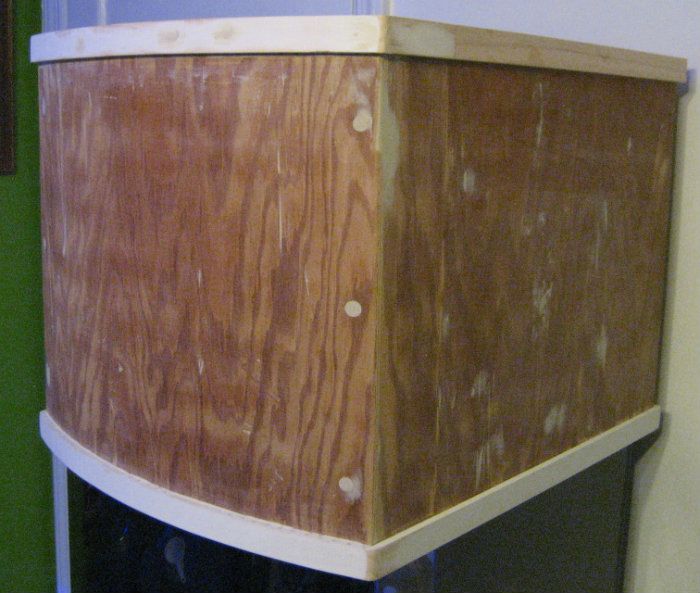
So with the side panel installed….HERE IT COMES…..here is how the new canopy looks (without paint).


THECANOPYUnfinished.jpg


I must admit, I really like my choice of the size of the opening….it will make access very easy.


Canopyopenleftside.jpg


Now, while I finish up doing the final fittings and painting, I need to fit an LED fixture to put into this thing.
 

redfishbluefish

Officer Emeritus
Officer Emeritus
Gotta give it to you Paul. You have some great building skills. Love the door idea. The canopy looks awesome.


Thanks Jose, but I have a confession:


Bless me Father, for I have sinned………


I buy wood filler by the quart. In fact my only expense thus far has been about $13 for a new quart of wood filler. Yes, I buy it by the quart! In addition, you will notice that I purposely did not take any pictures of my boo-boos. :eek:


Well done, well thought out, well explained and well...AWSOME!


Thanks again Pete, but I wouldn’t go too far with the “well thought out” part. This sort of evolved as I built it. I had a general idea what I wanted, but the detail didn’t come until I mulled over that particular part as it was being built. An example were the doors….and changes still came to them as I built them.


Today’s Progress

Today I spent some time fitting the doors. I want them to slip very easily in and out now, because I figure the paint will add some thickness to them, albeit very thin. Most of the “fitting” was rasping down the side of the top brace.

I also did a fair amount of touching up with wood filler and sanding. Hopefully I’ll be able to prime tonight.

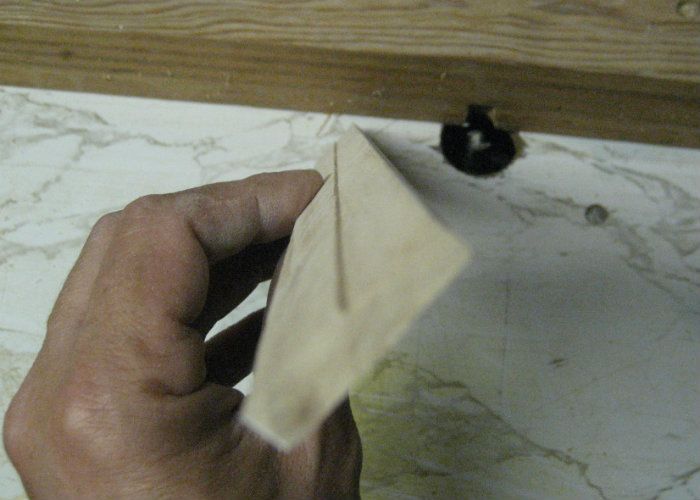
The last thing I installed on the canopy were lattice strips where the fixed plywood side meets the plywood on the door. The concern was that a sliver of light would shine through this slit if I didn’t cover it. Before putting on these pieces, I cut a smidge off of half the length using the router table.


LightCleat.jpg


This would assure that any paint thickness on these pieces won’t interfere with the door sliding in and out.


These were glued and clamped into place.


LightCleatInstalled.jpg
 

redfishbluefish

Officer Emeritus
Officer Emeritus
PAINTING


The whole canopy was primed with Kilz Complete. I usually then paint the inside and out with a quality exterior latex. But this time I decided to use spray paint……. for two reasons. The canopy is relatively small (not much paint), and those kerfs on the inside of the front panel were a pain to prime with a brush. Gloss white on the inside, flat black on the outside…..both are the $0.99/can at HD.


So the inside was painted first….no taping or paper covering. This was allowed to dry overnight. The gloss white looked good.


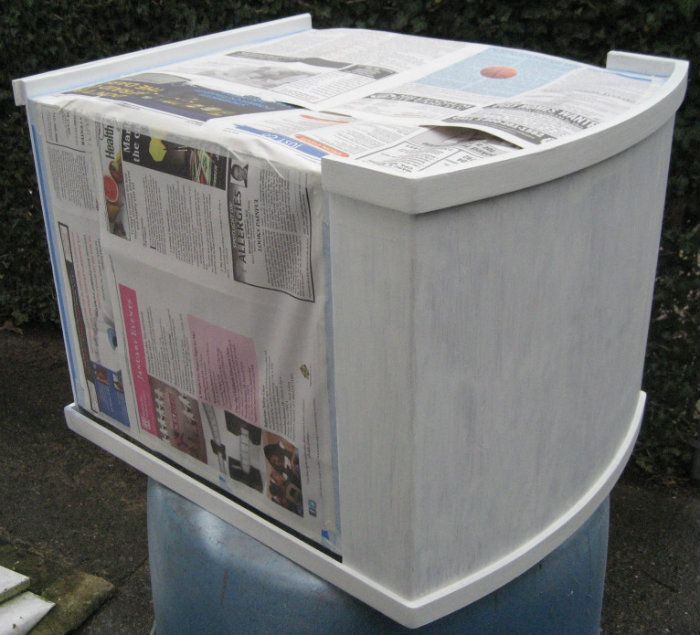
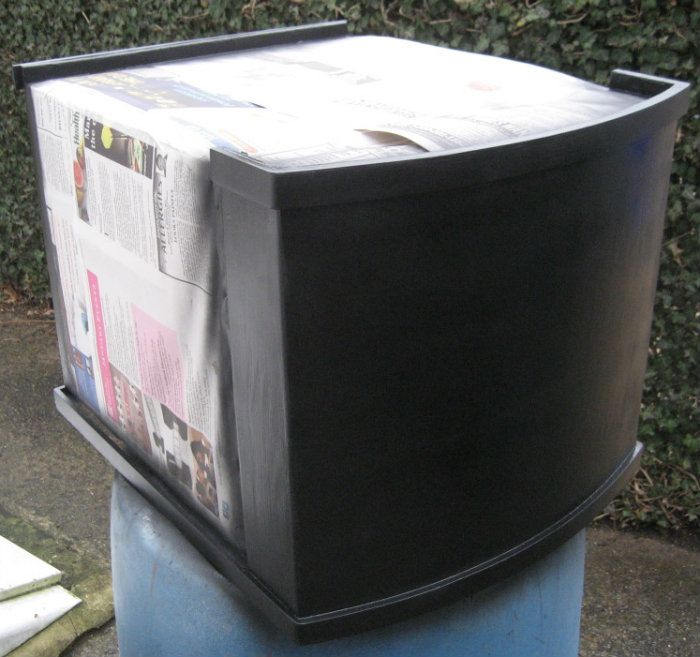
Because some of the pieces were a mix of white and black, I will need to tape and paper this thing. I was expecting to pay less than a buck for a painter’s tape, and was shocked to find blue painter’s tape at $3.20/roll….and that was for the thinnest, 0.7 inches. Next to this 3M product was the same size and length, but regular colored, light tan tape, called Tartan. This cost $0.70/roll. I purchased a roll of each so I could test out this Tartan. Once home I found it had a similar feeling to the 3M….a paper tape with low tack. But the test would be if it releases from the surface, without damaging the surface, while at the same time leaving no residue. So I used a little of both when I taped up the canopy.


CanopyPrimedandTaped.jpg


So the plan is to give this thing three or four coats of top coat, let it dry well, and then sand with a 400 grit paper. That will be followed with one more finish coat. Here it is after two coats:


CanopyFirstCoat.jpg
 

TanksNStuff

Officer Emeritus
Officer Emeritus
No idea how I missed that! :confused: I swear I didn't see it when I made my last post. Anyway...

Wow, great idea Paul. That should work perfectly and fit nice and snug. Is there any "play" at the bottom edge of the side panels? Just wondering if you should have did the same thing on the bottom to make it a bit more rigid? You could make the biscuits smaller on the bottom... maybe 1" high x 1" wide or so, just enough to catch and make a bottom connection.

Also, you seem to put a lot of trust/faith into the wood glue. I realize this is a small unit and probably light weight, but I personally would have used a few SS finishing screws to make sure it stays together.

Can't wait to see it when it's all finished and painted!
 

redfishbluefish

Officer Emeritus
Officer Emeritus
Is there any "play" at the bottom edge of the side panels?

No! Snug as a bug in a rug.


….you seem to put a lot of trust/faith into the wood glue.

Quality glue results in joints that are stronger than the wood itself.


Fini


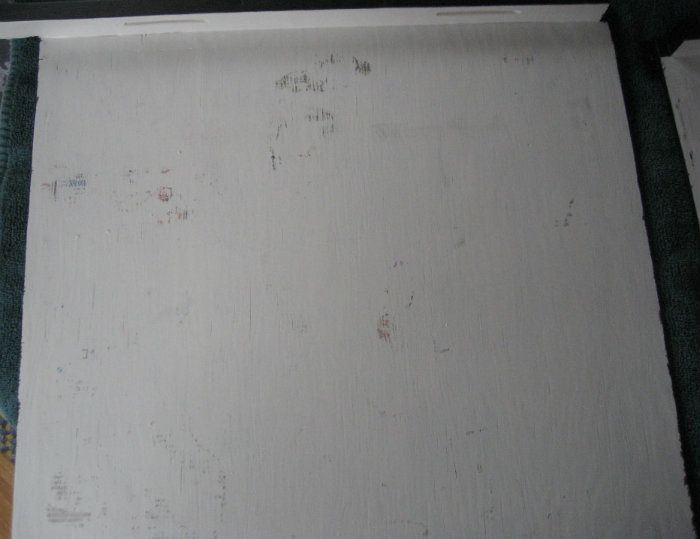
Well I’m a little PO’ed. When I pulled off the tape and newspaper, some of the ink from the newspaper transferred to the paint. This was especially true on the flat door panels.


Doorwithpapermarks.jpg


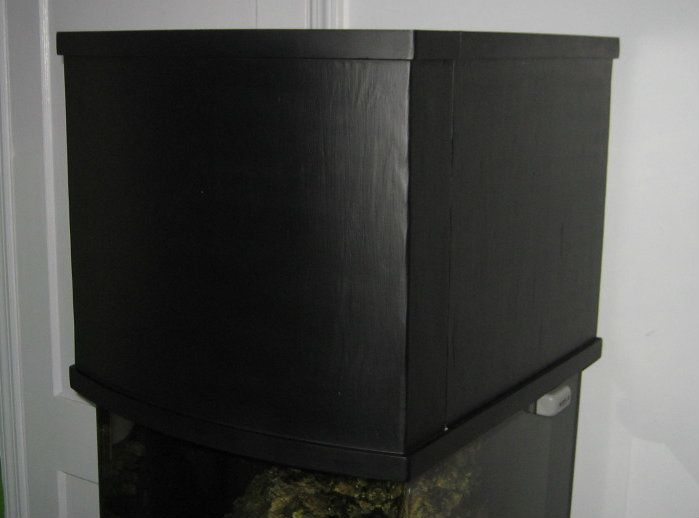
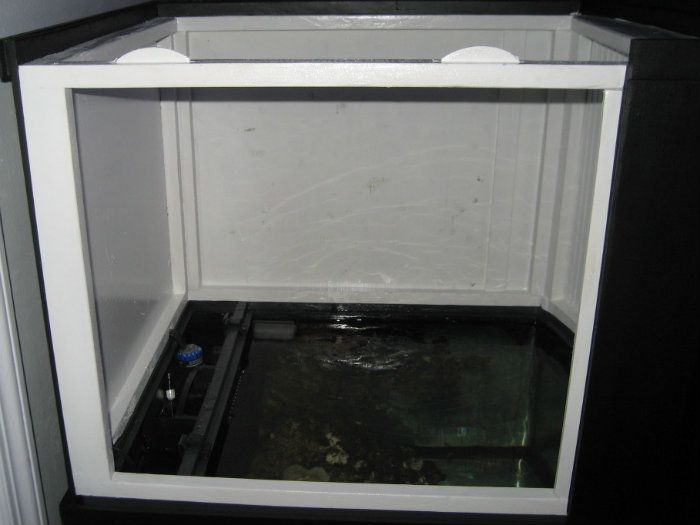
I’m still playing with the final fitting…..some of the paint it too thick and I’m rasping it off, along with additional wood. I’ll just do paint touch-up when it’s all fitting nicely. But here it is:


Canopyfinished.jpg


CanopyFinishedandOpen.jpg


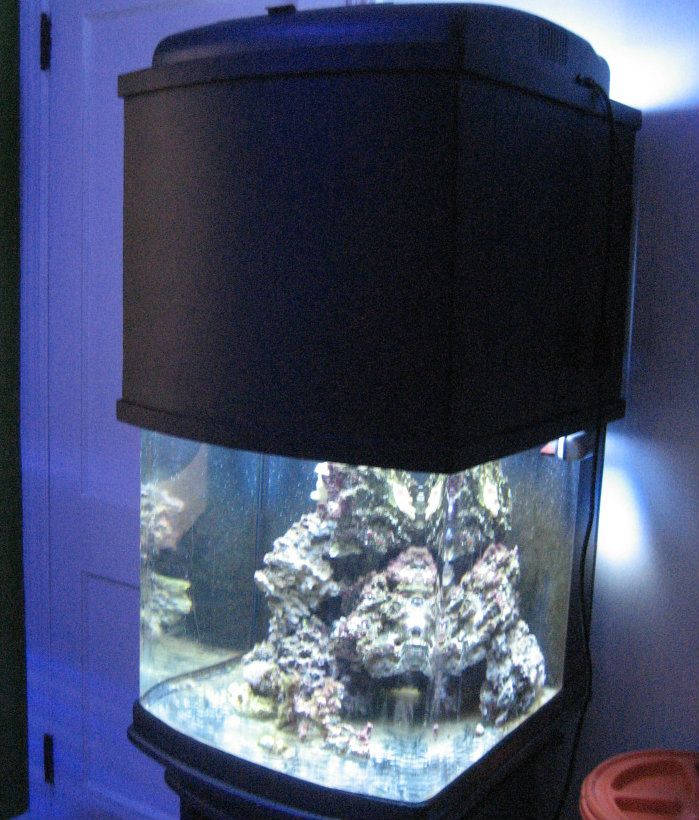
And I took the current JBJ hood and put it on top to get an idea of how it will look.


NewCanopywithJBJLight.jpg
 
Top