• Folks, if you've recently upgraded or renewed your annual club membership but it's still not active, please reach out to the BOD or a moderator. The PayPal system has a slight bug which it doesn't allow it to activate the account on it's own.

DIY Nano Cube Canopy

redfishbluefish

Officer Emeritus
Officer Emeritus
Thanks everyone for the compliments. Now if only I could get the tank looking good.


Where do you find those cord mgmt things (don't know a better way to describe them)? They are the little plastic things screwed down holding the cords? Thanks

Matt, Mike (greybolt) had the answer.....hardware stores, even HD or Lowe's carry these. They are called plastic cable clamps.
 
Thanks, I always have a tough time finding things at Lowes/HD. Never know if something is in hardware, or electrical, or some other random stand in an aisle that doesn't belong.
 

redfishbluefish

Officer Emeritus
Officer Emeritus
Darn you Zippy! If you hadn’t mentioned this, it wouldn’t have happened…….(this is a proverb from the Book of Ostriches).


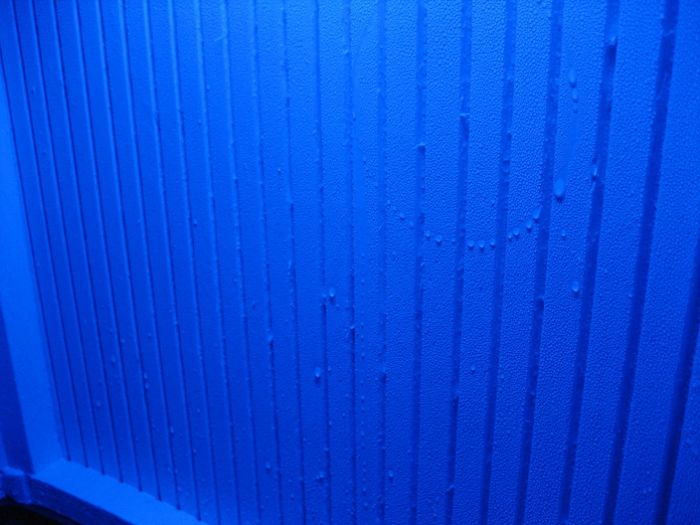
I checked the canopy/light fixture for moisture this morning and this is what I found on the front wood piece:


62baa158-bf74-40dc-81be-64c76232ab98_zps1db789c6.jpg


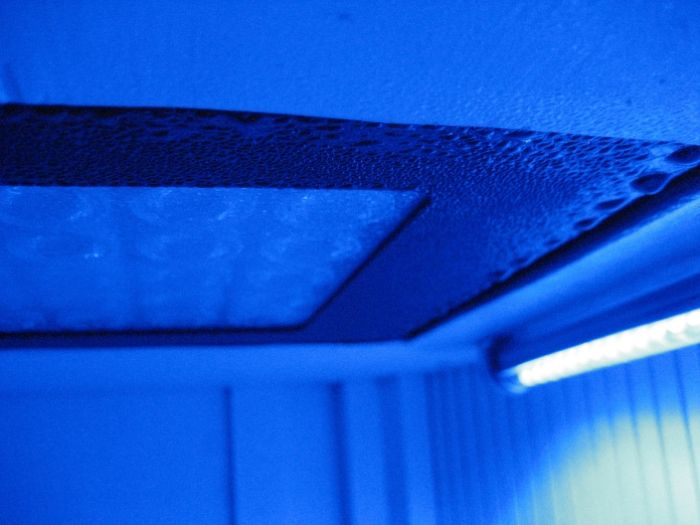
And the light was dripping condensation:


9c9c1420-8eee-4dc8-8285-85d9b8c658d0_zpsddff972f.jpg


So now I’m going to do what Zippy pleaded for me to do, and put a piece of ¼” plexiglass over the hole. I bow to your wisdom and knowledge Zippy, and curse you at the same time. :grin:


Thanks Pete.
 
Any time Paul:) My great moments of wisdom usually occur with the help of a little bourbon and the white throne. Not at the same time though:applause:grin:
 

redfishbluefish

Officer Emeritus
Officer Emeritus
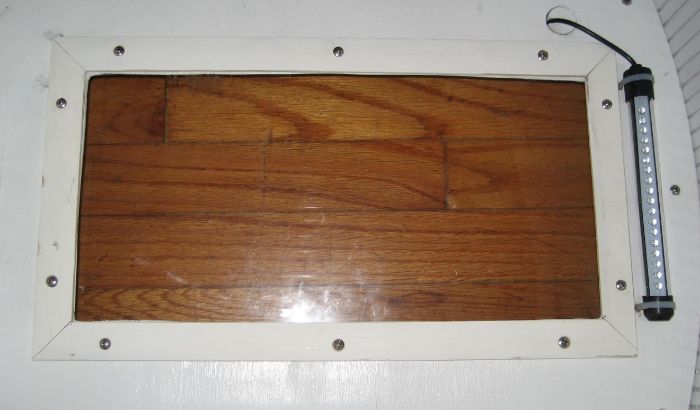
And here is the plexiglass cover held in place by a frame. I originally said ¼ inch, but it’s actually 1/8” plexiglass.


9e7fdfe5-07d7-4349-880a-9d96d1128d6e_zps3cf6be7c.jpg


I remain having a slight bit of concern over the amount of condensation on the inside of the canopy. Just have to keep an eye on it. At least the light will remain dry now. :grin:
 

TanksNStuff

Officer Emeritus
Officer Emeritus
Wow Paul, that is quite a bit of condensation in there. The plexi that Pete suggested is certainly a good one (sorry I doubted you Pete).

I think you might also do yourself a favor if you added a small fan near the top Paul. maybe you could put it on the back wall so it doesn't disturb your side panel "doors"?
 

redfishbluefish

Officer Emeritus
Officer Emeritus
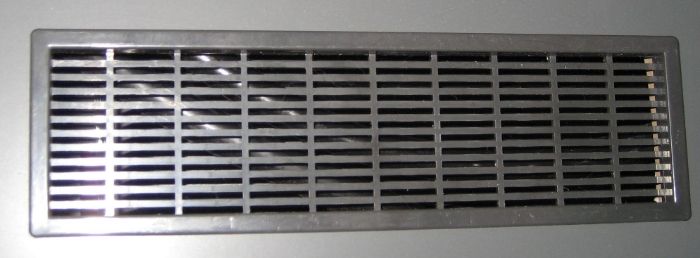
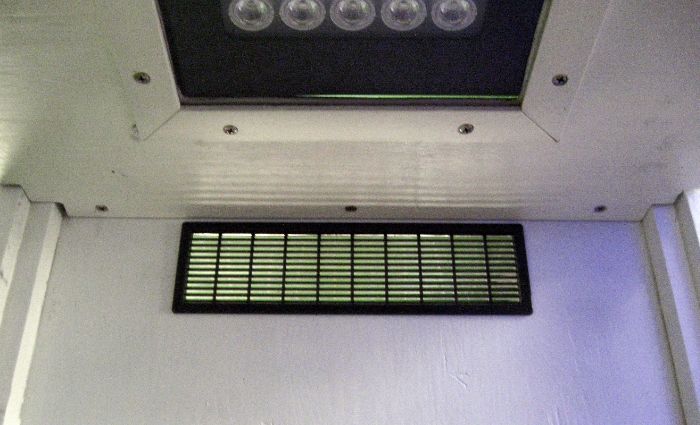
This really is turning into a never-ending project. The condensation is so bad (and by the way, the standard JBJ hood condensed like crazy as well), that water is dripping off the bottom of the doors. Now I closed this up to minimize evaporation, but now I’m going to have to open it up some, and find a balance between condensation and evaporation. I’m first going to try a passive approach and see want that does. Since I’m eventually going to be building a new stand (and getting rid of the original JBJ stand), I might try using the grates in that stand:


c5e4585d-b273-4ba2-bc3b-dd32760eb372_zps388ed1f1.jpg


Auto Top Off: How do the rest of you nano-folks hook up an ATO? I have a JBJ ATO somewhere buried in the basement, and plan on hooking it up once the PA group buy stuff comes in. I’d like to hear or see what others have done with an ATO on one of these little guys. Things such as, where did you put the float switch(es)?
 

mnat

Officer Emeritus
Staff member
Moderator
Never needed one for the JBJ because of the fact is was closed off.
 

redfishbluefish

Officer Emeritus
Officer Emeritus
This never-ending project continues…….handling excess condensation.

Since I’m going to build a new stand, I used one of the grates in the current JBJ stand to vent the canopy. I cut into the upper back panel and applied a small amount of silicone. I’m going to try this passive approach first to see if this cuts down the condensation.


c3db32df-4ae0-488d-8b1b-528719c60467_zpsac5ab923.jpg
 

TanksNStuff

Officer Emeritus
Officer Emeritus
Seems like your're going to have to choose between lower evaporation or lower condensation. I know the original goal was to lower evap... but in order to preserve the lifespan of the canopy I'd suggest lowering condensation.

Hope the vent works!
 

redfishbluefish

Officer Emeritus
Officer Emeritus
Ventilating the Canopy (The saga continues)


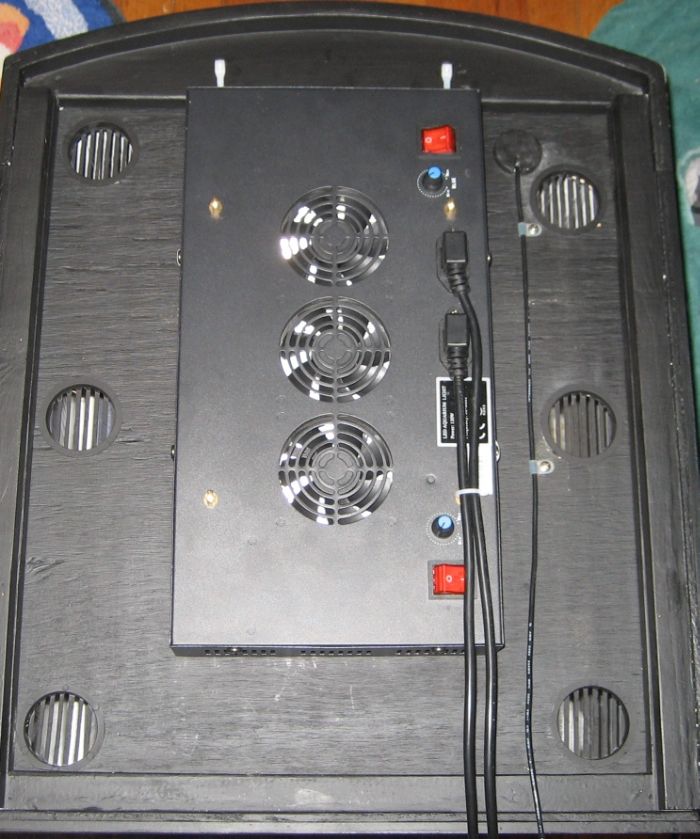
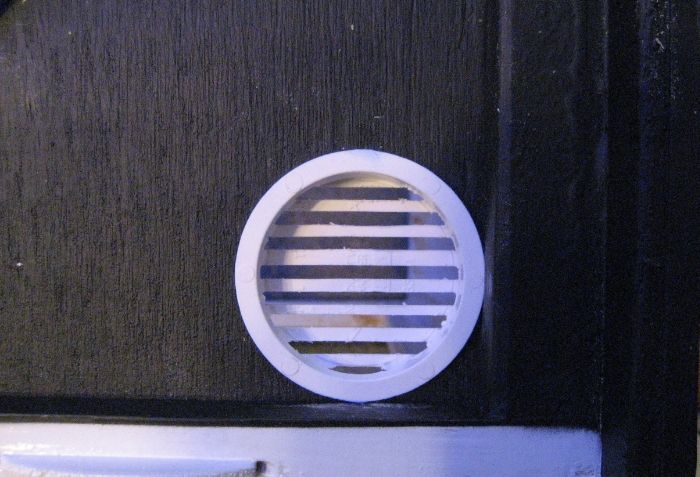
The one rear vent wasn’t enough. So six more vents were added to the top of the canopy. At first four, but that wasn’t enough, so two more were added:


53f53883-77cd-44e0-82c4-bf2073ec0b6c_zps39b34d61.jpg


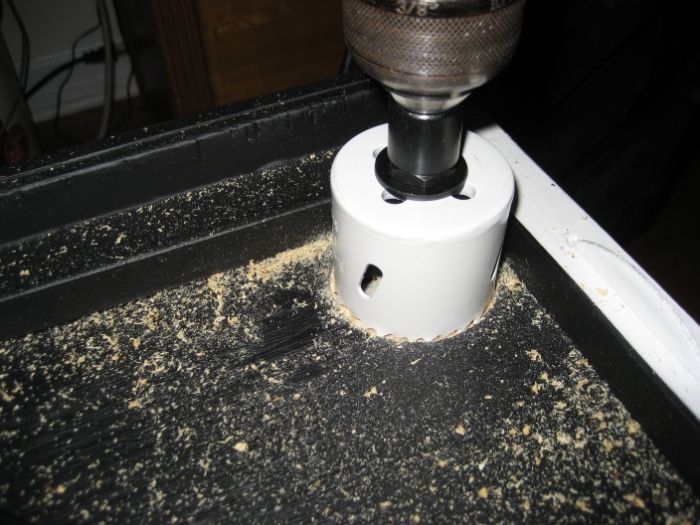
The way this was done was to first drill holes in the canopy top using a two inch hole saw. The hole was slightly enlarged using a rasp.


9c1474c6-9a0e-4562-879e-cee63c83651d_zps8e5134eb.jpg


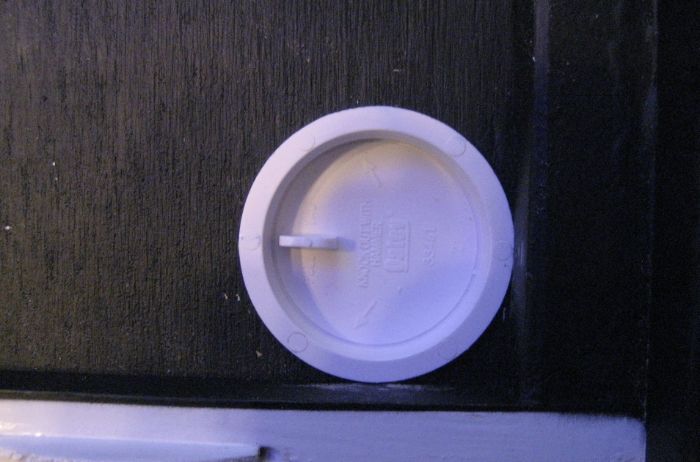
The idea was to then fill these holes with plastic knock-out test caps ($0.25/each at HD)…..


fcd67f48-5de1-405f-a0fb-12056ea98dbf_zps93990b86.jpg


……that were cut with groves to allow ventilation.


3e1f2ce5-1d49-4ae6-8bbb-81c370423554_zps8475435f.jpg


This was easier said than done. Here is how I did this and the difficulties I had.


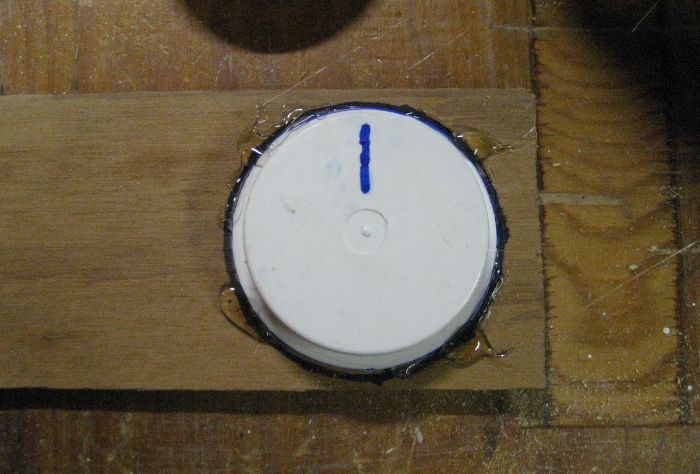
First the cap was marked where the tab was on the top of the cap. I wanted to make sure this tab was in line with the saw blade so that it would be cut off. The cap was then hot glued to a piece of scrap plywood.


3b3f12e1-c115-45b1-825c-4a9ef95f2ea4_zpse5726192.jpg


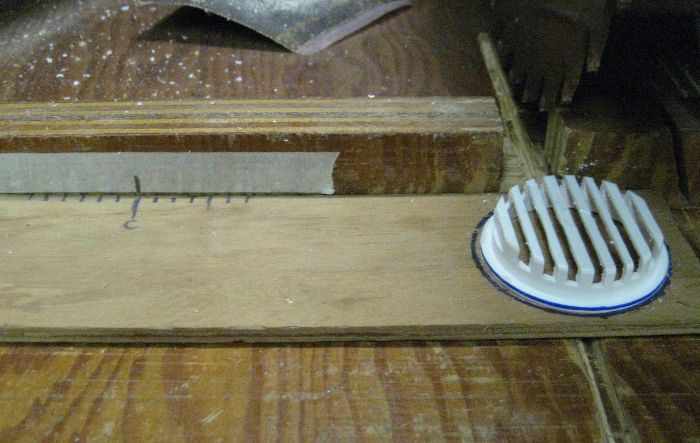
On the left side of the scrap plywood, ¼ inch marks were made. The saw blade has a kerf of approximately 1/8 inch, so spacing ever ¼ inch should leave approximately 1/8 inch of plastic. A piece of tape was applied to the back rest of the saw table and a reference line was applied. So now the plywood can be moved in ¼ inch increments to this reference line to make the cuts in the cap.


c5ae46dd-e81a-4250-a27f-926afa9a7b00_zps635b2122.jpg


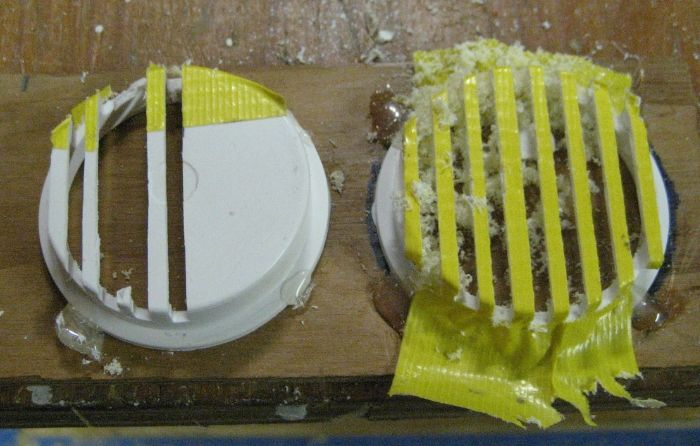
Now for the problems: No matter how slow, or how deep, or shallow the cuts, the cap would get torn apart by the saw blade. I first tried duct tape on the front edge of the cap, and finally covering the whole cap with duct tape. This helped in only keeping the cap from total self-destruction. I was still breaking one or more connections of the plastic to the edge of the cap, but the tape was now holding them from getting totally torn off. Of the nine caps I ended up cutting, three were total losses, and only one was cut that was perfect. The rest had one of more breaks that were fixed with a drop of frag glue. Here are two caps, one where I was first experimenting taping just the front edge and the other were I taped the entire top of the cap.


b89a020b-0028-48f5-9eb4-aeac47c3ee46_zps44b96526.jpg


The caps were then taped and painted with flat black paint. If this doesn’t resolve the excess moisture problem, the next step is to remove the top altogether.
 

redfishbluefish

Officer Emeritus
Officer Emeritus
Chris, you're always welcome.


Looks like all the vents I've put into this thing has cured the condensation problem. Now need to note how much evaporation I get. I will be setting up an ATO, so it shouldn't be a big problem.
 

redfishbluefish

Officer Emeritus
Officer Emeritus
Well, I’m ticked!


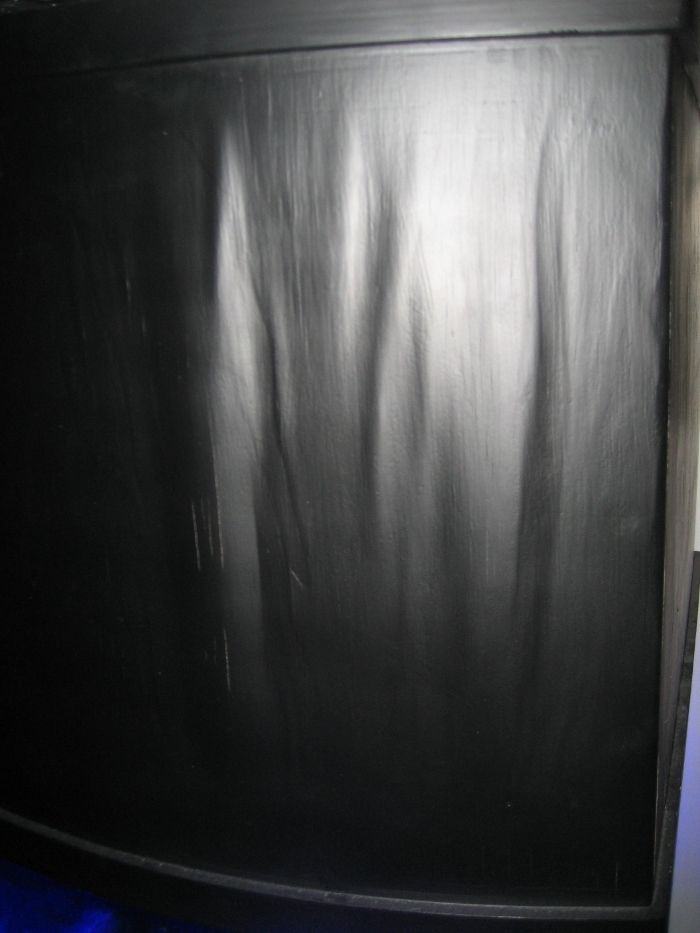
This started showing up about a month ago…..the front arced piece of plywood on my DIY nano canopy was “blistering.” To put it another way, the plywood was failing by the exterior piece of ply bulging outward. Here’s a pic:

e2a6755b-66ef-43a9-8286-82053804b4eb_zps534f1ab4.jpg


Now when I built this I used “re-claimed” exterior plywood. This was clearly labeled as exterior plywood, but it was 50+ years old. Although old, I wasn’t expecting this to fail. I’m PO’ed!!!


This is going to be a major headache to rip apart and fix. It’s not like I’m sitting at home twiddling my thumbs! (although that's what my wife thinks i do during the day.) :mad:
 

redfishbluefish

Officer Emeritus
Officer Emeritus
I actually use to work in a race shop (as the engine guy), but the way these guys drove, I ended up doing more body work than engine work. I'm actually thinking about taking a belt sander to the mess and then covering it up with Bondo. I was the king of Bondo in our shop.
 
That sucks! Capitalized, underlined, put in quotes with a neon flashing arrow pointing toward the word "sucks".
 
Top