• Folks, if you've recently upgraded or renewed your annual club membership but it's still not active, please reach out to the BOD or a moderator. The PayPal system has a slight bug which it doesn't allow it to activate the account on it's own.

TanksNStuff's 75G to 120G Upgrade

TanksNStuff

Officer Emeritus
Officer Emeritus
Thanks, and yes I did save it Jim. I even offered it to Dave (Fatoldsun) since he was working on a 40b sump too. He didn't take me up on it though.

The design has one flaw... it's made for a set distance between baffles and if you have different needs then its worthless. I do have a solution for that though if I ever decide to patent it. ;)
 
Sump looks good, I will have to make one (40B) eventually.....I have no room to put a skimmer on the 20L I've made.

Sent from my LG-MS840 using Tapatalk 2
 

TanksNStuff

Officer Emeritus
Officer Emeritus
OK, here's another update on some of the furniture build. I'll begin by showing some progression on the stand. This will sort of pick up from the last photos I gave from when I first built the frame of it.

I added a piece of plywood to the bottom, then added one on top too. For the one on the top, I cut out a hole where the overflow & return piping will go thru. I bought cheap plywood because I knew I'd be painting over these anyway.

Inside Stand Bottom.jpg Top Stand.jpg IMG_0868.jpg


At this point, I was still undecided on how I wanted to skin/finish everything, so I thought I'd work on the framing for the side cabinet and the canopy. I built these out of 1x2s as these won't need to be as sturdy as the stand and this was cheaper as well as lighter for the wood. I could have sworn I took some pics of each of these pieces individually while I was making them, but I can't seem to find them. I do have a pic of them complete and as they will be setup when they are in the house. I even have some dimensions on it that I photoshopped in there.


Full Front - Dimensions.jpg

So, to give an idea of my plan at this point in time, I'll explain where I'm heading. As a quick reminder, this whole setup will be backed up to a half-wall... so the tank will be visible from the front, right, and back sides. My furniture design will make it end up so that the very top of the black frame of the tank will be at the same level as the half-wall. But the oak trim will cover the black frame to make it appear as if the tank glass is set inside the woodwork. That's the plan anyway. Hopefully it will work out that way. :nervous

All of the furniture will be trimmed out with oak boards to hide the underlying pine frames. The "joint" between the tall cabinet on the left and the canopy/tank/stand sections on the right will be done with wider oak trim in 2 pieces that will cover the framing wood of all the pieces. One will be from the top of the canopy down to the black frame of the tank (covering the cabinet frame and the canopy frame, as well as a small portion of the tank). The other piece will be from the bottom of the stand up to 3/4" below the black frame on the tank (to cover the cabinet frame and the stand frame). The back side will just have one identical to the top section but none for the bottom since it will be hidden by the half-wall.

Then, I'll have a 3/4" oak board as a shelf, all the way across the front of the tank and the right side. I plan to add a piece of crown molding on a 45 degree angle so that it looks sort of like the pic in my first post of this thread. The left side will be covered by the cabinet so no shelf there, and the back won't have a shelf either, but will have a trim piece to cover up the pine stand and make it look nice.

The rest of the stand (front and right sides) will basically be boxed out in the oak boards. There will be no doors, but I plan to make removable panels that will have a nice "picture frame" trim around the edges to appear as if there are doors. Then I'll attach 1x2s to the back of these, and they will fit into the boxed oak trim. I'll also add some kind of magnet holders to the 4 corners to hold it in place.

The tall side cabinet on the left will also be boxed out in oak boards, but will have actual doors that are hinged on the left side. I'm still undecided on whether I want 1 solid door or split it into 2. On the bottom shelf of the stand, I'll have my ATO container on the left side, ALK/CAL containers and my new dosing pumps on the right side, and my Carbon/GFO dual reactor along the back wall. I will have a cut-out in the stand wall to allow for the passage of all the tubing for this stuff. I'll have a shelf above this equipment with a hole thru it for the wiring of the dosing pumps. This section will be where I keep all my electric components including a powerstrip and all my Reef Angel Controller equipment. Anything that will need to get plugged in will be plugged into a socket here and labeled. There will be another small cut-out in the stand wall here to allow for passage of every electrical cord that goes to something in the sump. Another cut-out will be made in the canopy wall too, to allow for plugs from my lighting and fan(s) to pass into this same section. I plan to add some kind of rubber grommet or something for all the cut-outs to keep moisture out of the cabinet. Finally, I plan to add one or two more shelves above the electrical section to store towels, test kits, grabbers, scrapers, nets, etc. All the misc stuff that I use for maintenance of the tank.

Lastly, the plan for the canopy finnishing is very similar to what I currently have on my 75g tank. The front and back sides will essentially be another "fake door" that will be attached via a long piano hinge across the top. The "doors" will swing up and rest on itself to stay open. The "doors" will also cover the black frame of the top of the tank too. The left side is just a solid piece of plywood (holes for wiring) and the right side will be another "fake door" but will be permanently attached. Oh, I attached 2 aluminum angles across the length of the canopy to hold my LED fixtures. They essentially make a track that the LED's sit on and will allow me to slide them from side to side if I need to access the tank from the top.

OK, enough talk. How about a few more pics?

I added a solid piece of plywood to the back of the stand, whole left wall and half of the back wall of the cabinet. For the left wall of the stand, I added a piece that would fit inside the frame of the side cabinet (see the 4th pic of this set) so that when I put the 2 pieces of furniture together there won't be a gap.

IMG_0935.jpg IMG_0936.jpg IMG_0937.jpg IMG_0938.jpg IMG_0939.jpg IMG_0940.jpg

These pics above were taken just before I painted the entire surfaces of all pieces with Kilz2. When I finished with the painting, I was tired, it was getting late, and it looked like it was about to rain. So I quickly brought it all back in the garage and cleaned up. Well, I forgot to take pics of the paint job. I'll try to take those soon to see that progress. It will likely be right before I apply the RedGard industrial waterproofer to the bottom of the stand and the bottom section of the cabinet. I will of course take some pics after applying that too.

Anyway, that pretty much has me caught up.
 

falconut

NJRC Member
Great job George. That looks so similar to mine except it's portable, where mine's attached to the floor, wall & ceiling.
 

TanksNStuff

Officer Emeritus
Officer Emeritus
Thanks everyone. I appreciate the feedback.

Craig - Yea, come to think of it... that is basically the same as your setup, except it's reversed left-to-right and mine isn't permanent. :encouragement:
 

redfishbluefish

Officer Emeritus
Officer Emeritus
George, as always, the detail included in both the sump build and stand/cabinet/canopy is phenomenal. Always love these DIY posts….it makes me jealous because it’s been too long since I’ve made some sawdust.

With your sump, I found it interesting that you first held the baffles in place and then applied the sealant/adhesive. I would think that getting a continuous smear of caulk between the baffle edge and sump would be difficult. I’ve always taken advantage of using the baffle to create a bead (on the limited space side) by pushing the baffle into caulk already applied to the sump. This allows for a continuous smear of caulk between the edge of the baffle and the sump while also allowing the excess to be pushed out on that limited-space side, which would now be smoothed with a dowel or stick. The opposing side (with easy access) would now receive a fresh bead of caulk.

I always like learning about new stuff….especially when it comes to DIY projects. That E6000 adhesive looks real interesting in that it appears to be able to stick to anything. I can think of a number of projects using that stuff, but first-to-mind is to use this on the patches on my pool cover. Everything I’ve tried to date doesn’t survive the winter under water. I wasn’t familiar with this stuff and looked up the MSDS and TDS (Technical Data Sheet), and still don’t know what it is. They are real closed-lipped about what type of adhesive it is. The one thing that slightly bothered me was this line in the TDS:

“E6000 is not recommended for any items that come into contact with food, drinking water or animals “

Now I would venture to guess that you won’t have any problems……..but…….. if at some point you do have issues with your tank, in the back of your mind you will be questioning this adhesive. JMTC


Your cabinetry is what really makes me jealous. I too plan on a side cabinet….some day. You made comment about it being X number of months since you’ve gotten to this build. Go take a look at the very first post in my Tale of the Tank (dated November 29,2010), where the very first item in my “ToDo” list is, “Build cabinet for left side of tank.” So in my mind’s eye, your build is happening real quick! I’ll be following along to get ideas for my side cabinet…….Good stuff George…..keep it coming.
 
Great posts George, amazing you can layout everything so cleanly...and at this point I am just talking about the post not the real work.
That is a great design. Nice job all around.
 

TanksNStuff

Officer Emeritus
Officer Emeritus
George, as always, the detail included in both the sump build and stand/cabinet/canopy is phenomenal. Always love these DIY posts….it makes me jealous because it’s been too long since I’ve made some sawdust.

With your sump, I found it interesting that you first held the baffles in place and then applied the sealant/adhesive. I would think that getting a continuous smear of caulk between the baffle edge and sump would be difficult. I’ve always taken advantage of using the baffle to create a bead (on the limited space side) by pushing the baffle into caulk already applied to the sump. This allows for a continuous smear of caulk between the edge of the baffle and the sump while also allowing the excess to be pushed out on that limited-space side, which would now be smoothed with a dowel or stick. The opposing side (with easy access) would now receive a fresh bead of caulk.

I always like learning about new stuff….especially when it comes to DIY projects. That E6000 adhesive looks real interesting in that it appears to be able to stick to anything. I can think of a number of projects using that stuff, but first-to-mind is to use this on the patches on my pool cover. Everything I’ve tried to date doesn’t survive the winter under water. I wasn’t familiar with this stuff and looked up the MSDS and TDS (Technical Data Sheet), and still don’t know what it is. They are real closed-lipped about what type of adhesive it is. The one thing that slightly bothered me was this line in the TDS:

“E6000 is not recommended for any items that come into contact with food, drinking water or animals “

Now I would venture to guess that you won’t have any problems……..but…….. if at some point you do have issues with your tank, in the back of your mind you will be questioning this adhesive. JMTC


Your cabinetry is what really makes me jealous. I too plan on a side cabinet….some day. You made comment about it being X number of months since you’ve gotten to this build. Go take a look at the very first post in my Tale of the Tank (dated November 29,2010), where the very first item in my “ToDo” list is, “Build cabinet for left side of tank.” So in my mind’s eye, your build is happening real quick! I’ll be following along to get ideas for my side cabinet…….Good stuff George…..keep it coming.

Paul, glad you appreciate the DIY details. In hind sight, I probably should have applied the adhesive to the glass first, then pushed in the baffles. That probably would have solved the minor leakage problem right from the start. I believe in the end my method will be fine since the last water test was pretty good. If I ever make another one though, I will surely consider your suggestion.

Yea, E-6000 seems to be a very versatile product. I chose it because I was using acrylic baffles in a glass sump and from my research I've found that this stuff bonds great to both. I also read that even after long time periods this adhesive did not seem to be cause for any problems for fish or corals. One person even said they used it to glue corals to rocks and had no issues with it so I didn't have any reservations after that. I guess only time will tell for me.

Oh, and my current build may be "faster" than yours... but don't forget you also completed that whole nano stand/canopy during that period of time too. That was an inspiration for me during my whole build too.
James - Thank you for your comments as well.
 

redfishbluefish

Officer Emeritus
Officer Emeritus
.........you also completed that whole nano stand/canopy during that period of time too. That was an inspiration for me during my whole build too.


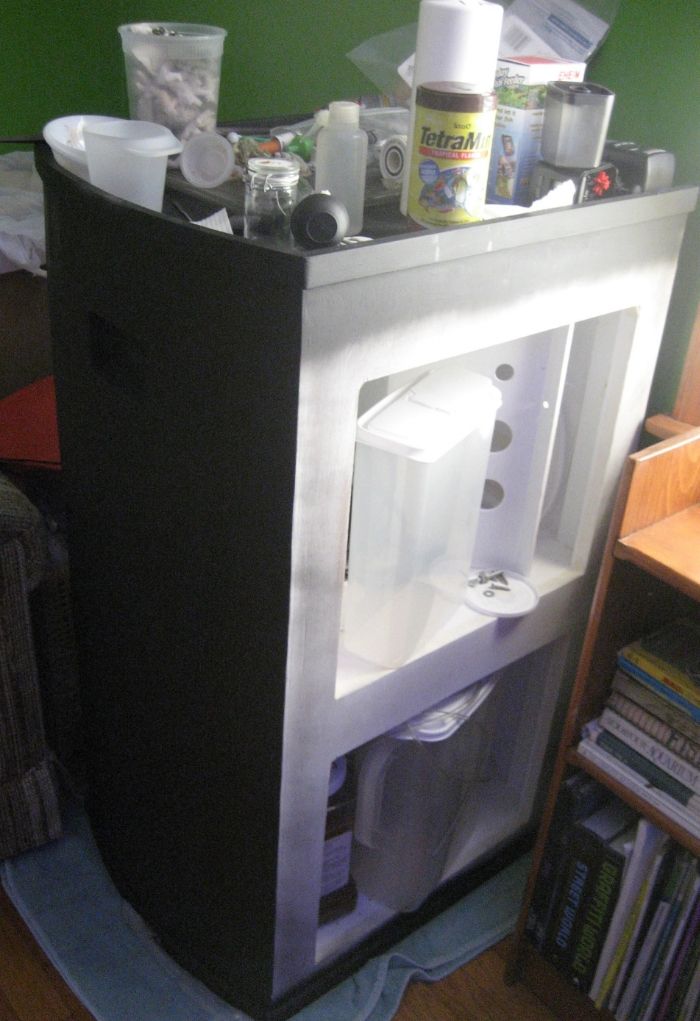
Completed! LOL George, you must have better dreams than I. I haven't touched the stand in months. Here it sits collecting dust and acting as a crap-collection table:

a801e8f7-f42d-4978-bac5-43463f9f3eb4_zps408a96e3.jpg


Conversely, it is your build that is inspiring me to get cracking on some of the projects I have ongoing. So keep these great posts coming. I'm like a kid at Christmas waiting for your next post! In the mean time I'm going down in the shop to do a little cleaning and organizing.
 

TanksNStuff

Officer Emeritus
Officer Emeritus
For being "incomplete" that looks pretty darn good there Paul! Get that tank setup on it already!

Have fun in the shop. ;)
 

TanksNStuff

Officer Emeritus
Officer Emeritus
OK, time for another small update. Having a few days off of work helped a bit. Too bad the weather was just a bit too cold or I would have gotten a lot more done today. Anyway, here's some progress:

As stated below, I had previously applied Kilz2 latex primer to the entire surface of all my furniture. I didn't take pics before putting it all away last time, so first thing I did was take some more pics of everything with the white wash.

IMG_0956.jpg IMG_0957.jpg IMG_0958.jpg IMG_0962.jpg IMG_0961.jpg IMG_0963.jpg IMG_0965.jpg IMG_0964.jpg

I noticed that there were a few spots that I either missed or needed some touch-up so as soon as I took those pics I patched it all up. While that was drying, I decided to prep for the RedGard water proofing coating for the bottom of the stand. Since there were some cracks around the edges, I put some self-adhesive fiber tape that you would typically use on sheetrock joints. This will help the water proofer span the cracks and also strengthen the corners.

IMG_0967.jpg IMG_0968.jpg IMG_0966.jpg

I was going to call it a day, but it was pretty nice out so I decided to apply the RedGard. I used a combination of putty knife (to press into the corners and cracks), spatula (to scoop it out of the bucket and smear on larger areas), and finally a small 3" roller (to even out everything). As you can see, I probably should have used painters tape to give me a nice clean edge, but I wasn't all that concerned with it since its hidden most of the time anyway. Also, I should note that this stuff applies a pink color, but as it dries, it turns deep red. In fact, if you look at the vertical edges on the back, you can see it getting darker.

IMG_0969.jpg IMG_0970.jpg

At this point, I had to stop because the temp started dropping. The instructions say that it shouldn't go under 40F degrees, and it was right around 39 so I stopped. I could tell it was getting too cold because the material didn't seem to be sticking very well. I'll have to check it out later and probably add another coat to it on Sunday since it's supposed to be nice again. Tomorrow our family is doing our annual Gingerbread House Competition, so I won't be able to get on it until Sunday.

Stay tuned for another update soon!
 

Tazmaniancowboy

Officer Emeritus
Officer Emeritus
Great job George! That is going to be awesome.

To make you and Paul feel better, my stands haven't been finished yet. It was on my list to complete for almost 4years. Honey-do lists and kids always get in the way! Getting a new carpet installed in the living room so that might nudge me into finishing the tank stands. I have to laugh, the carpet installers I've talked to cannot understand why I would butt up to the tanks, they all suggest I remove the tanks and carpet underneath! I just laugh and tell them "you'll see!"
 

Daniel

Officer Emeritus
Officer Emeritus
George I see you are finally getting it done!! It looks great. If you need anything I am here for you so just ask.
 
Top