-
Folks, if you've recently upgraded or renewed your annual club membership but it's still not active, please reach out to the BOD or a moderator. The PayPal system has a slight bug which it doesn't allow it to activate the account on it's own.
You are using an out of date browser. It may not display this or other websites correctly.
You should upgrade or use an alternative browser.
You should upgrade or use an alternative browser.
Ricwilli's 215 build
- Thread starter ricwilli
- Start date
Re: Ricwilli's 210 build
I have found easier to pre-aquascape just a little bit on dry rock and than cycle it. it just harder in my opinion to play with wet rock.
I am building very similar system to yours 200g tank, 80g sump, 30g frag tank, marco rocks, alpha 250 skimmer etc.
I opted to add only about 100lbs of rock (minimalistic approach)that created 3 large towers.
it has taken me 2-3 weeks longer than I expected due to the fact that I decided to re-do the stand and canopy.
Re: Ricwilli's 210 build
Thanks for the stand. It worked out pretty good. For the shelf, I have the cross beam on my drawing plan. The shelf is not finished yet.
The wire idea is actually better than the cross beam. It takes allot less space. I have incorporated it in my plan. Thanks
I'm definitely aquascaping outside the tank. The rocks that I have are huge. I will recycle in the tank with Brightwell. How do you like the Vertex 250? Are you planning on starting a build thread?
I am trying to make my water changes as easy as possible. All I will have to do is, open up the valves and the water will drain into a drain pipe. Than refill with new water.
TanksNStuff said:Hey, that stand looks familiar. ;D
Looking good so far Richie! I don't know how heavy the stuff going on top of that shelf is, but I'd suggest adding a brace between the 2 sets of legs at the bottom. That will help prevent it from toppling over. You may not need it, but if the shelf feels even a little wobbly, I'd add them to stiffen it up.
As for aquascaping the rock, if you only take out a few pieces of rock at a time, drill/glue them in smaller sections, then put back in the tub... the bacteria should be fine. Don't forget, you don't want them so big that it's hard to get them in the tank . And if they are heavy and you drop one while putting it in the display... well, that's not something you want to do.Nice pile of rock you are starting with though.
Thanks for the stand. It worked out pretty good. For the shelf, I have the cross beam on my drawing plan. The shelf is not finished yet.
ds4x4 said:that shelf should be strong enough but i would use some wire to hang from the ceiling to account for the leverage factor.
The wire idea is actually better than the cross beam. It takes allot less space. I have incorporated it in my plan. Thanks
rafal07013 said:I have found easier to pre-aquascape just a little bit on dry rock and than cycle it. it just harder in my opinion to play with wet rock.
I am building very similar system to yours 200g tank, 80g sump, 30g frag tank, marco rocks, alpha 250 skimmer etc.
I opted to add only about 100lbs of rock (minimalistic approach)that created 3 large towers.
it has taken me 2-3 weeks longer than I expected due to the fact that I decided to re-do the stand and canopy.
I'm definitely aquascaping outside the tank. The rocks that I have are huge. I will recycle in the tank with Brightwell. How do you like the Vertex 250? Are you planning on starting a build thread?
JRWOHLER said:Sweet looking tank and setup. Why are you worried about draining each part of the sump individually?
I am trying to make my water changes as easy as possible. All I will have to do is, open up the valves and the water will drain into a drain pipe. Than refill with new water.
Re: Ricwilli's 210 build
I did quite a bit today. I started working on the Manifold. I decided not to glue anything until I'm 100% sure where I want things to go.
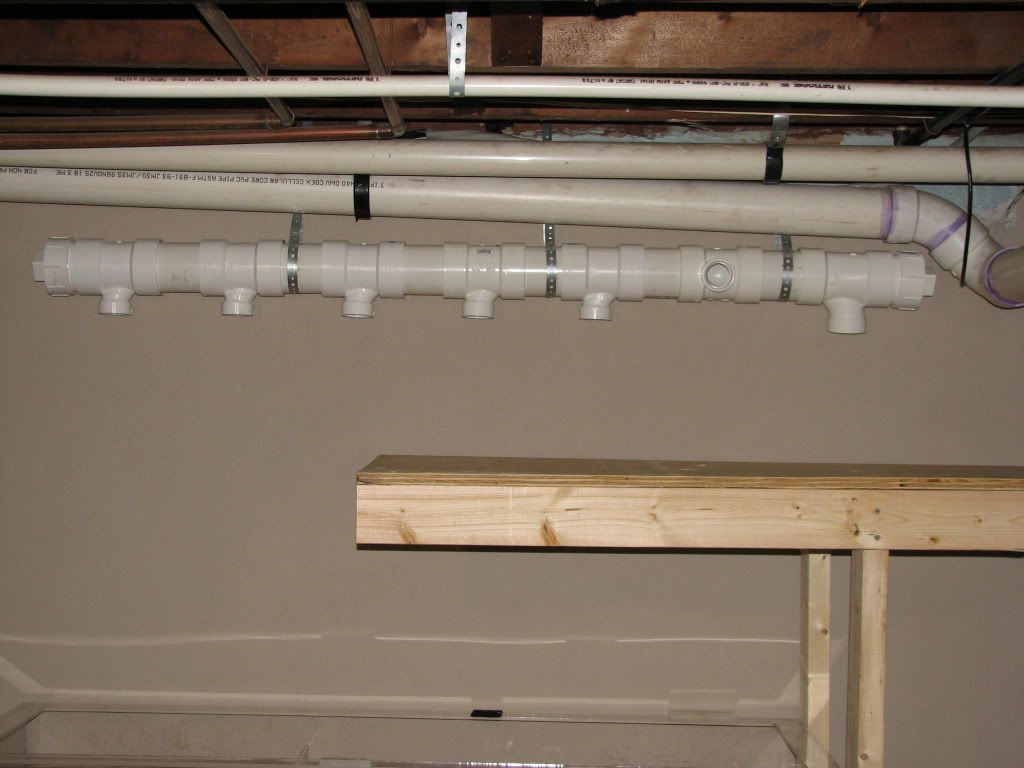
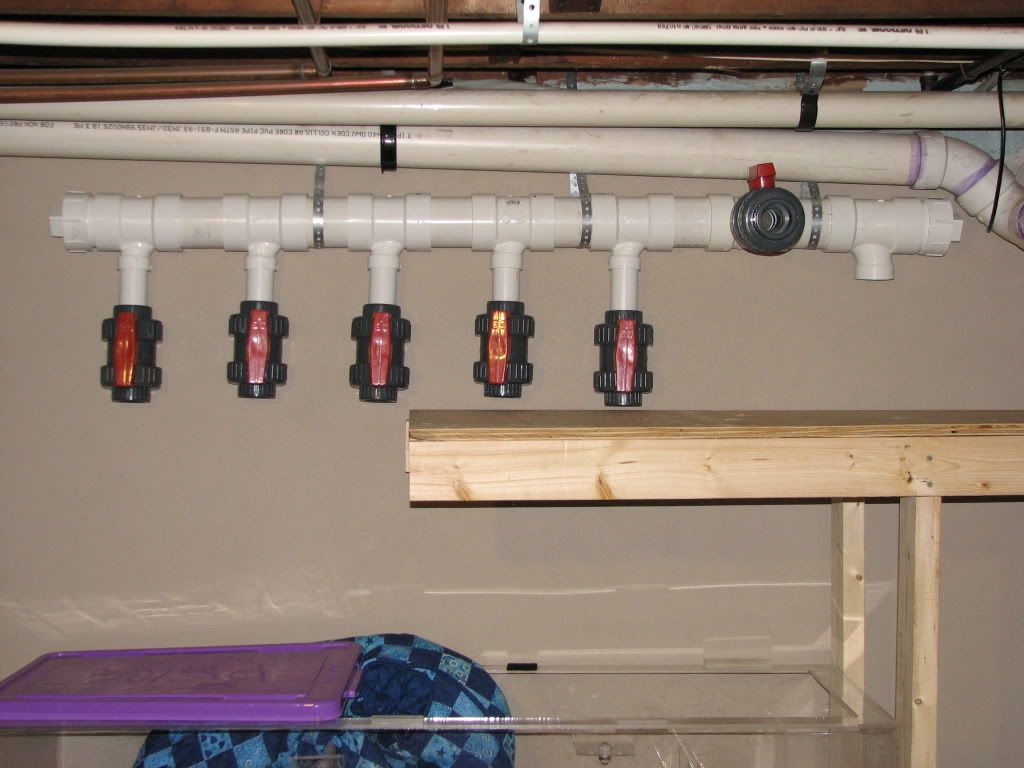
Manifold with True Union Valves
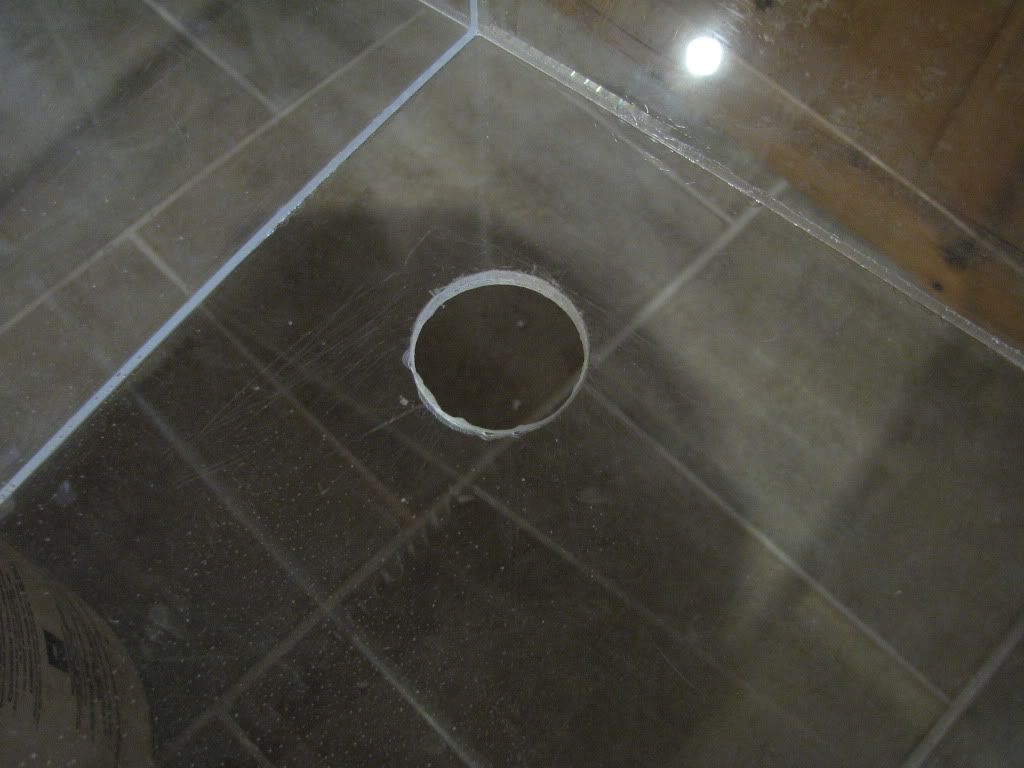
My sump has three compartments and I decided to drill a hole in each compartment. Now I will be able to drain each compartment for water changes. This will also allow me to move all the crap on the bottom of the sump into the holes while draining the sump. I'm guessing that I should be able to drain about 40 gallons for a water change. Not including the water that I will remove from the frag tank.
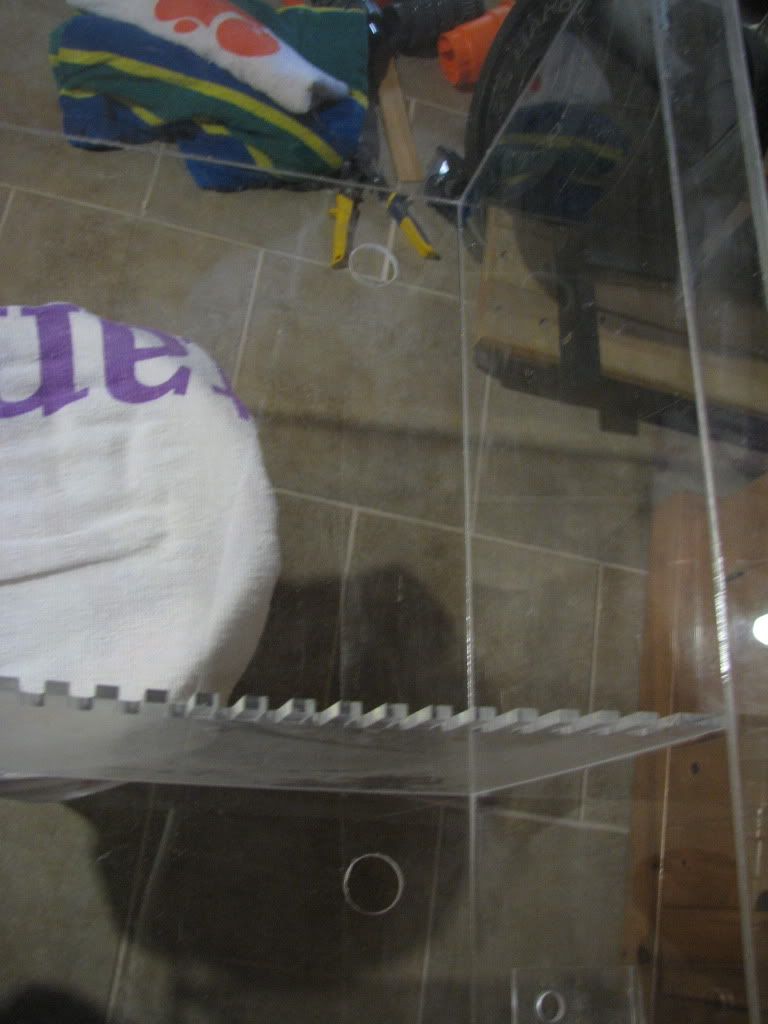
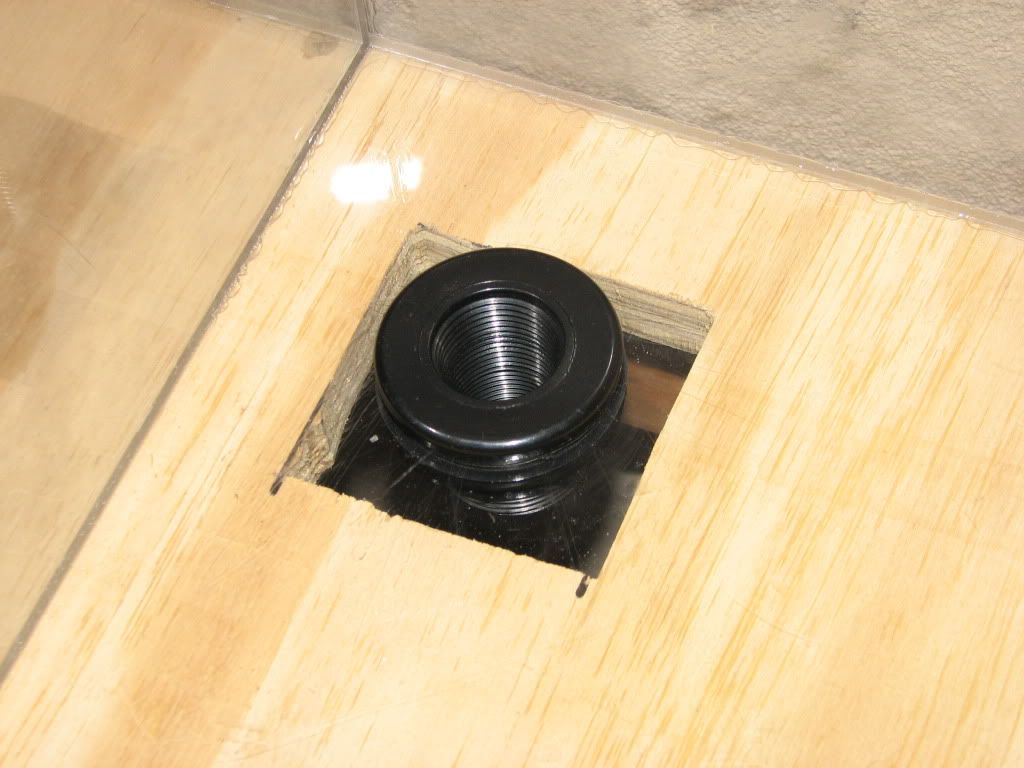
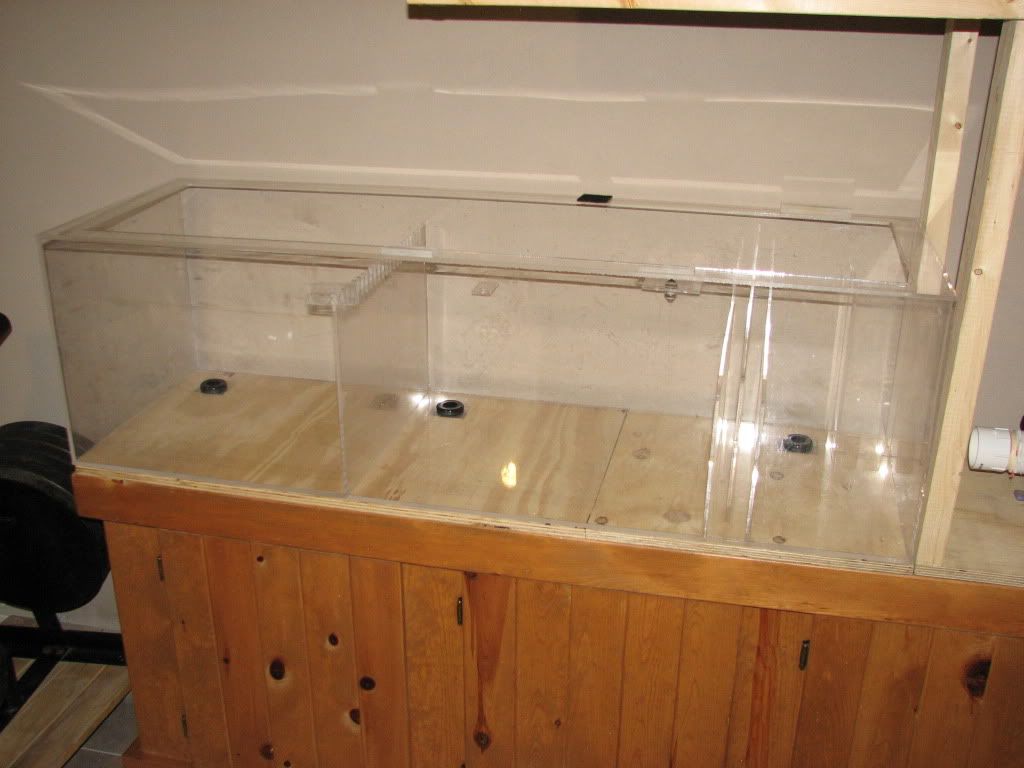
These are the valves under the sump that I can open to drain the sump. The water will drain underneath the sink into a drain pipe. I have not finished this as I still have to connect the frag tank to this drain pipe.
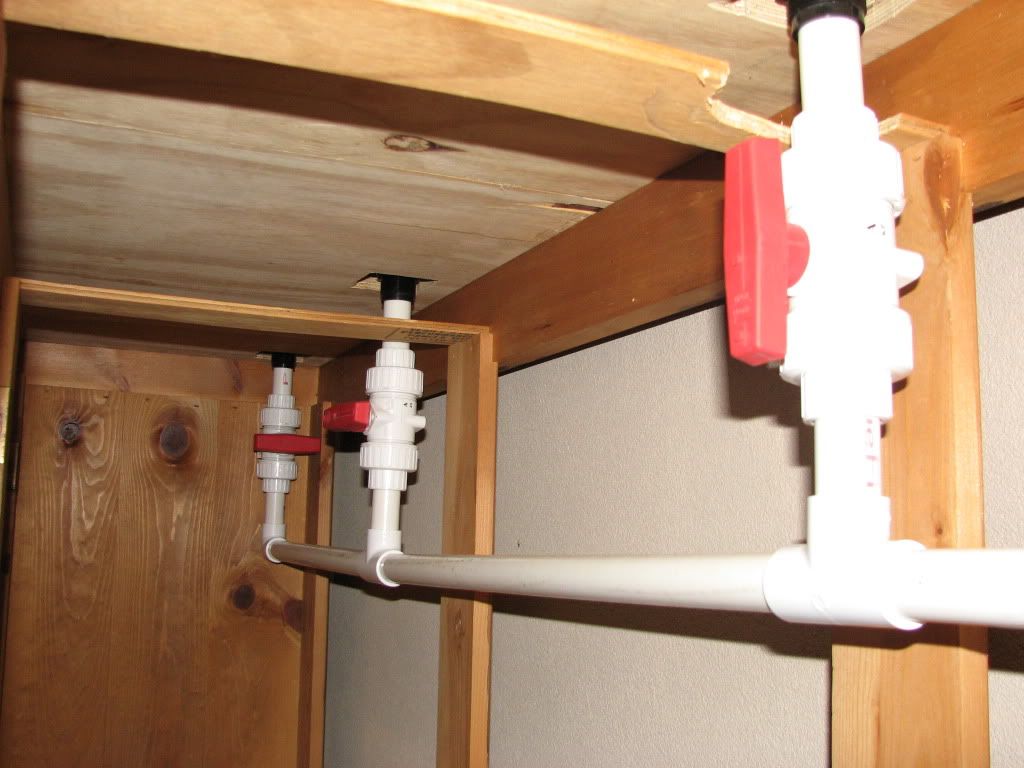
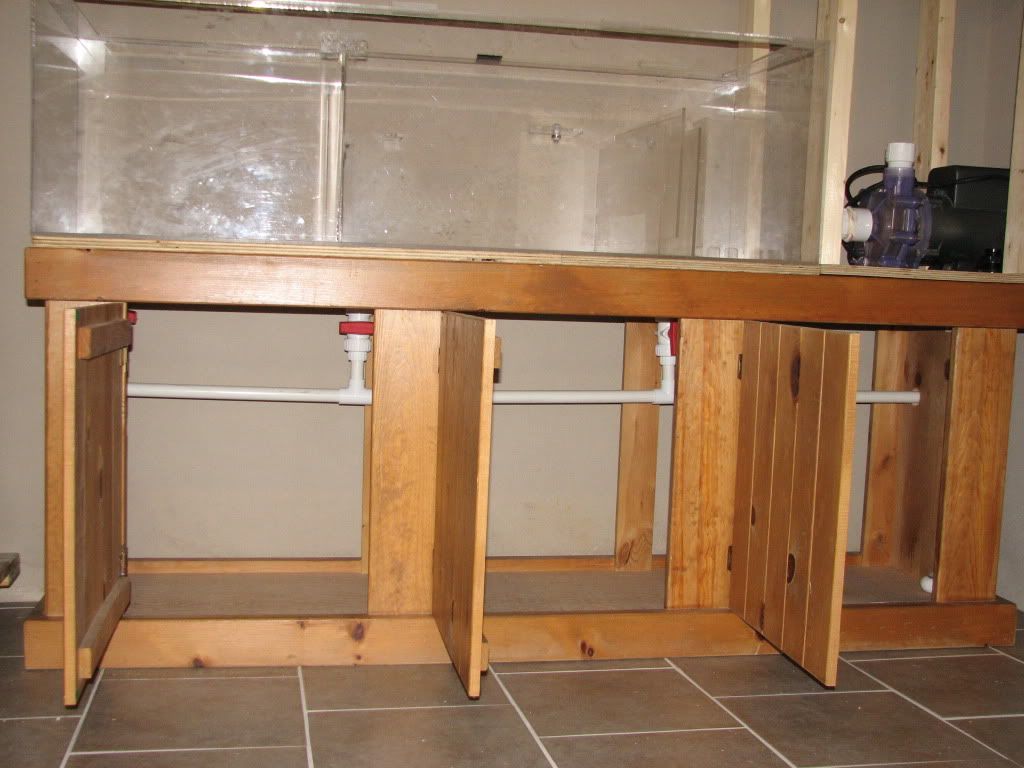
This is where I left off.
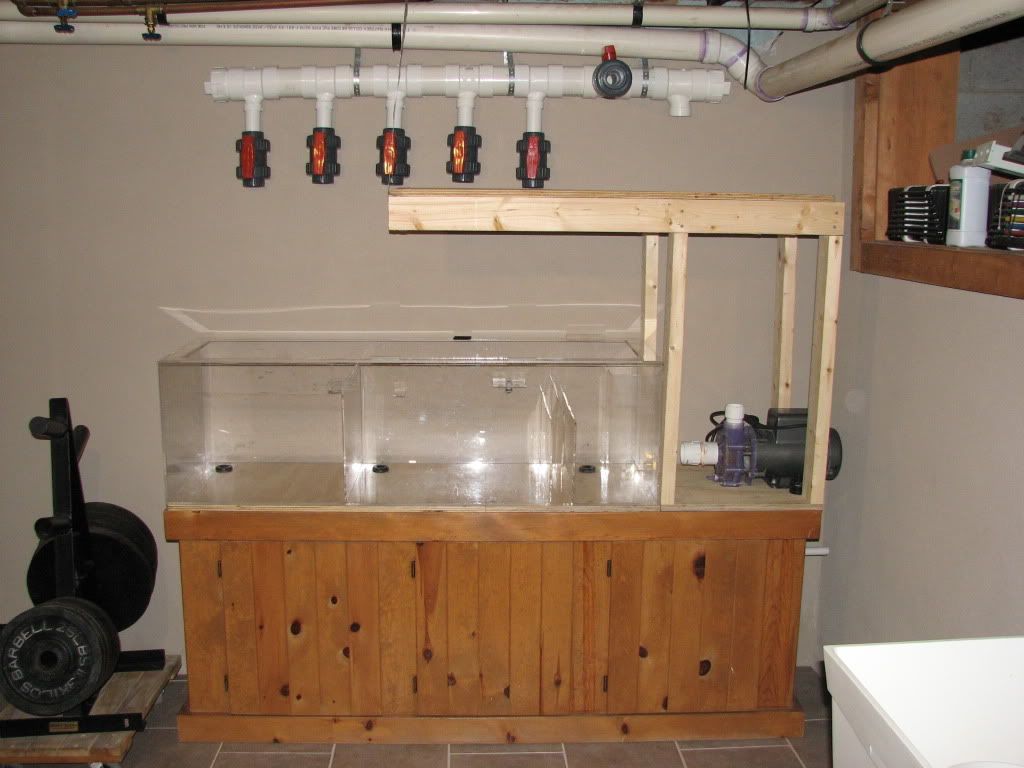
I did quite a bit today. I started working on the Manifold. I decided not to glue anything until I'm 100% sure where I want things to go.

Manifold with True Union Valves

My sump has three compartments and I decided to drill a hole in each compartment. Now I will be able to drain each compartment for water changes. This will also allow me to move all the crap on the bottom of the sump into the holes while draining the sump. I'm guessing that I should be able to drain about 40 gallons for a water change. Not including the water that I will remove from the frag tank.


These are the valves under the sump that I can open to drain the sump. The water will drain underneath the sink into a drain pipe. I have not finished this as I still have to connect the frag tank to this drain pipe.


This is where I left off.

Re: Ricwilli's 210 build
Hey Ric what are you going to use for Live sand? I was thinking of buying some of this stuff from ebay. The Reception of it seemed to go over well and it looks really pretty. I like that it won't cloud the water so I can have good flow and not worry about blowing sand all around.
http://cgi.ebay.com/ws/eBayISAPI.dll?ViewItem&item=250491184058&ssPageName=STRK:MEWAX:IT
heres a video of it on Youtoob
http://www.youtube.com/watch?v=lW490_iGq_I
Re: Ricwilli's 210 build
Manifold looks good, but are those last 2 valves on the right side pointing down too close to the shelf? The very last one looks like it's almost touching it. Or do you plan on pointing those away from the wall, like the last one on the right?
I like how you made the sump drain setup. At first I didn't understand the concept you were going for, but now that I see it setup I love the idea. I see the drain pvc goes thru the wall on the right side... do you have a sink or something in that room that you can dump it right into? If so, that rocks!
The drain line looks like it's sagging a bit under the sump though. You might want to add a support strap near that Tee in the middle and lift it up a hair. There won't be much pressure going thru there, but if you have it all on a nice mild slope, it will drain faster. Maybe even shorten the pvc spools between the valve and Tee on the left and middle (left one slightly shorter than the middle.)
I agree with you and ds4x4 that hanging with a wire is a better idea than the bracing, especially since the pump sticks through the shelf legs.
Anyway, nice progress. Keep it up.
Oh, and asonitez, that sand looks awesome if you can pour it in like that and not have a sand storm! Any reviews on the "Live" factor of that "Live Sand"? Does it have enough bacteria in it?
Re: Ricwilli's 210 build
asonitez I actually have some sand that's been sitting in buckets for a couple of months. I will need to wash it real good before I put it in the tank. Thanks for the link.
That sand looks pretty good.
TanksNStuff None of the pipes are glued. They are just attached together. I can not force them in cause I will have a hard time taking them apart when its time to glue. All the unions will get shorter when I glue them together. Besides, the stand will not sit against the wall cause I will have hoses coming down from the manifold. Same goes for the pipes underneath the sump. They are not glued, just set in place.
The drain pipe does not go threw the wall. I have to put a 90 degree elbow so that it can go underneath the white sink that is shown in one of the pictures above in the lower right hand corner.
Re: Ricwilli's 210 build
rigid is better for a pressure application since they are glued. flex eliminates the sharp turns a 90 gives witch makes less restriction and more flow but it uses barb connections with pipe clamps. make sure you use the pressure rated Schd 40 and not the "street" elbows that are really only for gravity/low pressure applications. you can tell because the lip where the pipe connects is less than a normal pvc elbow.
rigid is better for a pressure application since they are glued. flex eliminates the sharp turns a 90 gives witch makes less restriction and more flow but it uses barb connections with pipe clamps. make sure you use the pressure rated Schd 40 and not the "street" elbows that are really only for gravity/low pressure applications. you can tell because the lip where the pipe connects is less than a normal pvc elbow.
Re: Ricwilli's 210 build
ds your talkin about the clear tubing you need the barbed fittings and hose clamps for that. Ricwill you should use flexable pvc for that run, it eliminates elbows cause you can bend it. Also you glue all your fittings like normal pvc and it can handle pressure. The stuffs nice I used it to set up my new tank. It is expensive though. I found the best price at one of the 5 pool places by me. Some places were more than a dollar a foot difference! What diameter pipe was it you need for the run?
ds your talkin about the clear tubing you need the barbed fittings and hose clamps for that. Ricwill you should use flexable pvc for that run, it eliminates elbows cause you can bend it. Also you glue all your fittings like normal pvc and it can handle pressure. The stuffs nice I used it to set up my new tank. It is expensive though. I found the best price at one of the 5 pool places by me. Some places were more than a dollar a foot difference! What diameter pipe was it you need for the run?
Re: Ricwilli's 210 build
I'm thinking of using 1.5" - 2" dia. pipe. Can you tell me how much you payed? I'm going to go to HD and Lowes to compare price. I plan to have the two drain from the tank go into one pipe.
Nickjr000 said:ds your talkin about the clear tubing you need the barbed fittings and hose clamps for that. Ricwill you should use flexable pvc for that run, it eliminates elbows cause you can bend it. Also you glue all your fittings like normal pvc and it can handle pressure. The stuffs nice I used it to set up my new tank. It is expensive though. I found the best price at one of the 5 pool places by me. Some places were more than a dollar a foot difference! What diameter pipe was it you need for the run?
I'm thinking of using 1.5" - 2" dia. pipe. Can you tell me how much you payed? I'm going to go to HD and Lowes to compare price. I plan to have the two drain from the tank go into one pipe.
Re: Ricwilli's 210 build
Lowes only had 1.5" And 1". I had to go to the pool place for the 2". Think it was national pools on rt 22. It was like 2-4 dollars a foot. You could always do most of your straight runs in hard pipe then use this for your bends and tricky turns. The 1.5 bends pretty good. The 2" takes a real wide bend it's tough stuff. A hacksaw cuts it nicely.
Lowes only had 1.5" And 1". I had to go to the pool place for the 2". Think it was national pools on rt 22. It was like 2-4 dollars a foot. You could always do most of your straight runs in hard pipe then use this for your bends and tricky turns. The 1.5 bends pretty good. The 2" takes a real wide bend it's tough stuff. A hacksaw cuts it nicely.
Re: Ricwilli's 210 build
Ahh, I see the sink now Richie. That will work just great if you tie right into the drain from that sink. I read before that nothing was glued yet, but I thought all the piping was pushed tightly into place. Looks like you got it all under control there.
As to the flex/rigid piping for the return, I'd agree that you should do all the straight runs in rigid and use the flex for all of the bends. If you think you will have any issues with pressure, I'd go with the 1.5", but if not, I'd go with the 2". Smaller pipe will give you more pressure, but less volume. Larger will be the opposite. So, depending on what size your drain lines to the sump are, you may want more volume instead of more pressure and maximize flow.
Re: Ricwilli's 210 build
The straight run in rigid PVC sounds like the way to go. I will have two drains from the tank going into one 1.5 pipe, down to the sump in the basement.
Well, it looks like this weekend is shot. I have to go to a wedding today, and tomorrow is my sons 1st birthday. I guess I will try to start on Tuesday. Maybe I can sneek some work in without the wife knowing .
.
The straight run in rigid PVC sounds like the way to go. I will have two drains from the tank going into one 1.5 pipe, down to the sump in the basement.
Well, it looks like this weekend is shot. I have to go to a wedding today, and tomorrow is my sons 1st birthday. I guess I will try to start on Tuesday. Maybe I can sneek some work in without the wife knowing
Re: Ricwilli's 210 build
I figured, I would respond in your build thread to the question you asked in MY build thread.
The Apartment Building I was in were wooden floors laid over concrete. My apartment was on the outside of the building. Definately near a load bearing wall. The tank stand was a little over 5 feet long which evenly distributed the weight across the beams.
Re: Ricwilli's 210 build
Pressure is always a constant, it doesn't change based on the pipe size. For example a house with a 1" water line and 1/2" lines, the pressure always is the same on both lines. Basically the larger size just creates more load that the pump has to fight.
TanksNStuff said:Ahh, I see the sink now Richie. That will work just great if you tie right into the drain from that sink. I read before that nothing was glued yet, but I thought all the piping was pushed tightly into place. Looks like you got it all under control there.
As to the flex/rigid piping for the return, I'd agree that you should do all the straight runs in rigid and use the flex for all of the bends. If you think you will have any issues with pressure, I'd go with the 1.5", but if not, I'd go with the 2". Smaller pipe will give you more pressure, but less volume. Larger will be the opposite. So, depending on what size your drain lines to the sump are, you may want more volume instead of more pressure and maximize flow.
Pressure is always a constant, it doesn't change based on the pipe size. For example a house with a 1" water line and 1/2" lines, the pressure always is the same on both lines. Basically the larger size just creates more load that the pump has to fight.
Re: Ricwilli's 210 build
Not exactly true Mike. Did you ever put your thumb over the end of a garden hose to get it to shoot out farther? Putting your thumb over the hole reduces the pipe (hose) size and creates a higher pressure because the water is bottlenecked inside the hose. It gives you a narrower stream that pushes harder than the full open hose. Yes, friction, resistance, and backpressure will all cause your pump to work harder and there is a maximum pressure a pump can provide, but bottlenecking can increase the actual discharge pressure. The constant pressure of the water building up behind the bottleneck is what increases the output pressure.
This same situation could be created in the return piping by using 2" from pump (or in Richie's case the manifold) and then just before entering the tank, reducing it to 1.5". Or better yet, further reduce that to two 3/4" loc-line fittings that you can split the flow into two different directions. You could even have a reduction in the middle of the pipe and then enlarge back to the original (ie. an eductor) and increase the pressure.
As I said before, this doesn't affect the volume of water being pumped, but it could give you more flow pressure.

