• Folks, if you've recently upgraded or renewed your annual club membership but it's still not active, please reach out to the BOD or a moderator. The PayPal system has a slight bug which it doesn't allow it to activate the account on it's own.

Ricwilli's 215 build

Re: Ricwilli's 210 build

Pascal's law if you want to look it up. When you hold your finger over the end you are increasing the velocity of the fluid, the pressure would still be the same. The pipe sizes affect head loss, not pressure. I don't want to highjack ricwilli's thread so I will leave it at that.
 

TanksNStuff

Officer Emeritus
Officer Emeritus
Re: Ricwilli's 210 build

Mbodell said:
Pascal's law if you want to look it up. When you hold your finger over the end you are increasing the velocity of the fluid, the pressure would still be the same. The pipe sizes affect head loss, not pressure. I don't want to highjack ricwilli's thread so I will leave it at that.

I don't think Pascal's law applies here since the pvc wouldn't be enclosed. But I don't know for sure and am certainly no expert in the field. Perhaps it's just the velocity that increases and not the pressure? I suppose I could be wrong in my terminology, but I know things like eductors, venturis, etc. are proven to help push fluid through a pipe when forces such as gravity and friction slow the flow.

Anyway, I don't want to hijack the thread either, and certainly don't want to start an argument, so let's agree to disagree and leave it at that. ;) Sorry for the sidetrack Richie.
 
Re: Ricwilli's 210 build

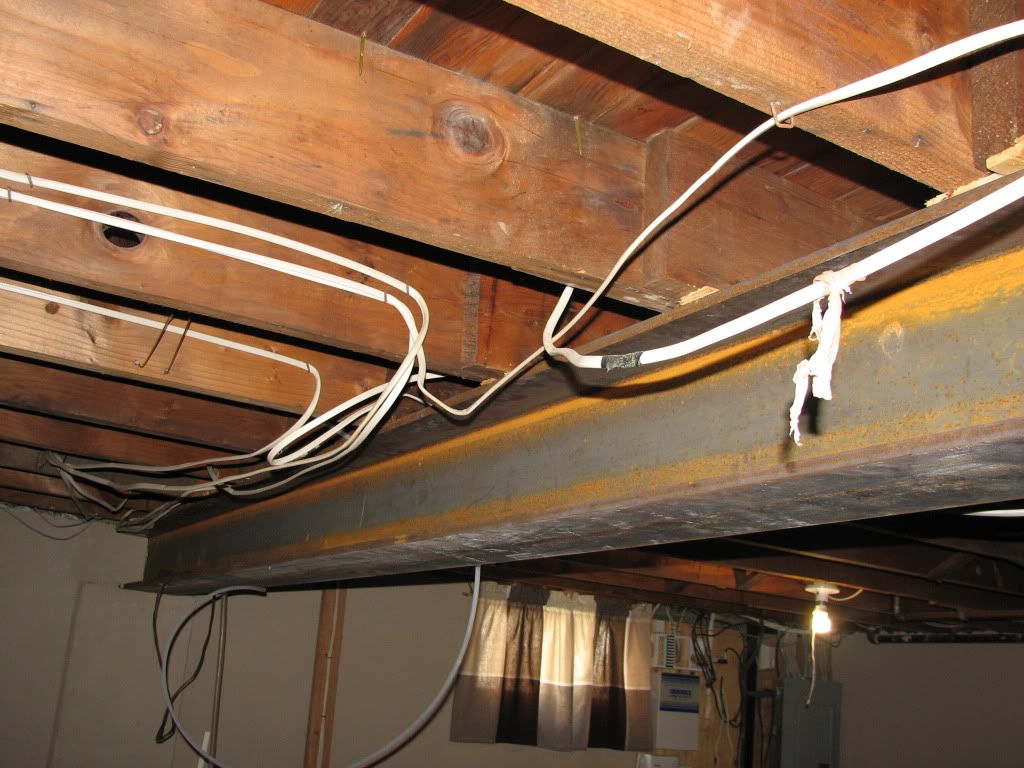
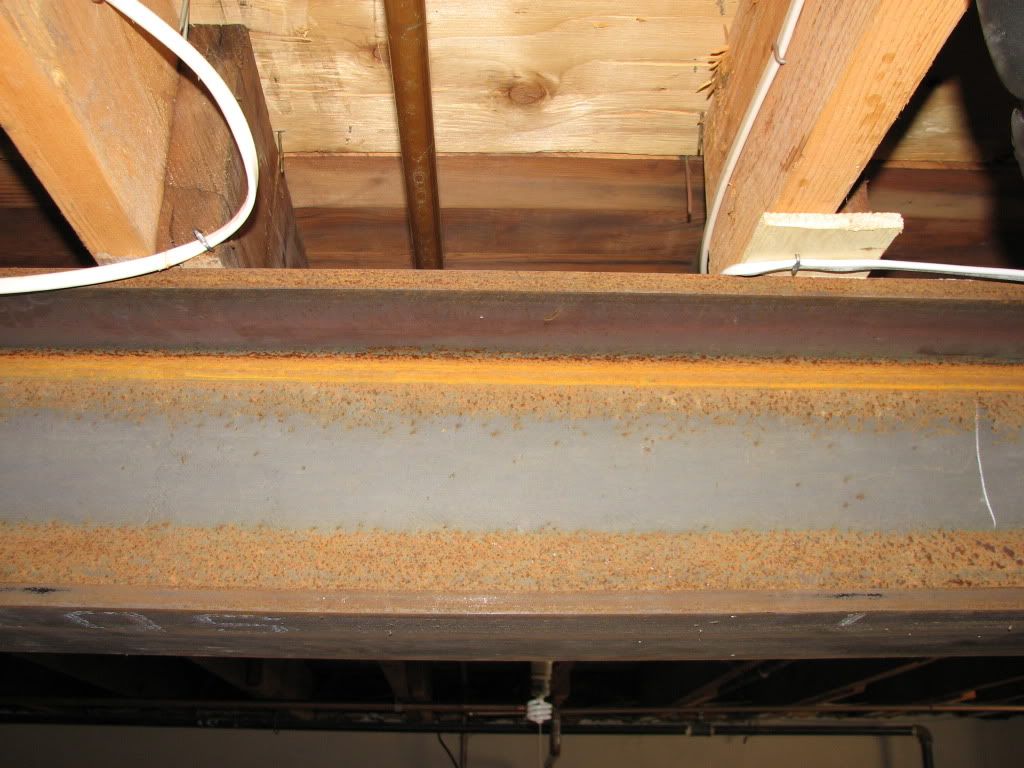
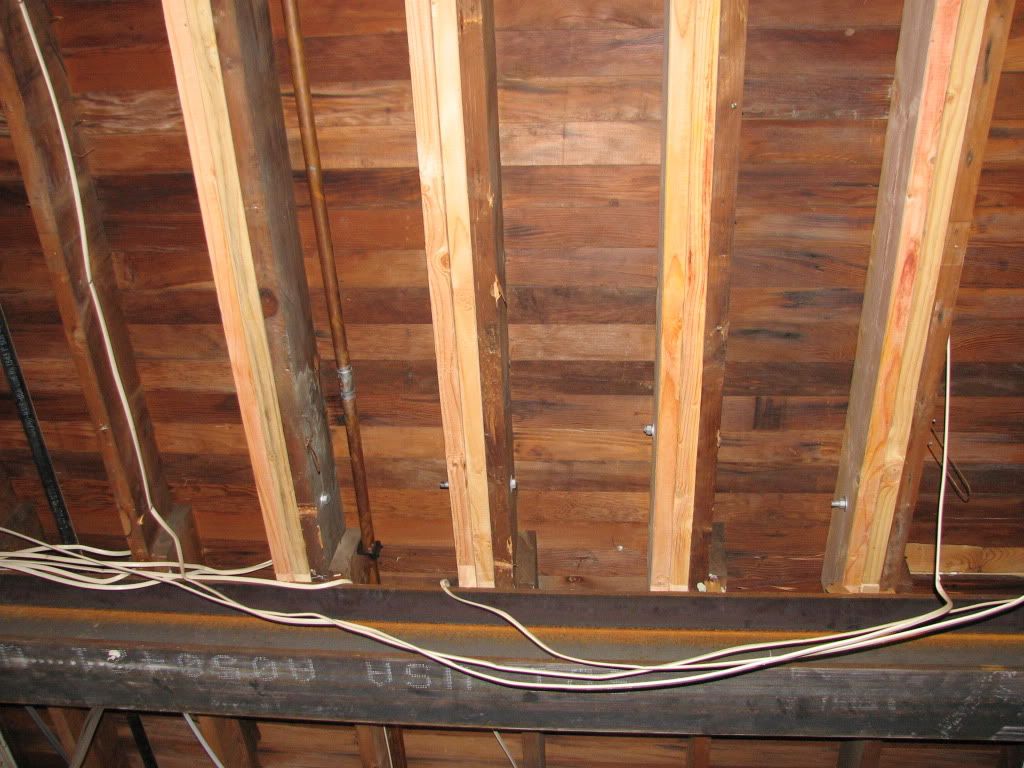
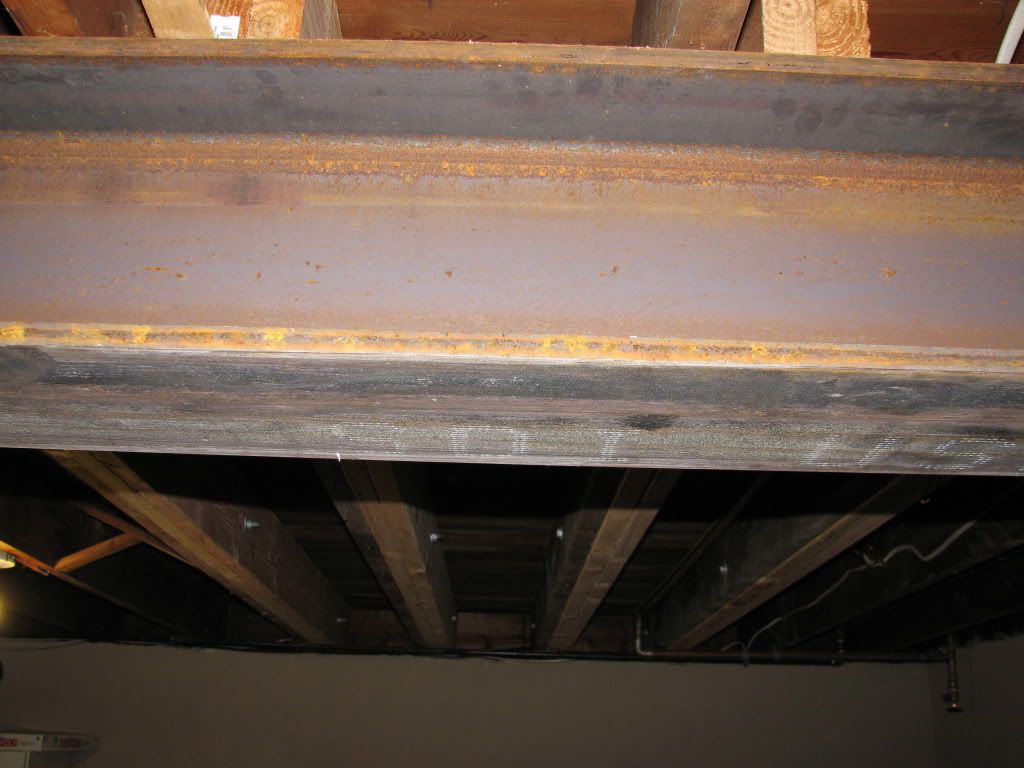
Well maybe I do. I ran into a small little problem. I was hoping that the Iron I-Beam in my basement would support the 215 tank. Well I was informed that I needed more support.

This is the Iron I-Beam

IBeam.jpg

IBeam1.jpg


The thing is that, the 215 does not sit on top of the iron I-Beam. Only 5-6" of the back of the tank does. It was suggested that I sister the wood beams from wall to the iron I-Beam. I've been trying to finish this for about four days now and I can't cause I've been pretty busy with the family.
 
Re: Ricwilli's 210 build

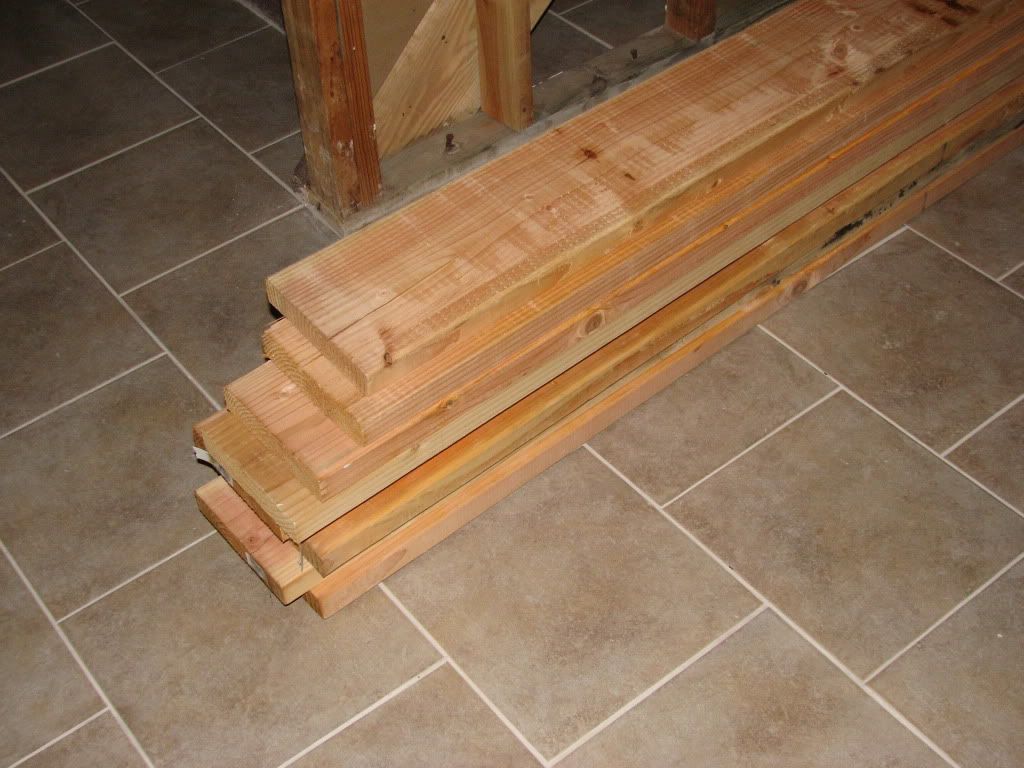
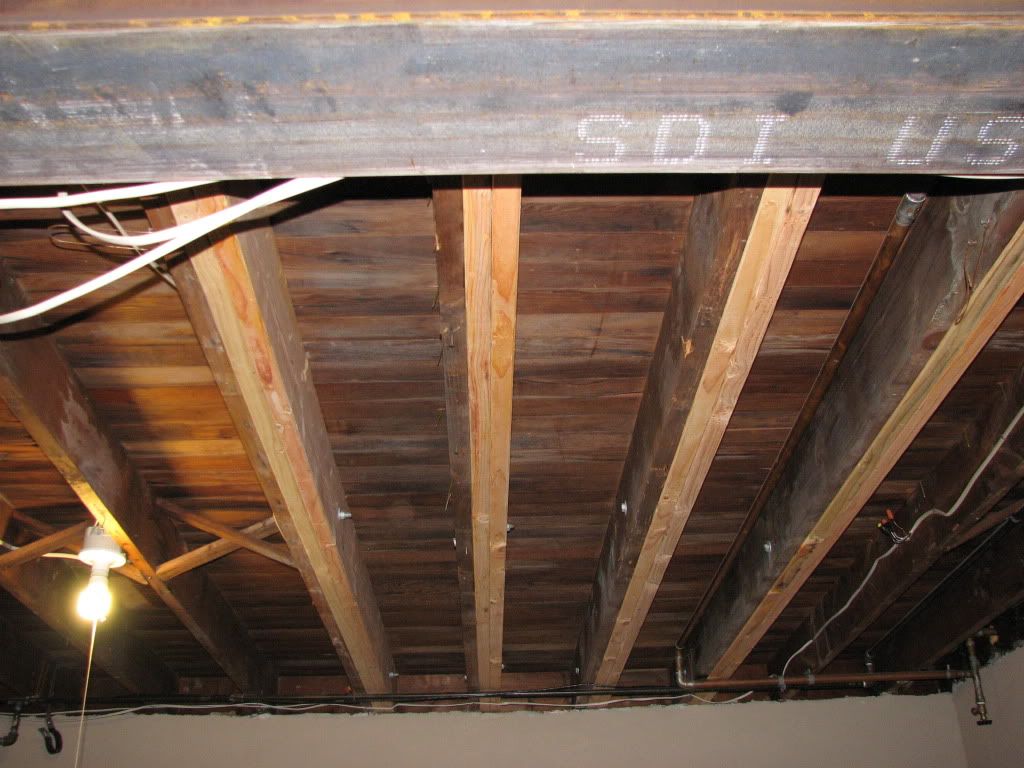
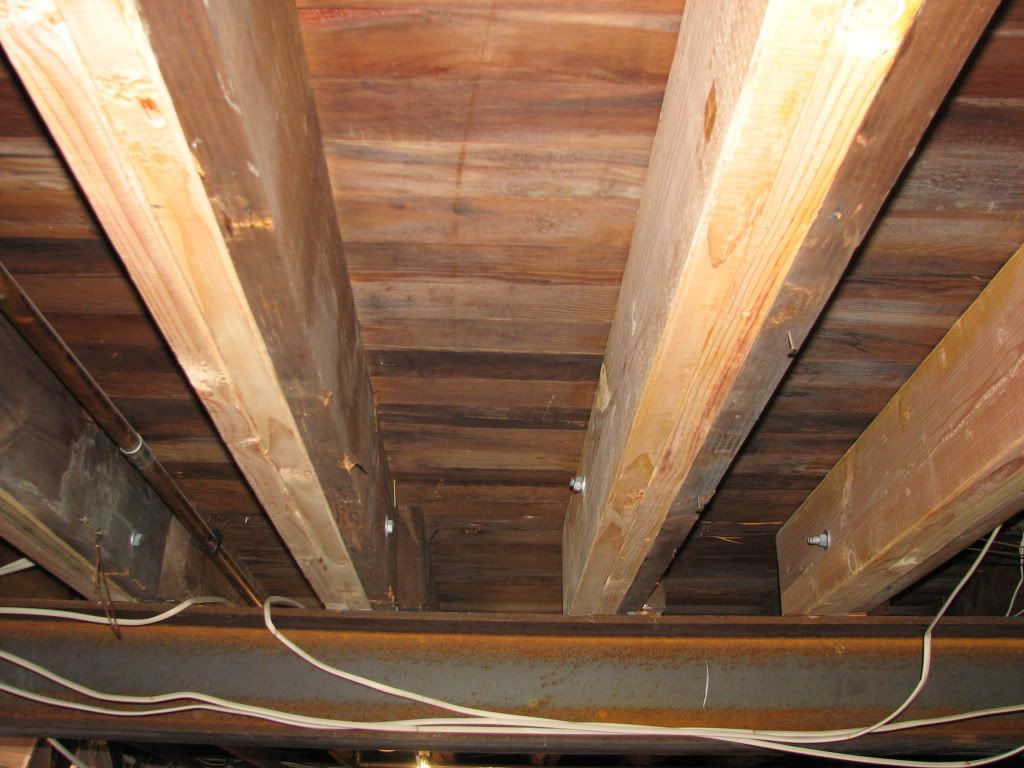
OK, so it took me a whole week just to sister four wood beams.

Here are the wood beams waiting to be put up.

SisterBeams.jpg


Beams that need to be sistered.

SisterBeams1.jpg


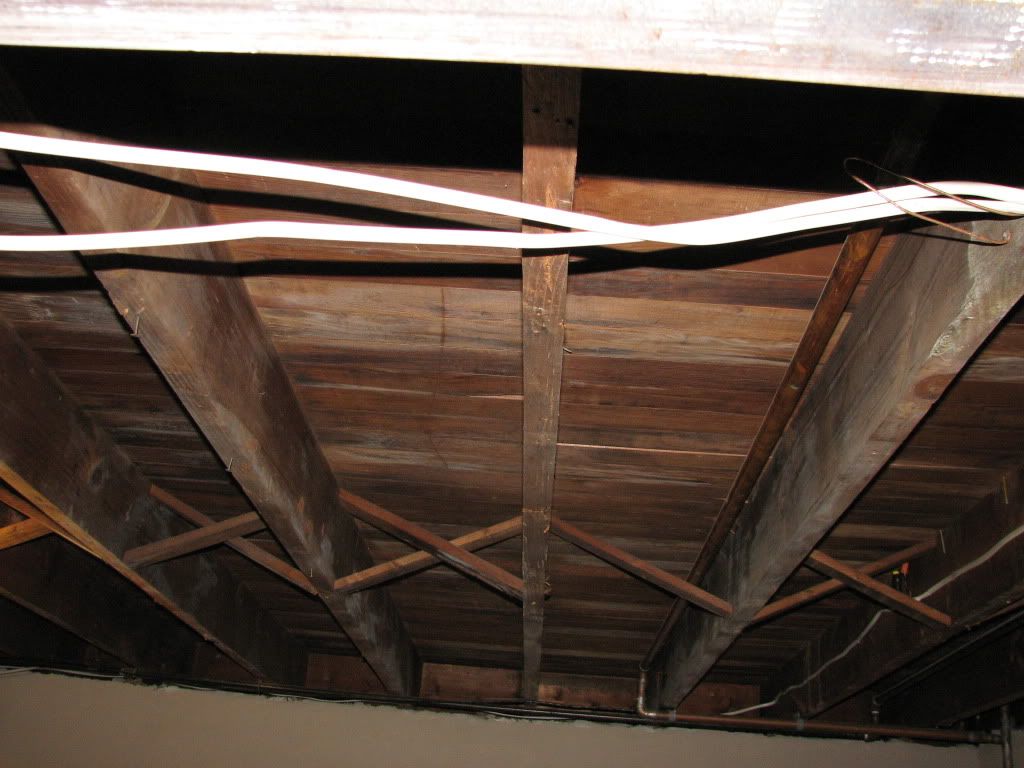
Here they are, put up and bolted.

SisterBeams2.jpg


SisterBeams3.jpg


SisterBeams4.jpg


SisterBeams5.jpg


I wanted to sister 5 wood beams but one of them had electrical wires next to it and I did not want to go through the trouble and start cutting wires. So hopefully 4 sistered wood beams, will give me enough support for the 215. Wow, the things we do just to put up a fish tank.
 
Re: Ricwilli's 210 build

I am no expert but that looks pretty darn sturdy. Looks like you did great work for what it is worth. :)
 
Re: Ricwilli's 210 build

it's looking great man nice. I'm supprised they said ya needed the extra support though ah well better safe than sorry.
 

TanksNStuff

Officer Emeritus
Officer Emeritus
Re: Ricwilli's 210 build

If you have problems after all that bracing, you have some heavy fish, lol.

You should be fine with just the four sisters.
 
Re: Ricwilli's 210 build

Arrg said:
it's looking great man nice. I'm supprised they said ya needed the extra support though ah well better safe than sorry.

Thats because the tank is not sitting on top of the steal beam.
 
Re: Ricwilli's 210 build

Here is a little update. I've got about 90 percent of the plumbing done.

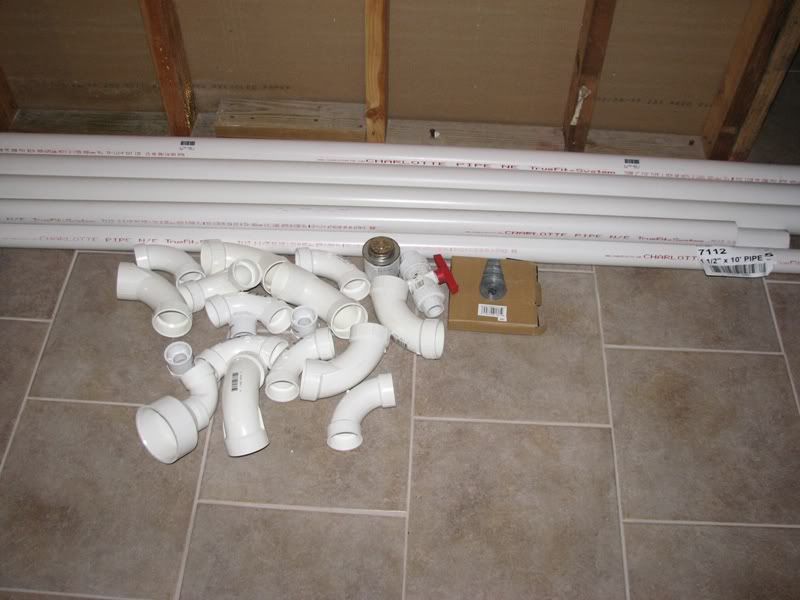
The Parts

PlumbingParts.jpg


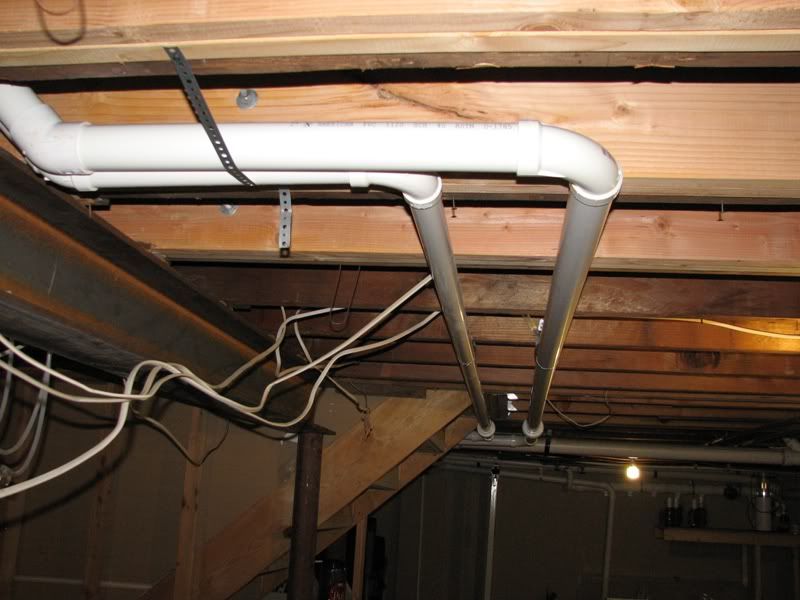
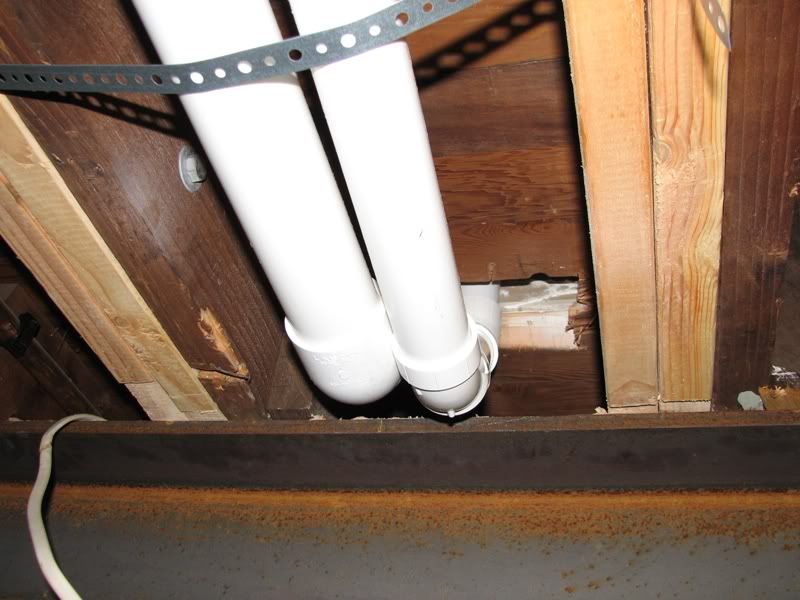
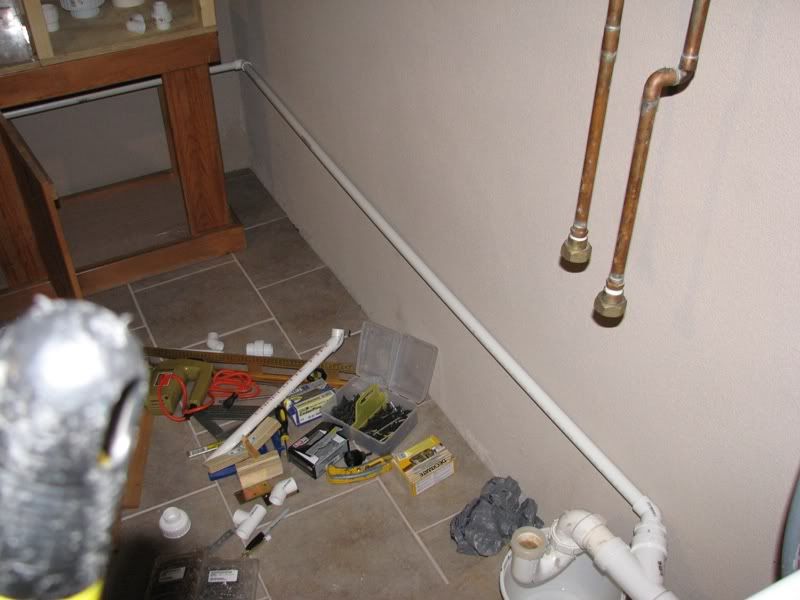
The drain and return pipes

Plumbing1.jpg


Plumbing2.jpg


Plumbing3.jpg


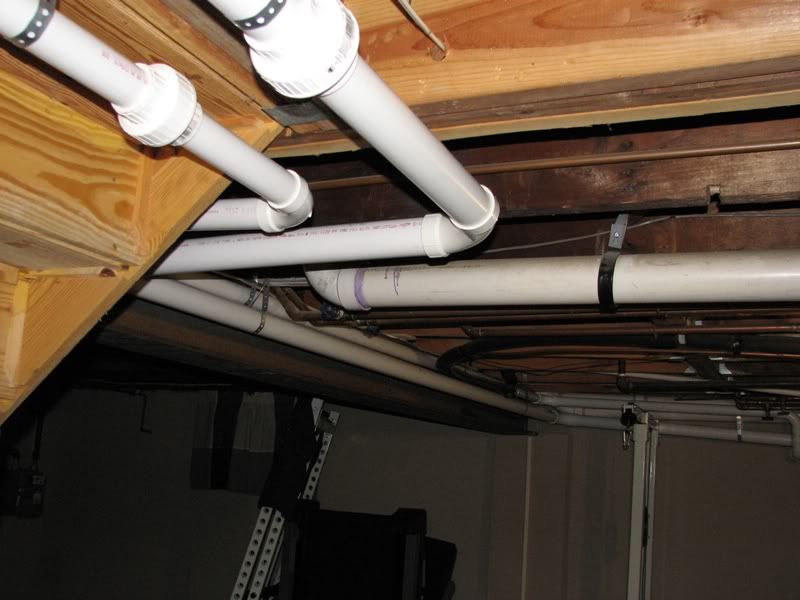
Pipes going to the first floor.

Plumbing4.jpg


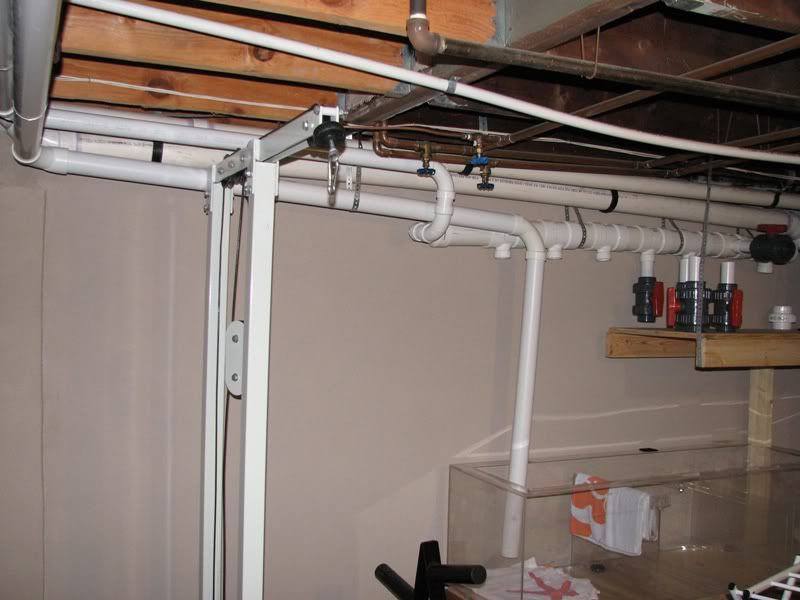
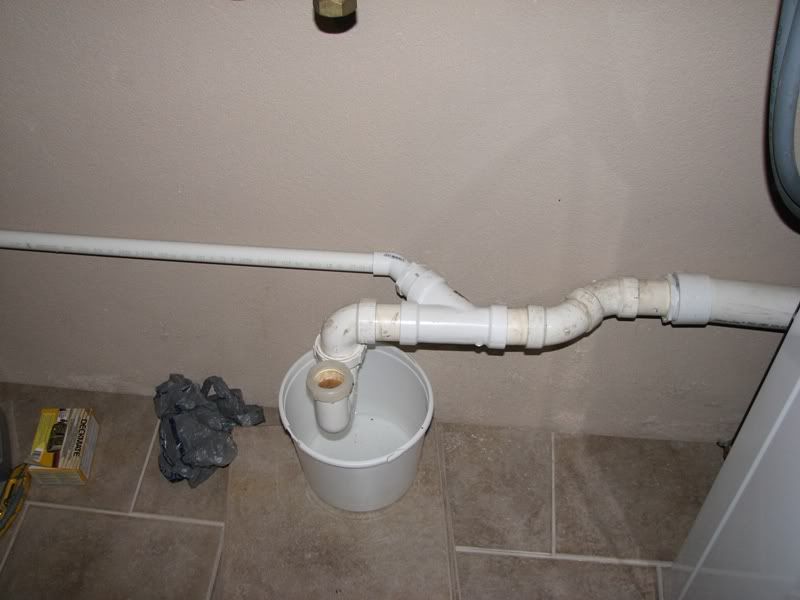
Drain pipe from the sump. I still have to connect the Frag tank drain to this pipe.

SumpDrain2.jpg


SumpDrain3.jpg


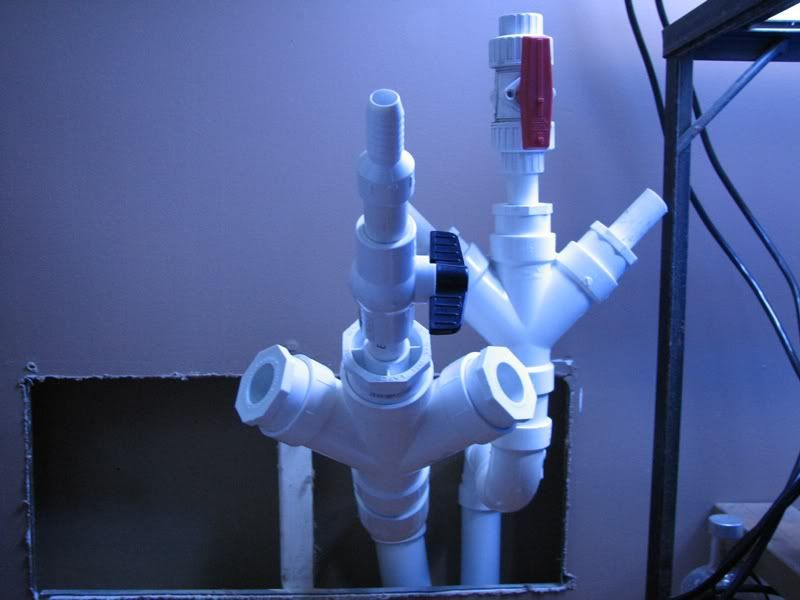
Pipes on the first floor. They will be in the stand

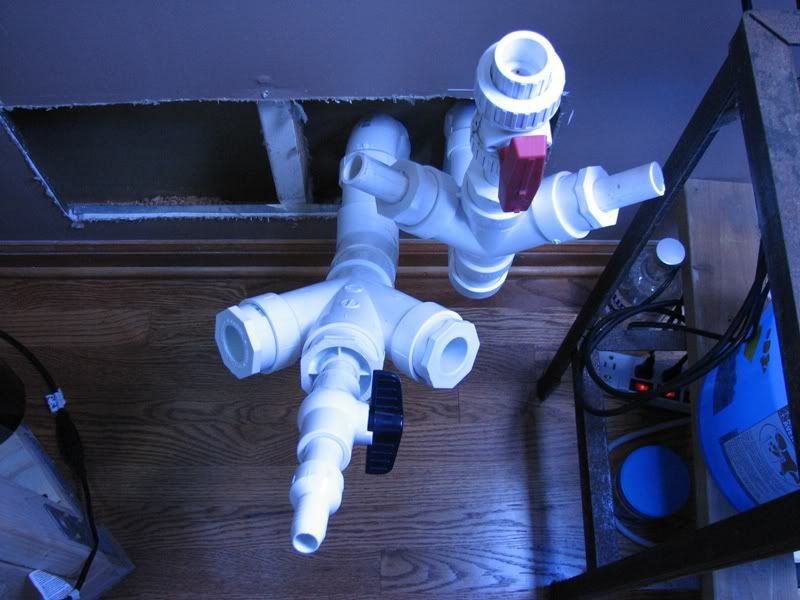
UpstairsPiping1.jpg


UpstairsPiping2.jpg


The pipe with the black handle on the valve will be the drain pipe. The left and the right will be connected to the drains on the tank and the middle connection with the black
handle will be for cleaning the tank. All I have to do is connect a hose to it, open up the valve and start siphoning out all the crap from the tank.

The connection with the red handle will be the returns. Left and right will connect to the returns on the tank and the middle connection with the red handle will be for a 3/4
in Sea Swirl.

For now, I will leave the plumbing the way it is. My next step is to aquacape. The reason why I'm doing this next is because I would like to start dosing Brightwells. That will
be a four week process. I would like to dose only the rocks that I will be using. So if I start this now, I can do other stuff while the rocks are curing.
 
Re: Ricwilli's 210 build

Lol Ric, I remember when I stopped by the house the first time to pickup some kenya tree frags with my Fiance. I think we met your mom and you had that cool top-off container. What was that thing? Also, man all that feet and feet of water I'd probably pee myself the first Time I fire up the pumps hoping for no leaks. Your wife must be pissed your already cutting holes into the floor and dry wall lol.
 
Re: Ricwilli's 210 build

The only think that I see that could go bad for you is if your power goes out. You have a lot of pipe that will be filled with water so make sure your sump can handle the extra volume. If not a check valve and an overflow sump would not be a bad idea.
 
Re: Ricwilli's 210 build

Mbodell said:
The only think that I see that could go bad for you is if your power goes out. You have a lot of pipe that will be filled with water so make sure your sump can handle the extra volume. If not a check valve and an overflow sump would not be a bad idea.

This was one of my biggest concerns and now you have given me a great idea with the overflow sump. Thanks as I realy did not want to use any check valves.
 
Re: Ricwilli's 210 build

Does anyone know if the red liquid in a thermometer is toxic? I found the thermometer that I had in the rubbermaid with rocks, broken. I'm also thinking of changing the manifold to 2". I think 3" is overkill. What do you think?
 

JohnS_323

Officer Emeritus
Officer Emeritus
Re: Ricwilli's 210 build

Sorry Richie, I'm late to this thread. What size pump are you using? Unless it's fairly small, I'd stick with the 3" manifold (of course I'm biased!)
 
Re: Ricwilli's 210 build

John, I'm hoping a Reeflo Hammerhead pump will do the job since the run is over 20 feet and the pvc is 1.5.
 

JohnS_323

Officer Emeritus
Officer Emeritus
Re: Ricwilli's 210 build

That's the same pump I'm using. I'd stay with the 3" manifold. Also, my suggestion would be to use 2" pipe on the infeed side and then from the outflow to the manifold. That's how we're setup and it works great. The pump doesn't strain at all and there is plenty of water available at all of the ports.
 
Re: Ricwilli's 210 build

OK, I will leave the 3" manifold. I have another question. Do you forsee a problem with my drain pipe? Two drains going into one. Should I have installed two separate Y connection instead of one single double Y connection?
 

JohnS_323

Officer Emeritus
Officer Emeritus
Re: Ricwilli's 210 build

Are you talking about the line with the black handle? If so, that's pretty much exactly how ours is. 1" coming from each drain from the tank into a 2" line going donwstairs.

The good news is that with the manifold, you can fine tune the flow through your display to whatever your drain can handle. I'm sure you're going to be using tunzes or something to create additional flow in the tank so you don't need to rely on your main pump to give you all of your flow.

ricwilli said:
 
Re: Ricwilli's 210 build

ricwilli said:
Does anyone know if the red liquid in a thermometer is toxic? I found the thermometer that I had in the rubbermaid with rocks, broken. I'm also thinking of changing the manifold to 2". I think 3" is overkill. What do you think?

the old style thermometers used mercury - but all the newer ones are colored alcohol. So you have already started dosing alchohol eh? ;D

The small metal beads are lead - if you use a mag float - you probably could grab those out.
 
Top